


December 25, 2018
Merry Mopar Christmas 2018
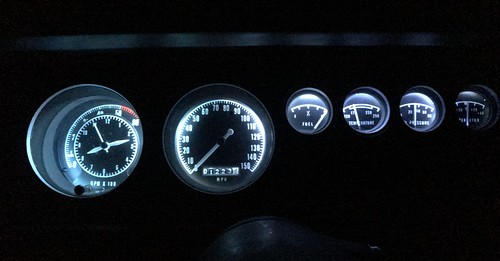
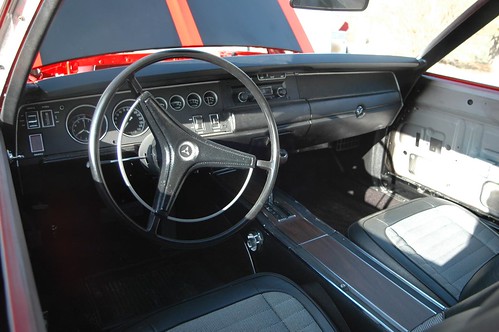
This year for Christmas my wife splurged and bought me a new reproduction replacement Tic-Toc-Tac for my Charger. The original clock never worked since I had owned it, and some time ago the tachometer got erratic and stopped working too. (after almost 50 years who could fault it?)
The new one fit right in, and connected just like the original. While I had the cluster out, I replaced all the instrument panel lights with new LED units I bought online.
The end result was a VAST improvement and it is SO COOL to have both the clock and tachometer working. Merry Christmas everyone!
And I must say thanks so much to my lovely wife for such an awesome gift!
Posted in 2004-present | Family Helpers | RESTORATION | interior | wiring | link to this page | | Comments (0)
September 14, 2014
Final details
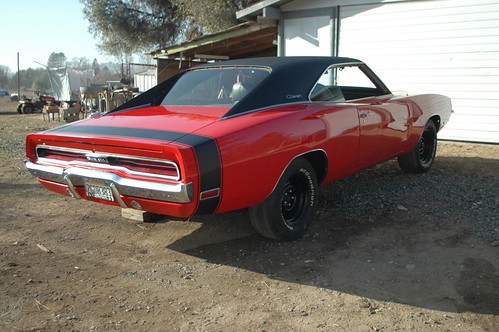
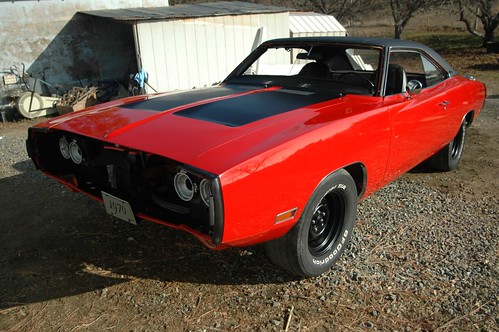
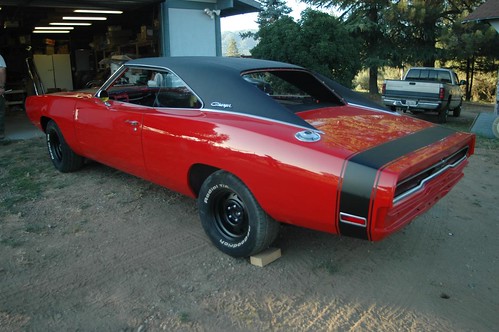
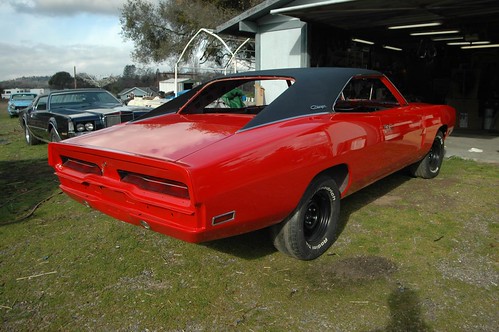
Working through the final details. All four tires are on. Went with Master Craft Avenger G/T's because they were the least expensive tire I could find and they still seem to get great reviews. Bought them from Summit with no shipping, no oversize fees, no tax :) Saved about $300 over going with BFG's (which I hope to do down the road - but I could not swing it right now)
My wheels are Mopar 15 x 7.5" "cop" wheels that came on the Dodge Diplomats and Plymouth Grand Fury law enforcement cars in the 80's. The front tires are size P245/60R15 and the rears are P275/60R15's.
Got my stainless hubcaps polished and detailed with new red "circles" etc.
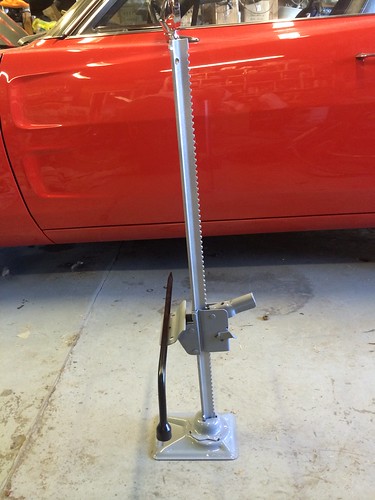
Some time ago I modified a jack to look original so my trunk would look right. Just to be clear, I will never use it, so safety is not a concern. In fact even if it was an actual factory jack, I would be crazy to risk the chrome on the bumpers, and the stability of the car. Those old jacks are pretty scary even when everything is right.
Here is the thread for that over at the '70 Charger Registry forum - Click Here
Well I finally got around to stripping it and painting it, then got it put in today.
A small step, but a fun one :)
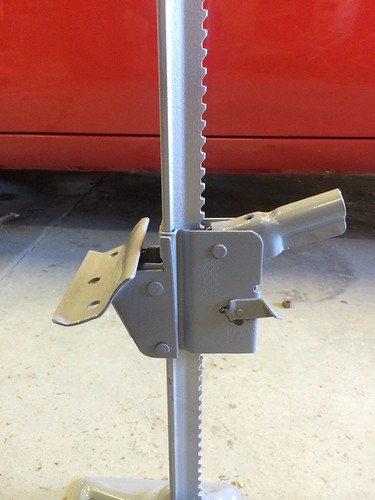
A close up
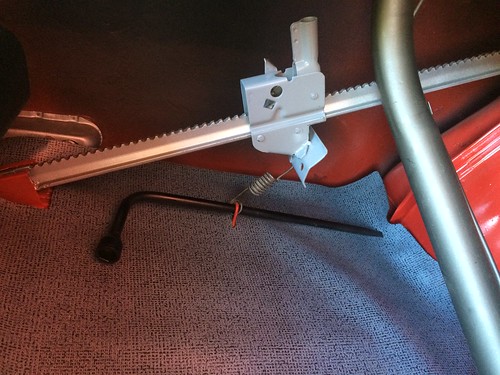
Everything at home looking correct :)
Very soon, I hope to be driving on the roads and attending car shows!
Posted in 2004-present | Reassembly | interior | suspension, brakes, tires, and wheels | link to this page | | Comments (0)
March 26, 2013
A Special Guest!
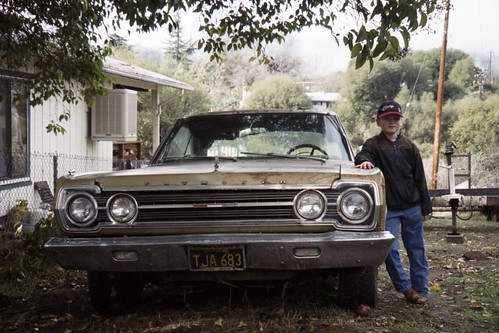
Something I've been encouraging my son to do for a long time is to create a web presence about the ongoing restoration of his 1967 Plymouth Satellite.
Well the last merit badge he needs to finish before he can submit his Eagle Scout package is Communications. One of the ways to meet one of the requirements is to design a web site. The requirements state you do not even have to post it, and it does not have to be more than a few paragraphs of information. However, with a little nudge from his Dad (and Assistant Scoutmaster) he put it on the web.
Here he is at age 7 when I bought him his first Mopar! (he is almost 17 yrs old now and 6'3" tall)
It is basic, and he'll be adding to it as we go, we have many hundreds of photos, but most are references for when we put it back together.
It is a blog, so just like my Charger blog, the newest posts are on top, you scroll down to see older stuff - all the way back to the beginning.
Here is a link to see it... Tolley's Satellite Restoration
Let him know what you think, or if there is anything any of you want to know.
Posted in 2004-present | Family Helpers | RESTORATION | disassembly | glass | interior | primer and paint | rust & rust repair | sandblasting | sanding | sheet-metal replacement | link to this page | | Comments (0)
December 19, 2012
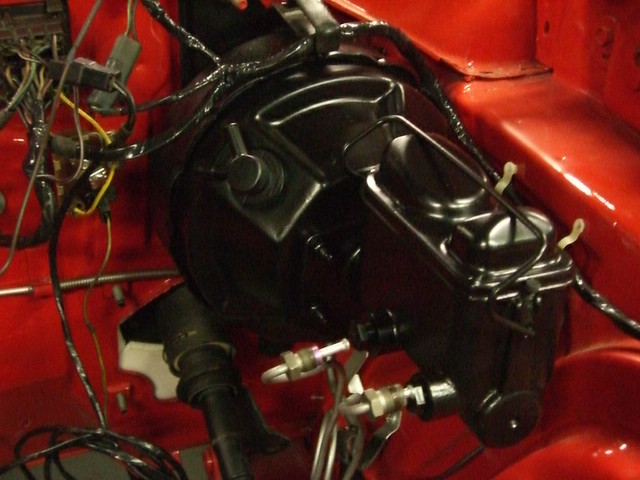
Brake booster and Steering wheel
Some more progress while I wait for the rest of my engine money...
I got one of my Bendix boosters rebuilt by Booster Dewey In Portland Oregon, it arrived in great shape yesterday...
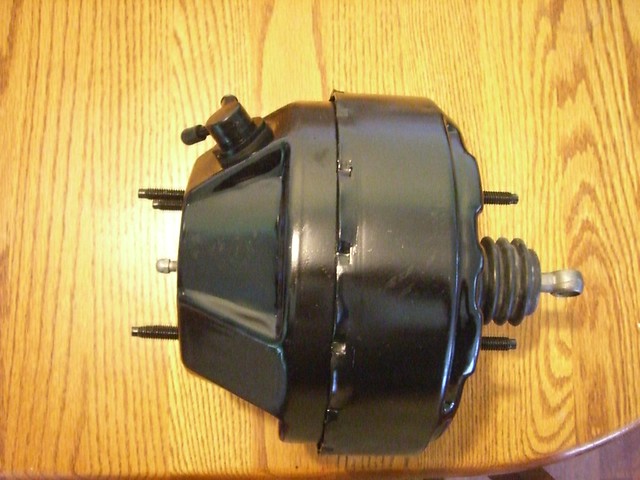
I got it installed today... Should be bleeding it soon, and begin tidying up the engine bay.
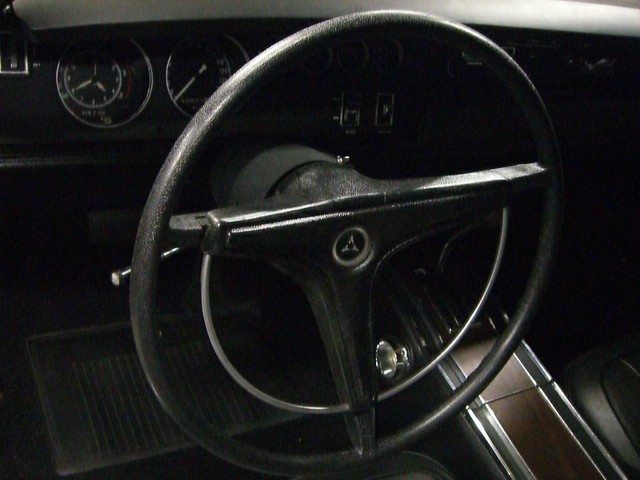
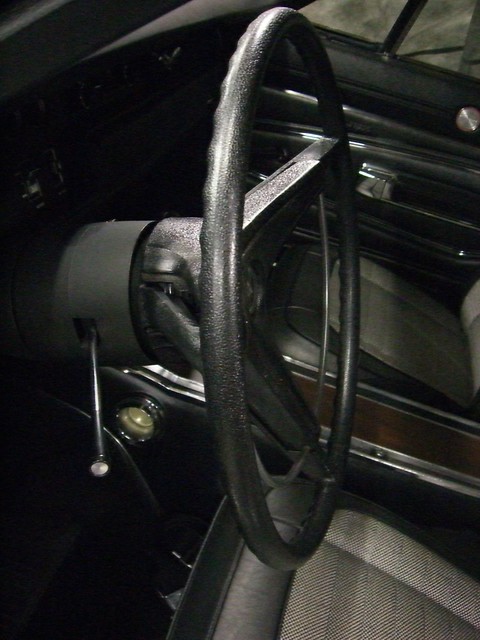
As much as I was stoked to have an original steering wheel that was in such perfect shape for my Charger, it turns out it wasn't for my Charger! (It will however be a beautiful addition to my son's '67 Satellite) So I ordered a new reproduction one from PG Classics, it arrived today and I put it on. Much better, now I have a textured wheel and I can't see my turn signal switch anymore.
This is the wheel I took out today, the wheel is for a '67-'69 with my '70 center put on it.
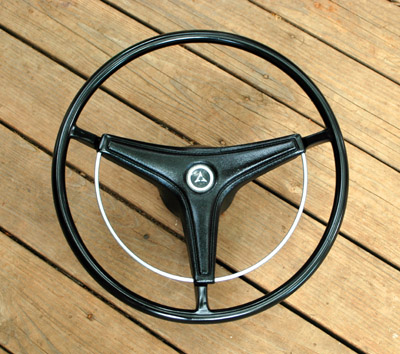
This is the correct wheel which I installed today also.
I'll keep working on my windshield trim too, it is getting close.
Posted in 2004-present | RESTORATION | Reassembly | interior | suspension, brakes, tires, and wheels | link to this page | | Comments (1)
August 02, 2012
Interior progress (finally!)
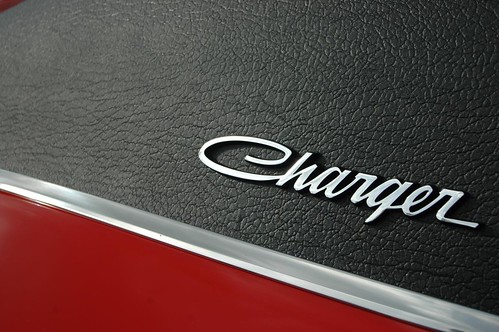
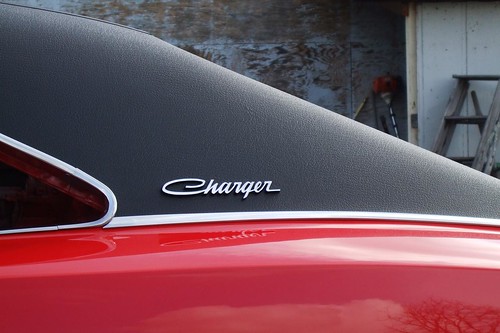
Well, I finally have some progress to report. Now that I have found a satisfactory solution to my door panel Charger script dilemma,( I found a guy who makes self adhesive Charger scripts in custom sizes on Ebay) At long last I could install the front door panels, trim, and hardware.
My son and I did both doors in an evening.
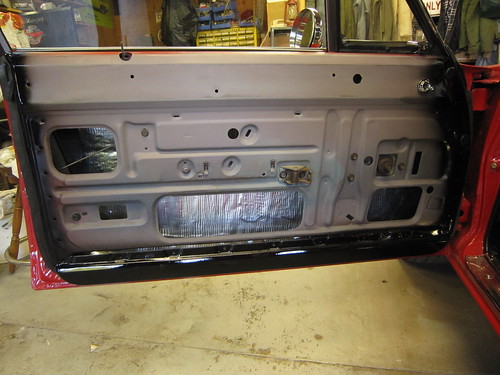
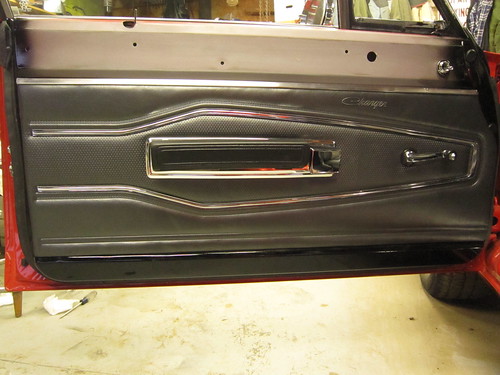
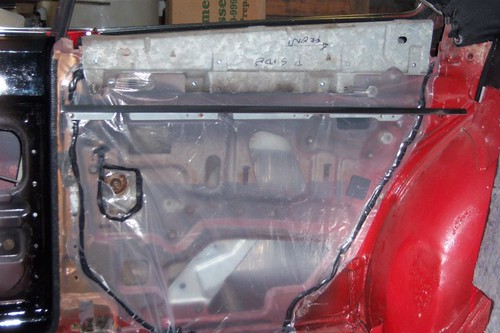
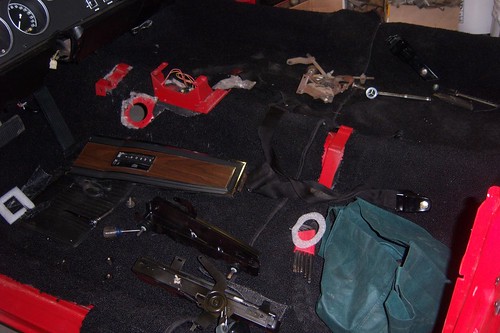
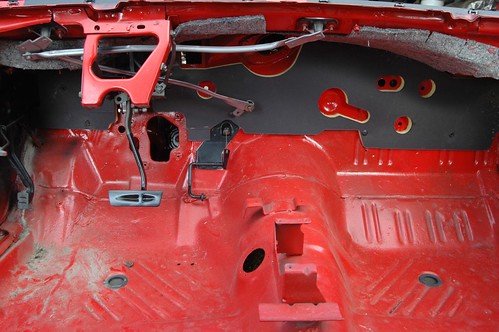
This was our starting point...
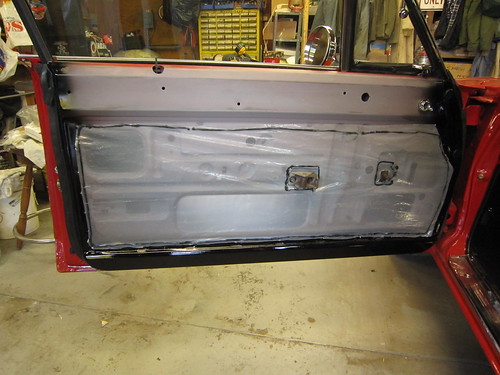
Then we sealed the door off factory style with barrier plastic held in place by a thin string of butyl tape I had left over after doing the rear window installation.
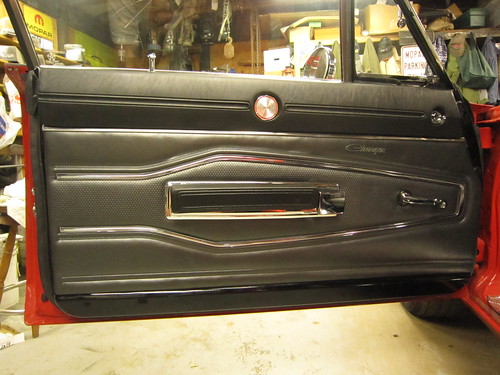
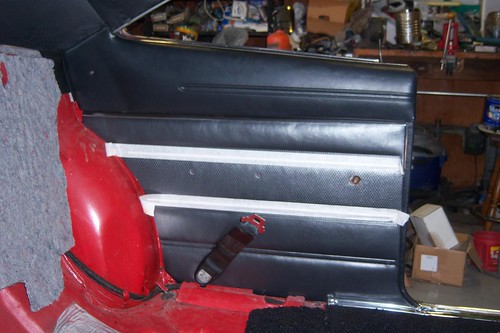
The the door panel trim, new Legendary Interiors door panels, arm rest bases, arm rests, inside door handles, and window cranks were installed. (everything but the trim itself was new).
Here is the completed door, the upper door pads are exceptionally nice used ones I bought last year. I treated them to a couple coats of correct Charcoal interior paint from Herb's Parts.
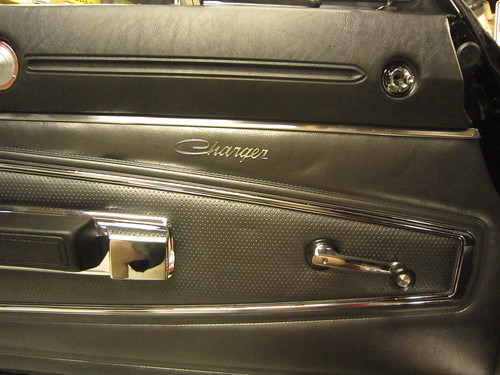
Here is a close-up of the rather nice Charger Script I had made to the same size as the hard to find original pieces.
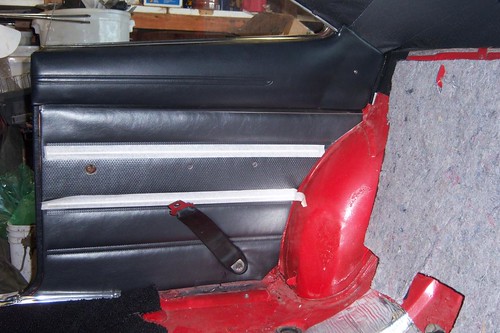
Both sides are looking sharp as a tack now.
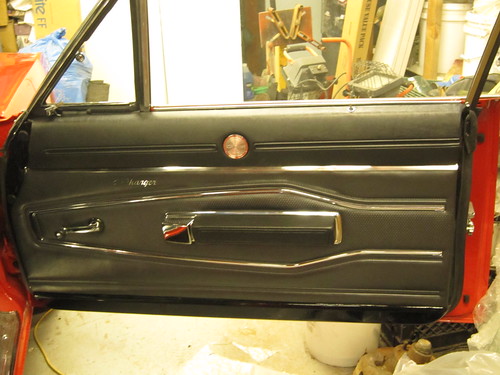
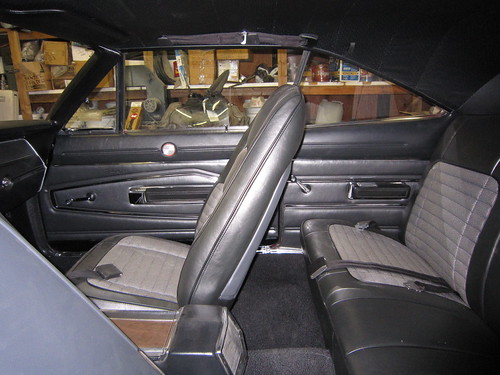
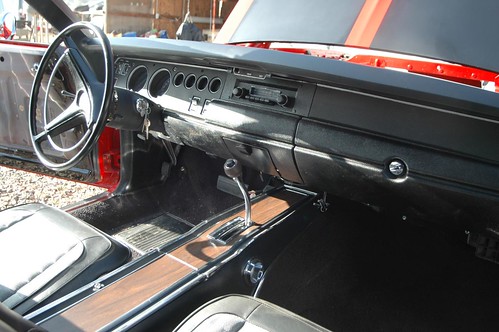
Here is a view of the completed interior,
Posted in 2004-present | RESTORATION | Reassembly | body | interior | trim | link to this page | | Comments (0)
April 19, 2012
Interior progress
It has been a while since I was able to spend much time on my Charger but finally I have something to report.
Once I was finally happy with the adjustments of the side glass, I was able to begin installing the interior items that have been boxed up for many years now.
The following pictures reveal the fun as it happened!
First the insides had to be sealed with a plastic barrier material.

Then the restored upper door pads, and the new Legendary lower door panels could go on.
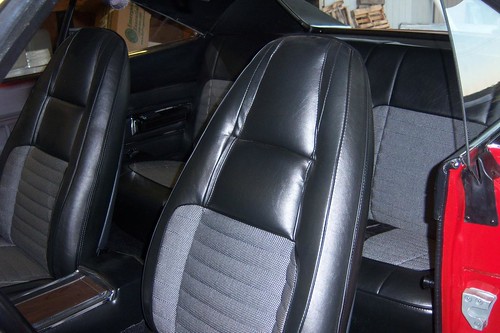
Then at long last the seat!
And all the rest too.
And a couple of over all views...
Next I will install a couple more small items, and the door panels themselves. Check back soon!
Posted in 2004-present | RESTORATION | Reassembly | glass | interior | trim | link to this page | | Comments (0)
December 28, 2011
Christmas goodies
OK, well I have not made much progress on my Charger lately, been busy saving every penny for my set of all new glass which I plan to buy in February. But for Christmas, I got an assortment of Charger care & beautification items I had requested from my wife and kids.
I got a waxing kit with Meguiar's Ultimate Liquid Wax, an applicator and buffing cloth, a "California Car Duster", and an assortment of car washing, and detailing supplies.
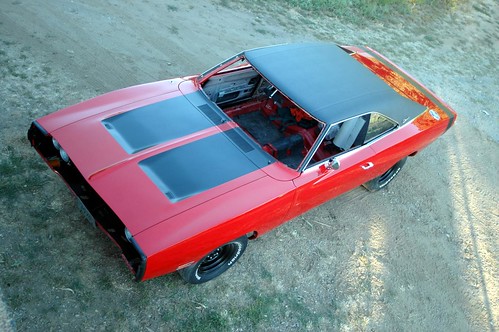
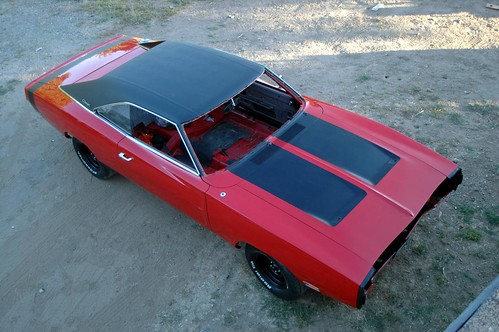
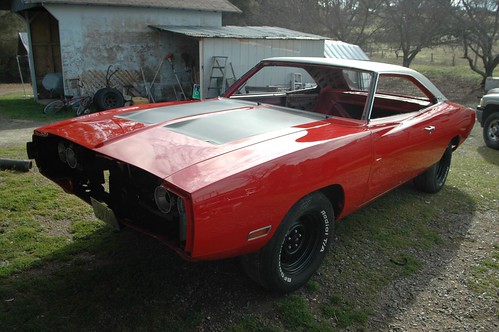
So, today since it was nice outside, we pushed my Charger outside and started in. It had gotten fairly dusty since I have never washed it since it was painted about a year ago. It is covered, and indoors, but everything here outside is dirt, or gravel, so over time dust creeps on to everything.
First thing we did, was very carefully give my Charger a proper bath, I dried it off with a large micro-fiber towel I got with my goodies. Then my son and I applied the "Ultimate Wax", and then buffed it off by hand with the Meguiar's micro-fiber buffing cloth from the kit.
It really came out nice. The pictures below are quite good, and taken by my wife, but even she says they really aren't as stunning as the car is in person. As always, you can click on each image to see it larger.
It was a lot of fun bring the shine out, and knowing the finish is now protected somewhat, is nice too.
It has been a very merry Christmas for my Charger indeed. (and me!)


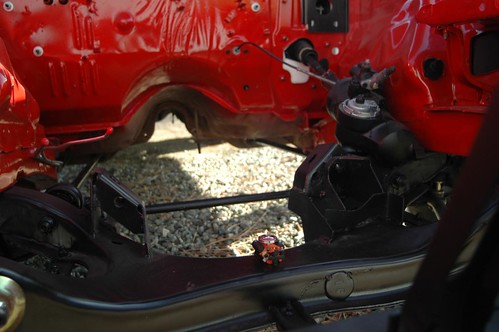
Oh, and since all my buddies, and everyone in my family keep asking me about the engine, I dropped in an engine today too. And YES, It's a HEMI!
I need to finalize the engine mounts, but check it out!
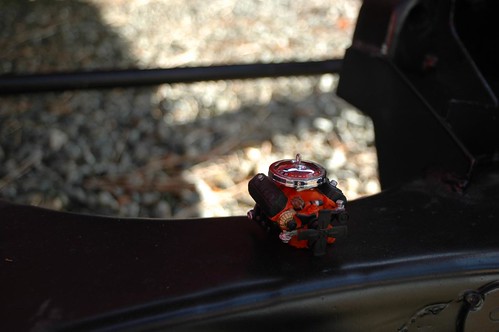
Well, on second thought, I guess I'll have to keep the "Holy Hemi" on our Christmas tree, and wait to overhaul my 440.
Posted in 2004-present | RESTORATION | body | engine | interior | primer and paint | link to this page | | Comments (0)
November 26, 2011
Hit a snag!
Well, it happens to everyone from time to time, now it is my turn (again)...
After cleaning my various windows really well this weekend, I realized that I am in dire need of replacement glass. My door glass, and rear window especially are scratched beyond belief! I guess all those years driving it, I never noticed (or cared)? Heck back then if my car had glass I thought I was "good to go!"
What that means is the glass installation will not happen right away, the newly chromed vent window frames and such will have to stay packed away, and the re-assembly of my interior will be on hold too. This is because I need to have the side glass all in and adjusted prior to putting the door panels on, and the rear door panels have to be on prior to the installation of the rear seat.
... Oh well, something else to save up for. I'll have to find other things to do on my Charger for a while. That should not be too hard!
Posted in 2004-present | RESTORATION | Reassembly | glass | interior | link to this page | | Comments (0)
October 28, 2011
Some progress
OK, things have been pretty quiet on my restoration for over a month, maybe closer to two. However, as my overtime pay has arrived and has now been put to work for me parts are starting to roll in.
Some folks have been asking, so I thought I's share the current status.
I will have pictures soon, especially when things start to go together, but, here is a list of what I have been able to acquire for my Charger...
Re-Chromed front bumper - got it!
Re-Chromed front bumperettes - got them!.
Re-Chromed rear bumper - got it!
Re-chromed rear bumperettes - got them!
Re-chromed vent window frames and smaller vent window parts (latches etc) - got them!
New bumper bolt kit - got it!
New shifter knob - got it!
New Wheel lip mouldings - got them!
New fuel tank - got it!
New 3/8 fuel line - got it!
New 1/4 fuel return line - got it!
New sending unit - got it!
New fuel line clip kit - got it!
Can't wait to get everything put on. That means I get to finish putting in the side glass, them complete the interior, I get to install bumpers and that means un-boxing my grille! I am getting excited!
Pictures coming "soon" (probably a bit at a time over the next 60 days or so) Please stay tuned!
Posted in 2004-present | Reassembly | body | glass | interior | trim | link to this page | | Comments (0)
August 23, 2011
Carpet, console, and front seats
Well, Finally getting some time to start putting a few more things together.
I got the tailight and dash wiring all in and connected. Using my little "jump-start" box, I was able to make all the lights tun on, which was fun and gratifying!
With the wiring in I was able to proceed with completing the installation of sound deadener on the floor pan, and move on to the carpet. With help from my buddies at the 70 Charger Registry forum, the carpet install went pretty smoothly.
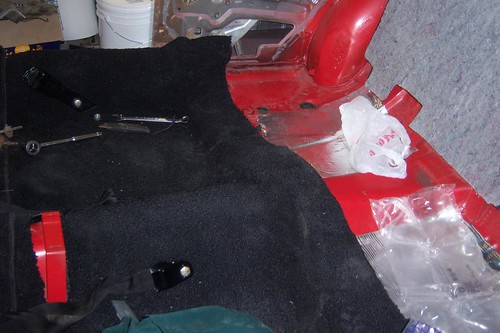
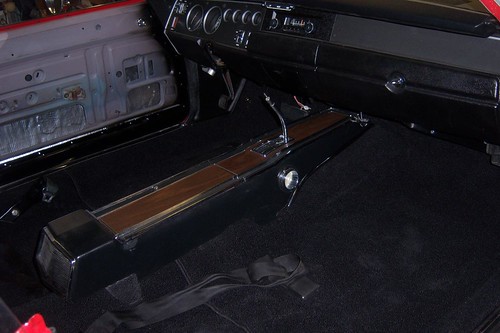
Here's the carpet in, with the console in position.
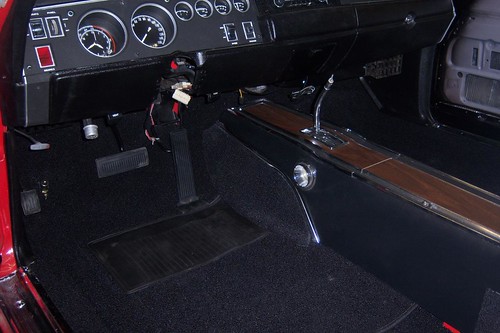
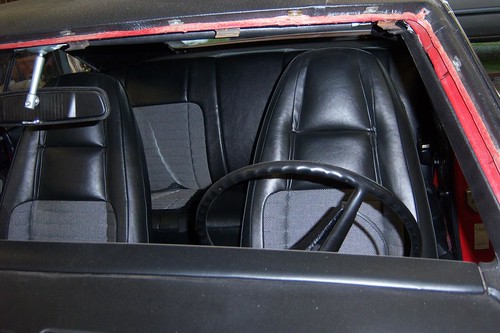
Before installing the driver's side front seat, I installed the steering column and steering wheel, since having the seat out made rolling around on the floor of the Charger much easier.
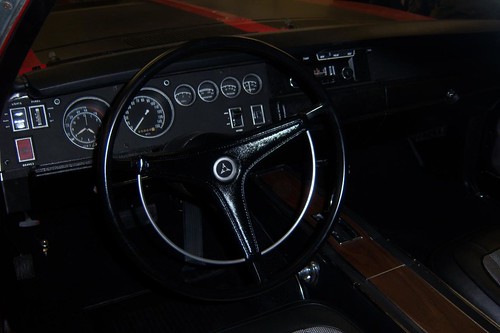
Steering column, and wheel are in and connected. Front seats are in! I have not sat in my Charger since 2004, happy days!
The rear seat is waiting until all my side glass is in, which is waiting on rechroming my vent window frame parts (hopefully in October) Once all the glass is in, and is adjusted correctly, then the door panels will go on, and the rear seat will go in.
Posted in 2004-present | RESTORATION | Reassembly | interior | trim | wiring | link to this page | | Comments (0)
July 26, 2011
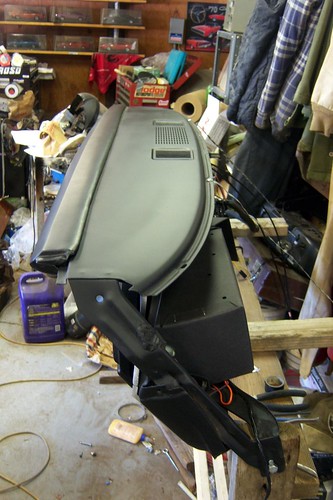
Dash installation
After completing the restoration and assembly of the dash, it was time to install it in my Charger. The dash pad was new from PG Classics, as was the radio bezel. The radio knobs are mint originals. I repainted the other dash bezels by hand. Everything was screwed together and ready to go.
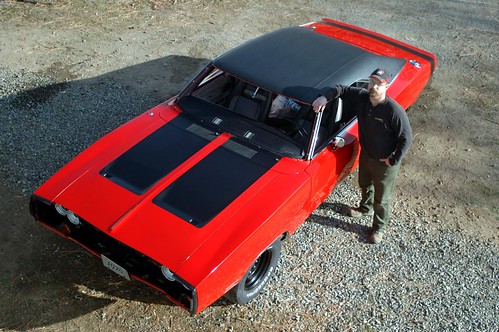
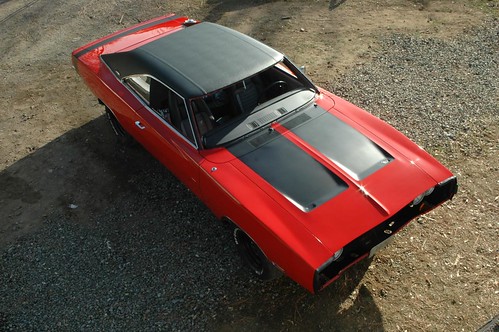
I rolled the car outside to give us plenty of room to work. My wife took the overhead shots from the garage roof!

This is me with my son (taller) and my nephew, working together to mount the dash in the car. The dash is large and relatively heavy, and you certainly don't want to scratch anything, so having some extra hands is a really good idea. My nephew had wanted to be a part of this part of the project, so we chose an evening when he was over to make use of his willing assistance.
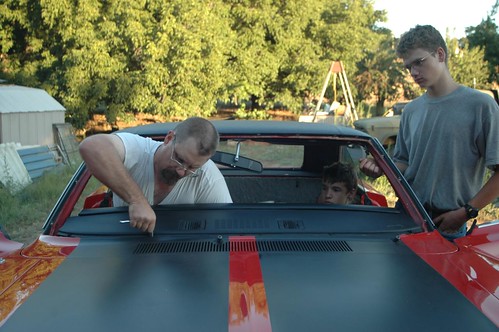
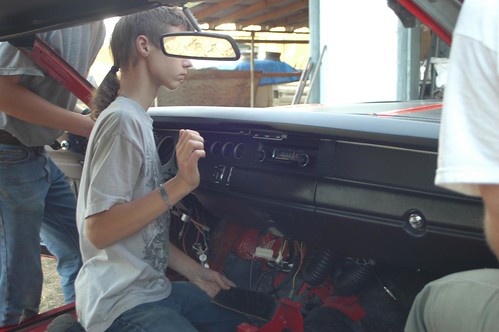
Mission accomplished!

Posted in 2004-present | RESTORATION | Reassembly | interior | trim | link to this page | | Comments (0)
July 23, 2011
Dash and trim progress
Finally had a moment to upload some photos of some recent progress.
First, my son and I have been working in our "extra" time to finish the dash assembly, here are some pictures.
First, dash overall. new PG Classics dash pad, new PG Classics radio bezel purchased from Mopar Ed, gauges and heater controls restored with Performance Car Graphics kit, everything else was restored and hand painted by me.
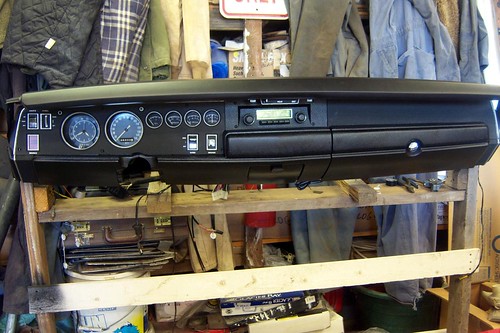
A close-up of the instrument panel area
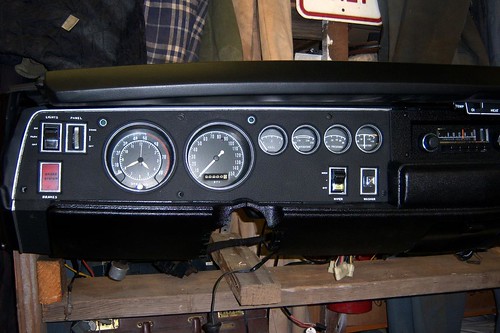
Side view
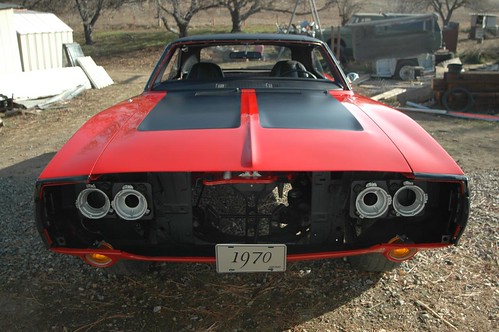
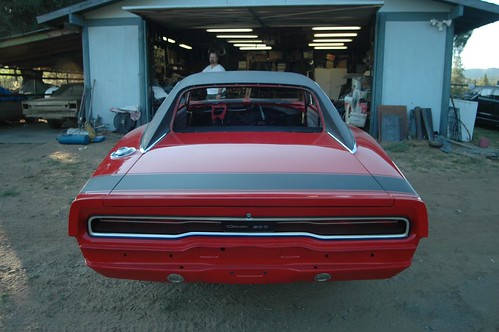
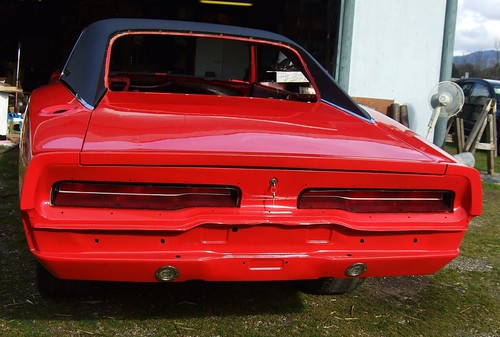
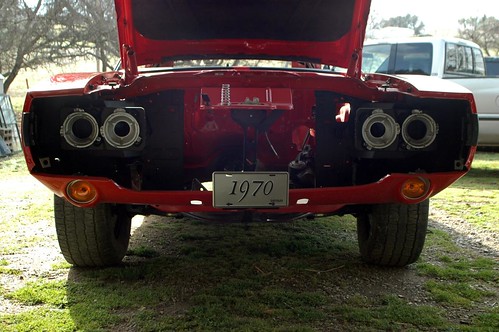
Next, emboldened by Murray's success on his tail light panel, I tried to restore my own. I started over three times before I ended up with the look I was after. Found the "chrome" paint I liked best, painted the black first, then masked off all but the shiny strip with super detail 3m 1/2" wide precision tape.
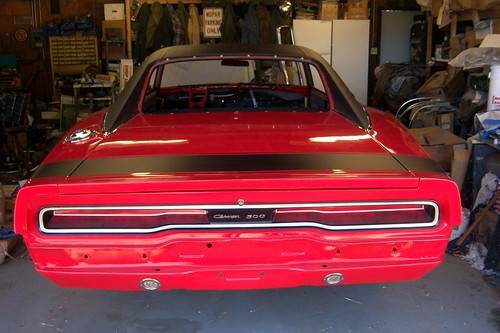
The 500 emblem I restored, the Charger emblem is new from AMD via Mopar Ed.
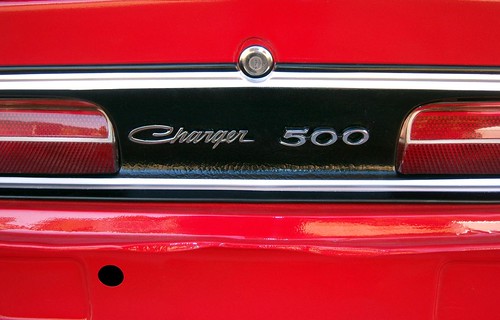
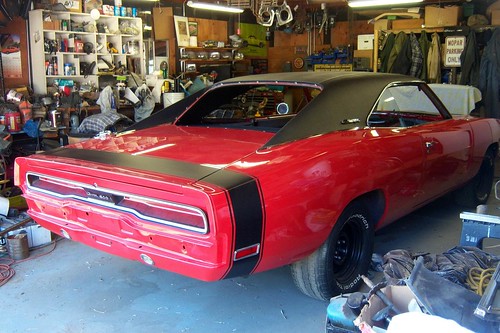
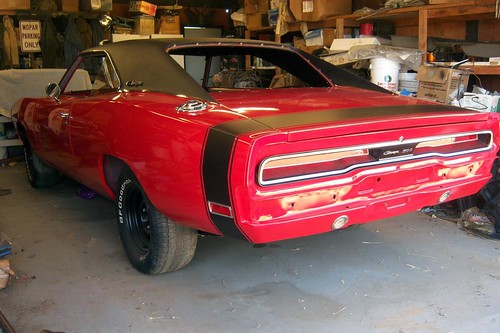
Here are some over all pics for effect.
More to come. Stay tuned
Posted in 2004-present | RESTORATION | Reassembly | body | interior | trim | link to this page | | Comments (1)
June 02, 2011
Headliner complete
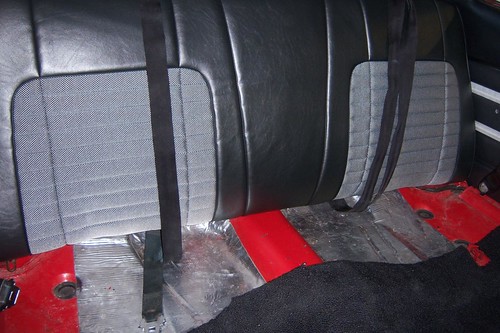
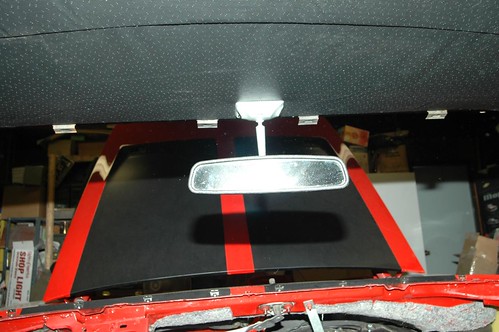
A bit more tweaking and time have helped my headliner a lot. I have the rest of the seat belt retainers, the visors changed to black (used to be tan) and installed, the mirror that a fellow Charger owner hooked me up with restored and installed.
I am really pleased with the way the headliner is looking now. I learned a lot, and praise Jesus for the patience and His nudge in the right direction when I wasn't sure what to do.
Here are some pictures.
Sun visors and mirror:
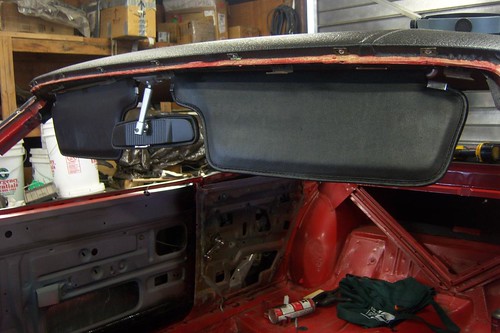
Sun visors:
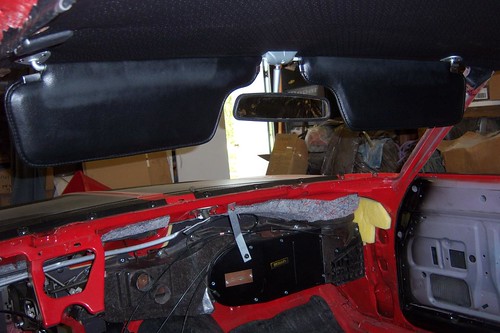
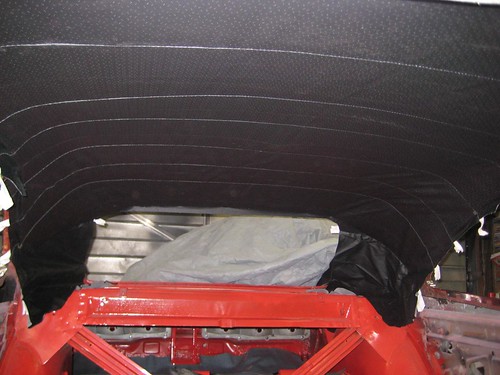
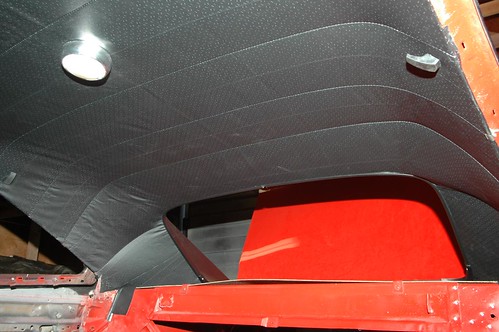
Headliner looking better:
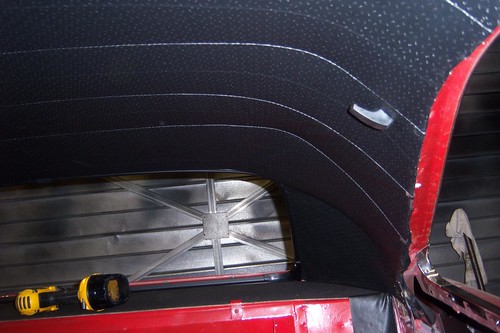
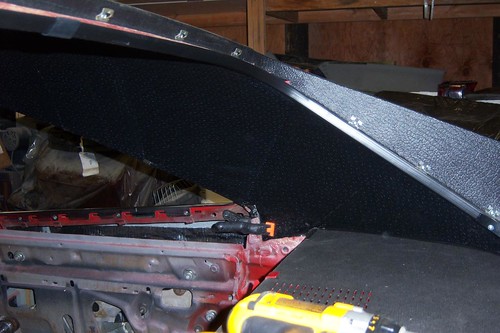
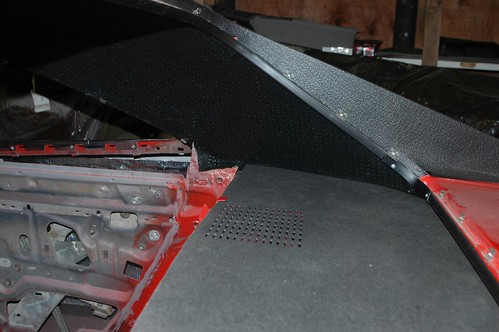
Headliner sail panel area, driver's side:

Headliner sail panel area, passenger side:
Posted in 2004-present | RESTORATION | Reassembly | interior | trim | link to this page | | Comments (0)
May 15, 2011
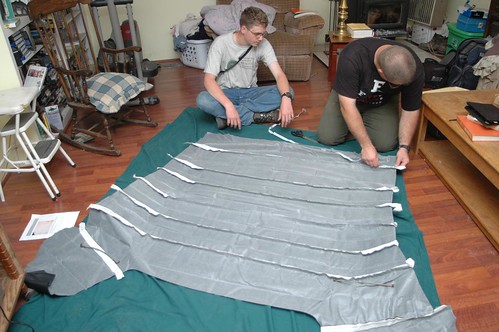
Headliner installation!
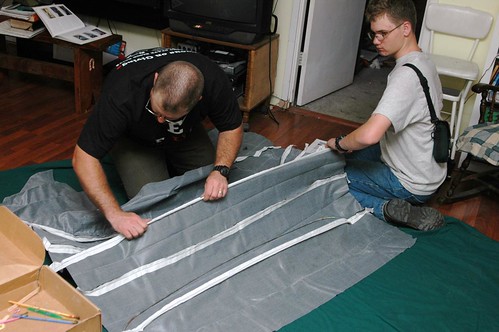
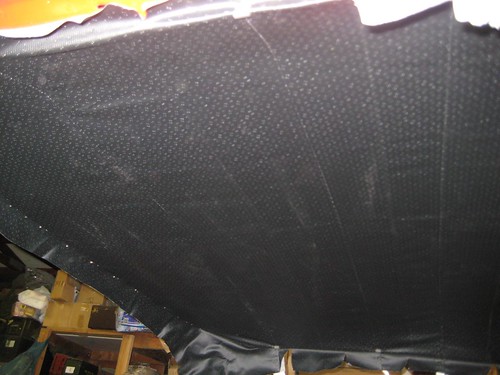
After reading everything I could find on the subject for months, thinking, and praying about it, I decided to attempt to install my own headliner. I'm sure my upholstery guy would have done a fantastic job for not too much money, but I really wanted to try it to see what it was all about. My son and I worked on this for three nights, and so far I am happy with the results. The headliner is in, the accessories are going on, I have worked the majority of the wrinkles out, and everything I read says it will only get better with time (and some attention from a steam tool of some kind).
The following pictures are taken in order over the course of those three days.


Posted in 2004-present | RESTORATION | Reassembly | interior | trim | link to this page | | Comments (1)
May 07, 2011
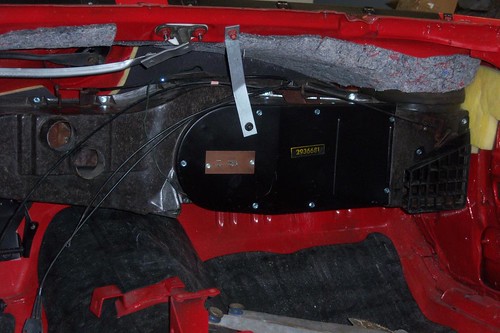
Heater box rebuilt and installed
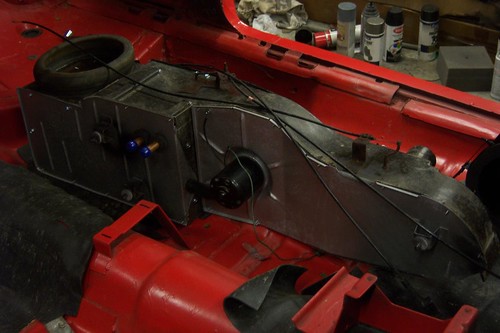
One of the things that needed to happen inside the car before the dash and some other things could go in was that I needed to thoroughly go through my heater box and get it installed. I ordered a complete seal and gasket kit from Restorations By Rick, and it was excellent. Everything fit perfectly, and the instructions left very little to the imagination. My son and I stripped all the parts, sanded, painted, replaced the heater core with a new one, and replaced all the seals using the kit. Once this was complete, we reinstalled the heater box and driver's side vent assembly, which we had also cleaned and detailed. Although we repainted all the metal parts, you may notice that the original Mopar part number stamp is still visible on the front panel. Since that spot was in good shape, I covered it with clear tape, used a razor knife to outline it, and then repainted the front panel. When I pulled the tape off, the effect was pretty good.
heater box rebuilt, front
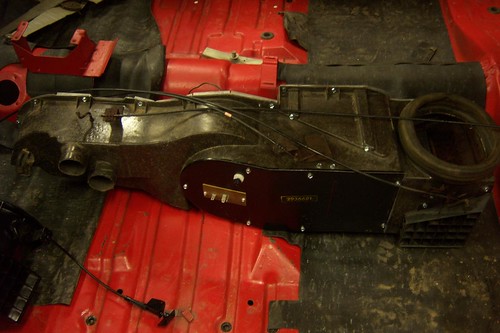
heater box rebuilt, rear
driver's vent installed
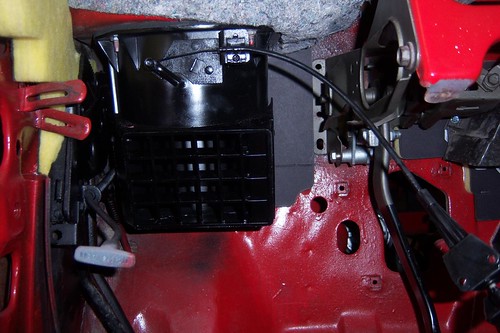
heater box, installed
Posted in 2004-present | RESTORATION | Reassembly | interior | link to this page | | Comments (0)
February 21, 2011
Trim and detail work
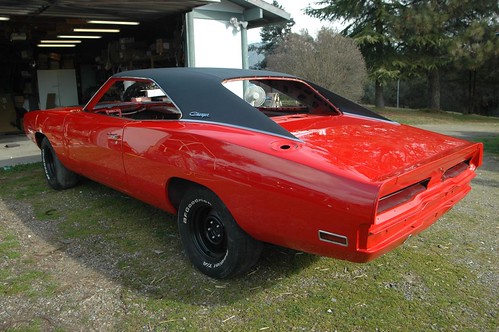
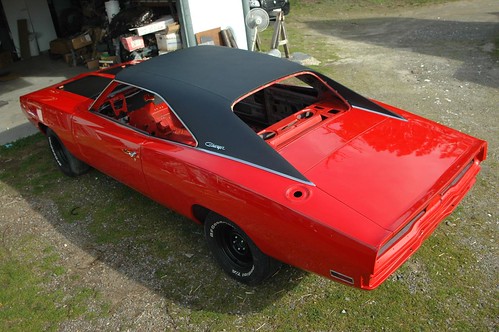
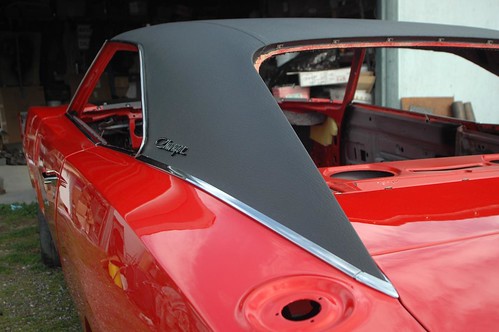
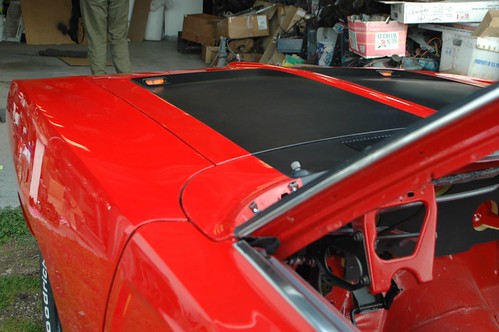
Work has been continuing full-speed on my Charger. The sorts of detail work that make up the phase I'm in right now require a large number of hours for a relatively small difference on the car, but I realize that attention to these details will add up to a terrific final product. The most time-consuming part of the project in this phase was straightening, sanding, and polishing the stainless steel trim that surrounds the border of the vinyl top. The materials I had read online gave tips for smoothing out dents, then sanding the pieces with progressively finer grits of sandpaper, and then buffing the pieces, all prior to installation. I am still learning, but so far I am happy with the results.
I have also been polishing the plastic lenses and have been able to now install a number of them. The firewall is also coming together nicely, with the brake pedal assembly and wiper pivots rebuilt and detailed. Next should be the heater box.
This morning my wife asked me to push the car outside the garage so that she could take a fresh round of pictures. Here are some shots that show what I've been doing lately on the Charger.

Posted in 2004-present | RESTORATION | Reassembly | body | interior | primer and paint | trim | link to this page | | Comments (2)
June 23, 2007
Steering column restored
One of the things I've looked forward to for a long time was the disassembly, thorough cleaning, and reassembly of my steering column components. Many of these were sandblasted, as noted in a previous entry. I also used a brand-new ignition switch and a brand-new ignition lock cylinder and keys (keyed to match the new door locks I bought). My turn-signal switch is a used one, but it is not burned, it's in good shape, and it still has the automatic cancelling tabs intact.
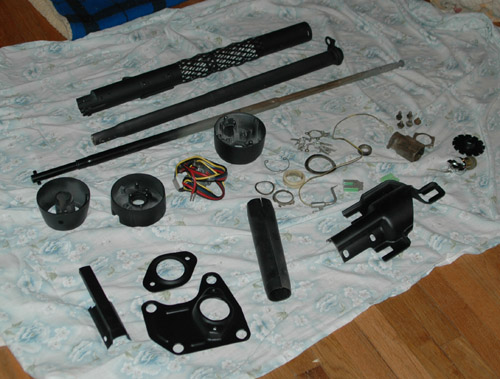

Now that it has been restored and each component has been tested, I will package this away, waiting for that wonderful day when my car has been painted and reassembly is underway.
Posted in 2004-present | RESTORATION | interior | wiring | link to this page | | Comments (3)
August 20, 2006
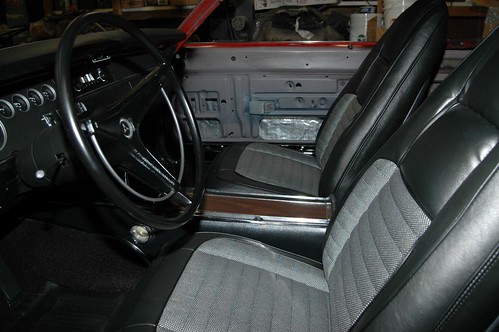
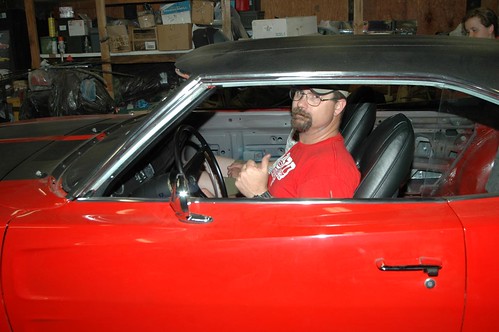
August 2006: Steering wheel, seats, and air cleaner restored
This has been an inspiring and productive month for my Charger project. Through God's grace, some good eBay fortune, and the generosity of several friends, my air cleaner, steering wheel, and seats are all restored and ready to be packed away awaiting their turn going back into my Charger as I reassemble it.
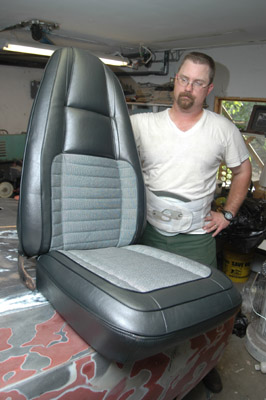
Here I am, posing proudly with one of my newly-restored front seats. The story of how these came out so nicely is really rather amazing and has had me praising the Lord for several days now. Earlier this year, I purchased a nice set of seat covers for my car in charcoal vinyl with salt-and-pepper cloth inserts. Then just a couple of weeks ago I happened to see one day in our very small town a 1969 Roadrunner in primer on a tow-dolly in front of our local greasy spoon burger joint. We parked my wife's 1972 Dart next to it, and I proceeded to look around the car hoping to attract the attention of the owner so I could talk to him. When he came out, I realized I had met him a couple of years before at the DMV, and we had promised to contact each other and never did. He told me the sad news: he was moving away in about three weeks. After a visit to his house and some lengthy Mopar-infused conversation, he told me he was an upholsterer by trade and had specialized in Mopars for 35 years. A short time later this fellow Mopar enthusiast decided to do a tremendous favor for me. For a very small fee, not even enough to cover materials really, he made time in his busy packing schedule to completely redo my seats, stripping them down to the frames, rebuilding the seat foams where needed, and covering them with my seat covers. The final result was stunning to say the least, and these pictures do not do them justice. Thank you Larry!
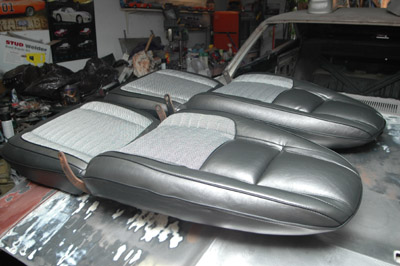
Here are both bucket seats, which will soon be put in storage. Before that, I will refinish the hinge covers and seat tracks and have them ready for eventual installation, the same time as the seats.
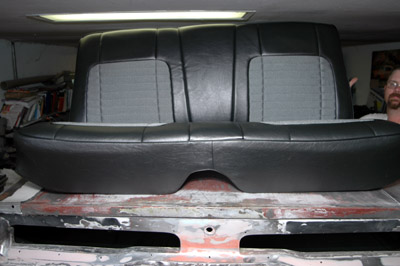
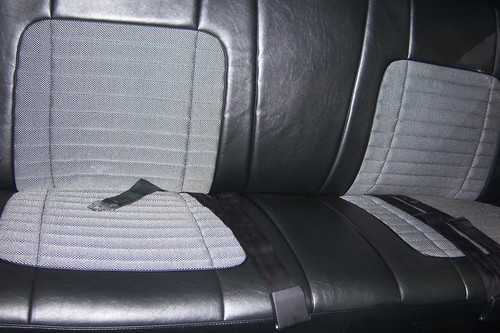
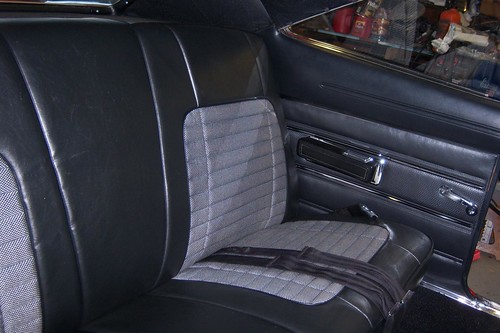
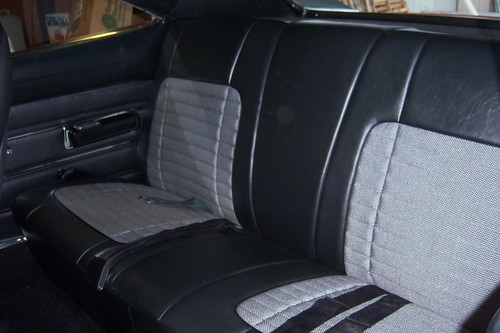
After so many years of seeing my poor, neglected, cracked, mouse-eaten, duct-taped, sometimes-covered-usually-not backseat, I have to pinch myself when I look at this perfect restoration to perhaps better-than-new condition. This really motivates me to get that car painted so I can start putting it together!

This air cleaner is a piece of the puzzle I have been in search of for a long time. After searching and searching eBay for years, being constantly disappointed by the high prices these air cleaner assemblies go for, I happened upon one that had been described incorrectly as a Chevy air cleaner. I could tell from the photos that indeed it was the exact Mopar housing I needed. Thanks to the error of the person listing the item I was able to get it for about 1/3 the going Mopar-air-cleaner rate. I guess the Chevy folks knew it wasn't theirs and the Mopar guys hadn't found it. The housing was perfectly straight. After cleaning it, I stripped the original remaining wrinkle finish, which was mostly gone anyhow, and then recoated the entire assembly with a proper coat of Krylon wrinkle paint. I purchased the pie-pan also on eBay, and it is an original NOS, which I bought for less than the price of many of the more commonly available reproduction pie-pans. This has been safely packed up in a padded box and will be stored until needed later on in the restoration of my Charger.
It took the generosity of a couple of friends to bring this steering wheel together for my car. The wheel itself came from my longtime friend James, and the wheel center, a 1970-only item, came from my friend Jude, a fellow Charger enthusiast. So for the cost of a little elbow grease and some vinyl dye for the wheel center, I now have a crack-free very original-looking steering wheel to go with the rest of my new interior stuff.
--------
Posted in 2004-present | RESTORATION | engine | interior | link to this page | | Comments (0)
March 10, 2006
Instrument bezel
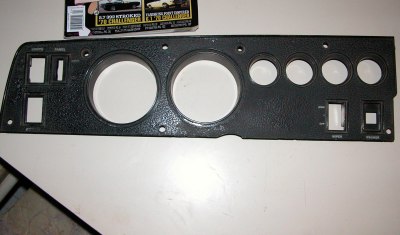
When one of my fellow 70 Charger Registry members was viewing my page, he noticed that I had not yet located a clean, restorable '70 Charger instrument bezel. For those who are unaware, in 1970, Chrysler moved the hazard switch to the steering column, along with the ignition switch and a steering-wheel lock mechanism. Well, this left no need for the hazard switch and its corresponding rectangular hole in the bezel. Thus, coming to the rescue, my new buddy Mike offered to sell me one that he had recently purchased on eBay, at his own cost. What a guy! I hope to eventually get my dash plastic rechromed and looking really good, now that I've got this sound piece.
--------
Posted in 2004-present | RESTORATION | interior | link to this page | | Comments (0)
March 10, 2005
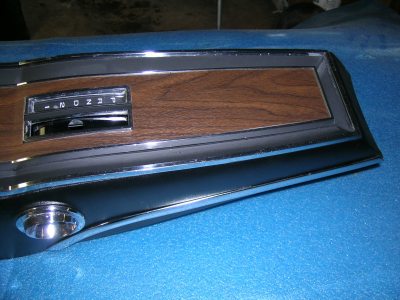
Refurbished center console: closer view
This closer view shows the corrected door alignment and the repainted border, the polished chrome bezels, and the new wood grain in place. I bought the wood grain kit from Performance Car Graphics. The kit was inexpensive and easy to use if you follow their detailed instructions.
--------
Posted in 2004-present | RESTORATION | interior | link to this page | | Comments (0)
Refurbished center console: closest
In this close-up, the grain and texture of the woodgrain material is evident. I also purchased a new filler piece for where the automatic transmission shift lever goes through. The look is complete and ready to go.
--------
Posted in 2004-present | RESTORATION | interior | link to this page | | Comments (0)
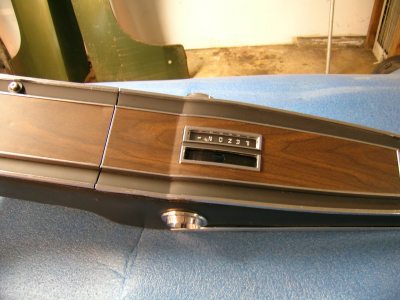
Refurbished center console
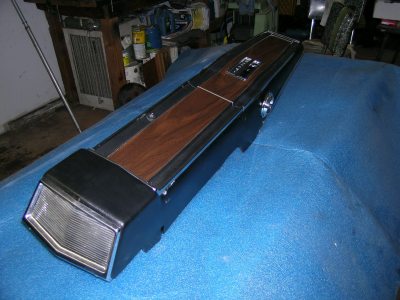
At long last, I had the materials and time to refurbish my center console. I repaired the broken parts of the plastic housing, using epoxy underneath where it doesn't show. The end product of that endeavor is nearly perfect. I refinished the console in black to match the new interior that will be installed one day.
--------
Posted in 2004-present | RESTORATION | body | interior | link to this page | | Comments (0)
Instrument Panel
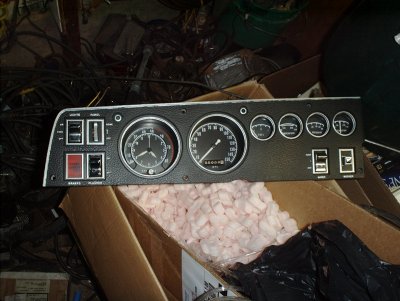
In rebuilding my instrument panel, I took all five or so instrument clusters I have accumulated over the years, set up a 5-volt tester, and selected the gauges with the best function. Then I used a kit from Performance Car Graphics to resurface the gauges once I had repainted them a flat black color. I do not have an unbroken 1970 cluster bezel, so I used one from a '69. Thus the panel I currently plan to put in my car has a dash-mounted hazard lights switch; if I find a 1970 bezel, I will install it and delete the hazard switch as would be proper. The bezel was repainted and relettered by hand, and detailing took me about a day and a half. I think the results will be very nice for my weekend cruiser of the future.
--------
Posted in 2004-present | RESTORATION | interior | link to this page | | Comments (0)