


March 26, 2013
A Special Guest!
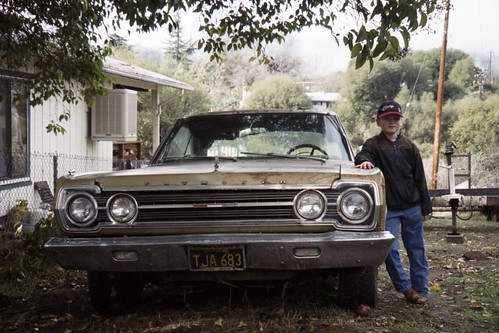
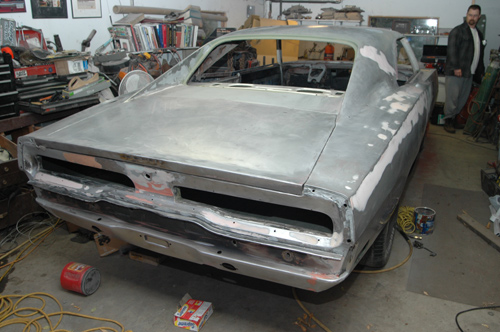
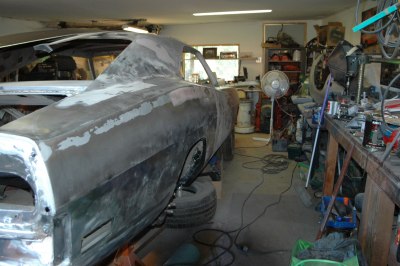
Something I've been encouraging my son to do for a long time is to create a web presence about the ongoing restoration of his 1967 Plymouth Satellite.
Well the last merit badge he needs to finish before he can submit his Eagle Scout package is Communications. One of the ways to meet one of the requirements is to design a web site. The requirements state you do not even have to post it, and it does not have to be more than a few paragraphs of information. However, with a little nudge from his Dad (and Assistant Scoutmaster) he put it on the web.
Here he is at age 7 when I bought him his first Mopar! (he is almost 17 yrs old now and 6'3" tall)
It is basic, and he'll be adding to it as we go, we have many hundreds of photos, but most are references for when we put it back together.
It is a blog, so just like my Charger blog, the newest posts are on top, you scroll down to see older stuff - all the way back to the beginning.
Here is a link to see it... Tolley's Satellite Restoration
Let him know what you think, or if there is anything any of you want to know.
Posted in 2004-present | Family Helpers | RESTORATION | disassembly | glass | interior | primer and paint | rust & rust repair | sandblasting | sanding | sheet-metal replacement | link to this page | | Comments (0)
August 17, 2009
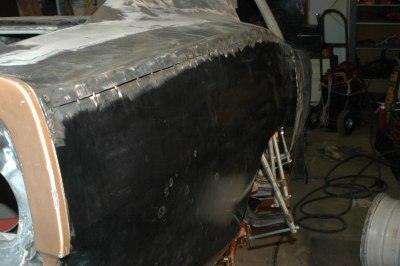
Just before the second round of 2K primer
Well, my son and I finally finished the first round of block sanding on my Charger. After blowing the car off really well with compressed air and using a tack cloth on the body, I covered bare metal areas with self-etching primer. Then, after letting it dry for a day or two, I blew the car off with air again, washed it down with wax and grease remover, and tacked it off again one final time, in preparation for the second application of 2K primer.
Here's a slideshow of a walkaround of the car just before I started spraying. The various highs and lows exposed during block sanding are now much more level than before and are about to be covered up again.
Posted in 2004-present | RESTORATION | body | primer and paint | sanding | sheet-metal replacement | link to this page | | Comments (0)
October 26, 2007
Fall Colors
With the coming of fall, many people look forward to the changing colors of the leaves. I have been looking forward to seeing my Charger change colors for what seems like a very long time. With all of the coarse bodywork done, it was finally time to put a base coat of etching primer on my rolling shell. Very soon, I hope to be adding two or three coats of black 2K primer, and to begin the blocking-out process. That should keep me busy for a very long time. Please enjoy the slideshow "walkaround" of my Charger in its new green glory. Hopefully soon we will be posting pictures of a newly-blackened Charger. Stay tuned.
Posted in 2004-present | RESTORATION | body | sheet-metal replacement | link to this page | | Comments (1)
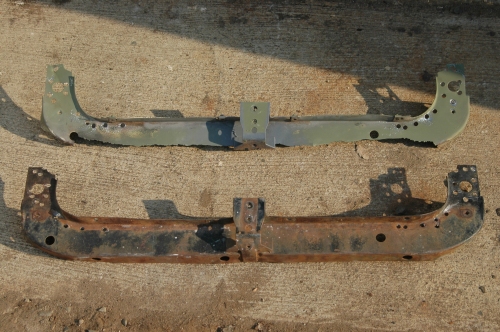
Beware teens with torches
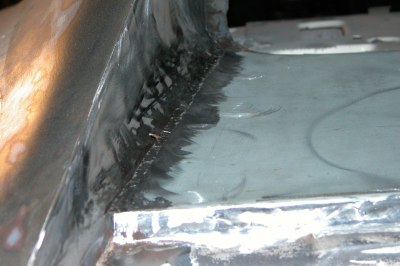
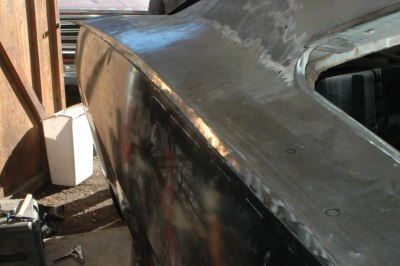
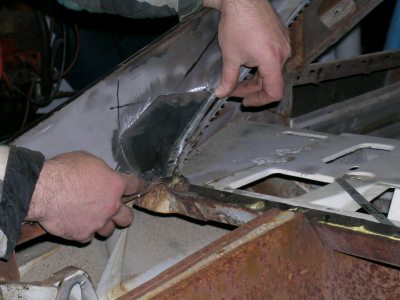
For many years, I have lamented the fact that back in 1987, some ignorant teenager took a torch to my lower radiator support, supposedly to make room for a larger radiator. That ignorant teenager was me. When I was seventeen, I thought it would be a great idea to put this big monster radiator I found in my Charger -- not that the one I had ever overheated, but it was bigger, so it would have to be better, right? Well, after making clearance for the taller radiator, I realized for some other reasons that escape me now that it wouldn't work, so I reinstalled the old radiator, and comforted myself with the notion that nobody would ever really see that jagged edge way down there.
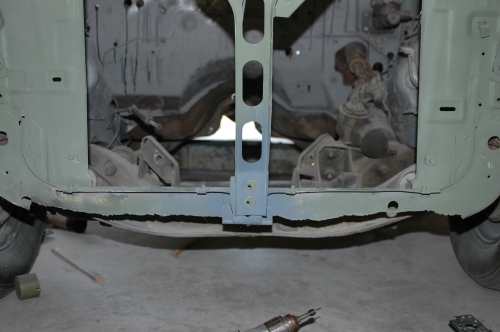
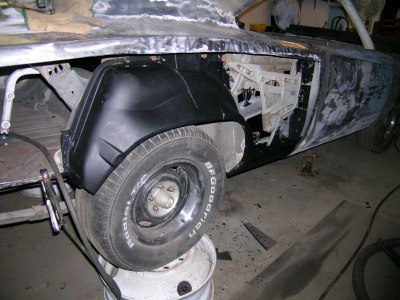
Recently, my son and I were scavenging some parts from a wrecking yard for his 1967 Plymouth Satellite. I had recently been perusing the sheet-metal parts catalogs and discovered that '67 to '70 B-bodies all used the same lower radiator support. As it turned out, the donor car had a good one, and we were able to get it very inexpensively.
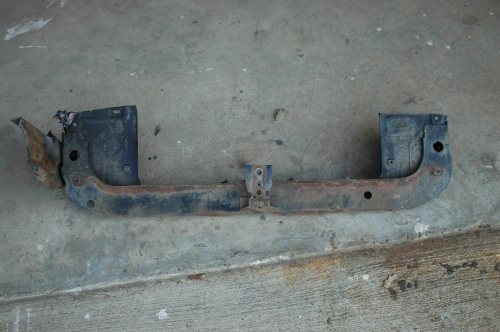
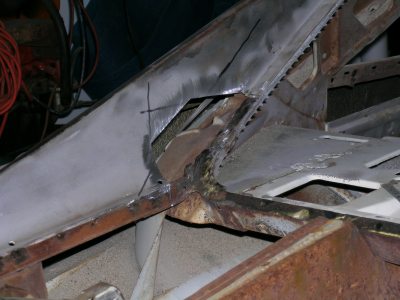
Now the replacement I had long thought would never happen was literally a few spot welds away from reality. The next couple of pictures show the front end of my Charger, with the old defiled part removed, and it sitting next to the cleaned and straightened replacement.
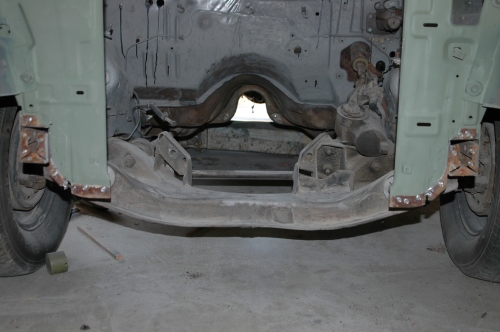
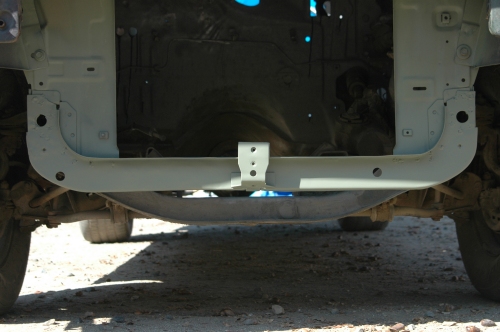
And here's the "new" support, installed, primed, and ready for paint.
Posted in 2004-present | RESTORATION | body | sheet-metal replacement | link to this page | | Comments (0)
July 01, 2007
The Return of the Wizard
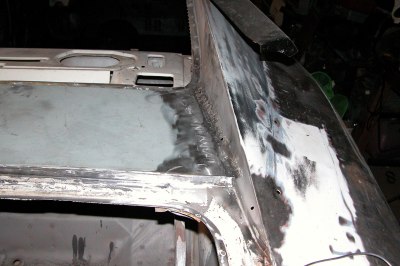
My great friend, brother in Christ, and "metal mentor", Frank, returned for a visit from his new home in Montana. In the several hours we spent visiting, he took a walk around my Charger and showed me where I've been making the rookie error of oversanding my filler, causing unevenness where the filler and the bare metal come together. With a pen marking the highs and lows, he indicated the areas that still needed work (there were lots). However, he did find one area that was done correctly, by chance, and had a nice indistinct feathered edge. Now that he's shown me what it all ought to look like, things have been progressing rapidly, and I think in the right direction.
I realized all over again how much I leaned on Frank when he was here, and it was great to see him. With his nudge in the right direction, there's a good chance my car might even be primered and/or painted before he sees it in person again.
Posted in 2004-present | RESTORATION | body | sheet-metal replacement | link to this page | | Comments (1)
April 28, 2007
360-degree view
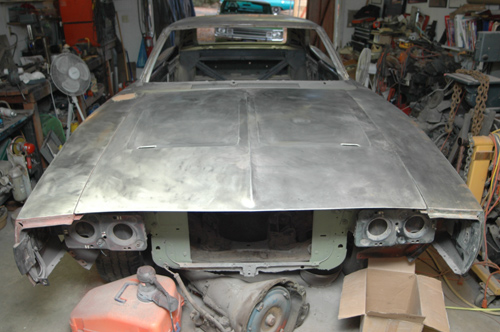
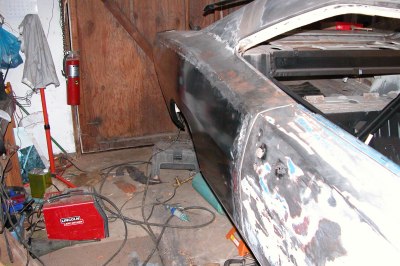
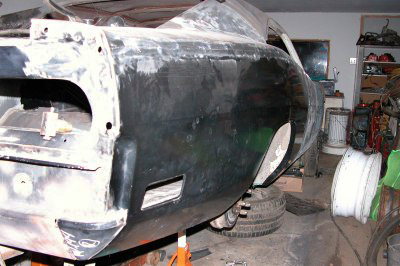
Well, I'm not done smoothing out the body yet, but I wanted to clean the shop, and it was a nice opportunity to roll the car outside and get some pictures with a wider view than I can get inside my small garage. I temporarily installed a complete steering column from a '69 Charger so that I could steer the car in and out of the garage more easily, since, once I am done restoring my '70 column, it will stay put away until the car is being reassembled.
The slideshow below somewhat approximates what a walk-around of my car would be like in its current state of restoration.
Posted in 2004-present | RESTORATION | sheet-metal replacement | link to this page | | Comments (0)
November 11, 2006
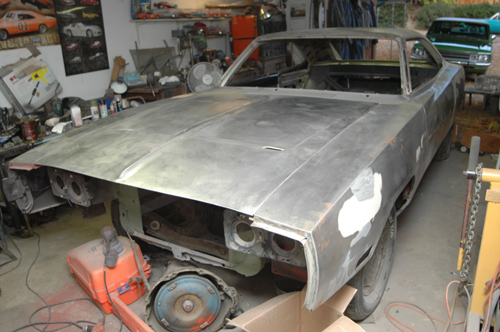
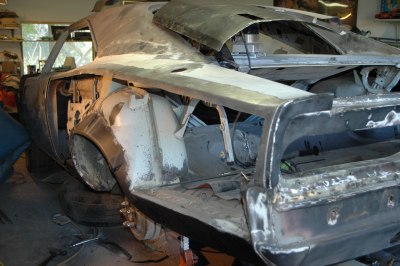
Body pieces back in place
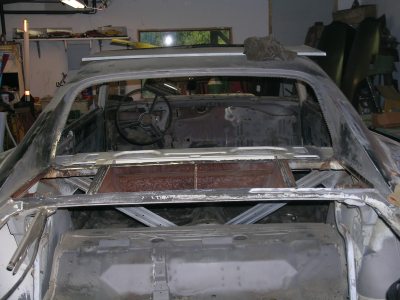
Here are a few updated snapshots of the body of the Charger coming back together a little bit more. The hood is now back on the car and on its hinges. A lot of attention has been paid to keeping all my gaps between the fender/cowl/doors etc even. It sure looks better than it did when it was last together. In these pictures, the trunk lid is not actually attached to its hinges; it's just sitting on some foam shims temporarily. My focus continues to be on smoothing out the body work as best I can, moving toward the eventual priming day, when I can then begin to really perfect the final finish of the car before painting.
Posted in 2004-present | RESTORATION | body | sheet-metal replacement | link to this page | | Comments (0)
July 15, 2006
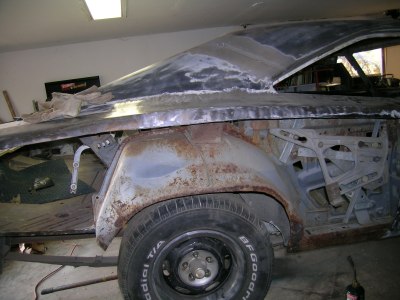
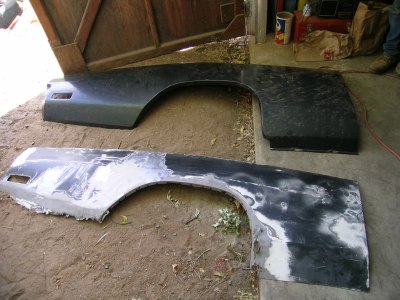
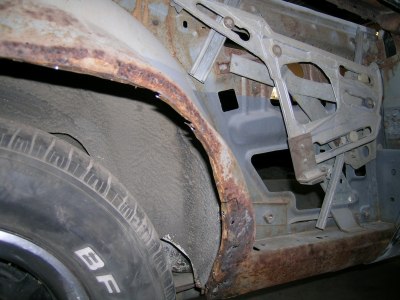
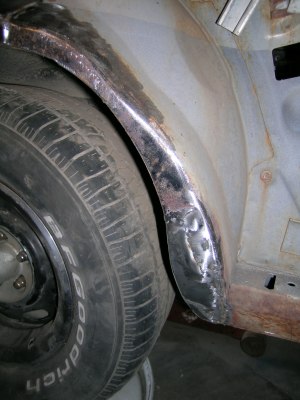
July 2006: Sheet metal replacement continues
The driver's side fender I acquired for my car was in excellent condition as it had no collision damage in its life. However, the car had sat since the 1980's and the lower portion of the fender behind the brace was thoroughly rusted out. Using a patch panel I purchased from Auto Body Specialties, I have repaired the fender by welding in new metal after completely cutting out the rusty metal. The welds were sealed with waterproof metal body filler, and then a skim coat of filler and glazing putty were applied to get the contour just right. I have coated the back of the fender with Eastwood's rust encapsulator, and hope to soon be re-mounting it on the car, following the same exacting alignment procedures I followed previously on the passenger side.
--------
Posted in 2004-present | RESTORATION | body | sheet-metal replacement | link to this page | | Comments (0)
June 30, 2006
June 2006: Body coming back together
After cutting out everything that was bad, replacing it with metal that was new, and doing rust-prevention treatment on parts, it is tremendously exciting and rewarding to begin reassembling the car. I am especially excited to see the body lines crisp and beautifully aligned, better than they ever have been in the 20+ years I've owned this car.
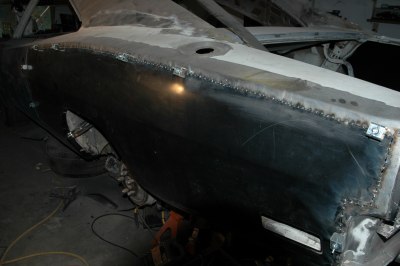
The welded seam on the newly replaced quarter panel needed to be sealed inside and out with waterproof metal body filler (I learned about how important this was from an outstanding set of how-to DVDs I purchased when my metal wizard friend moved away. I highly recommend the Howard's Backyard Auto Body series for anyone who plans to do any body work, any paint prep, any priming or painting, and isn't sure exactly how to proceed). With a heavy layer of metal filler on the inside, and a solid-but-thin layer on the outside, the quarter panel only required minor traditional filler to smooth out imperfections along the seam. It now feels and looks very good. I can't wait until the day comes to start laying some primer on this thing.
Before installing the passenger fender, I primed all bare metal beneath it with etching primer. The backside of the fender itself was treated with a good coat of Eastwood's rust encapsulator, the same as I used on the floors in the earlier sections. After adjusting all the adjustable portions of the fender-mounting arrangement, the body lines are crisp, the door gap is even, and now only some minor sanding on the fender will be required prior to priming. Eventually, the entire underside of the fender/wheel-well area will be underbody coated, once I know for sure that I'm not taking the fender back off for any reason.
This is the driver's rear quarter opening, all trimmed and prepped for installation of the new quarter, which has also been trimmed to fit the opening. Starting with a technique a friend shared with me of laying the new metal over the old metal and cutting them both at the same time, I improvised (and I think improved) the process by using my Sawzall to make most of the cut, using the cutting wheel on the grinder only to get the sawblades a place to start. This went much smoother, was easier for me to control, and was vastly less expensive than using six or eight cutting wheels as we did on the other side.
On the driver's side, the welding process was the same as for the passenger side -- slowly tacking the gap between the car and its new piece, keeping heat to a minimum. Pictured here are the special clamps I purchased from Eastwood's, which I mentioned in the write-up on the passenger side but did not have a picture of. These little gems really work, and keep the panels aligned while maintaining a small gap for good Mig penetration.
--------
Posted in 2004-present | RESTORATION | body | sheet-metal replacement | link to this page | | Comments (0)
March 11, 2006
Spring 2006: Seeing Results
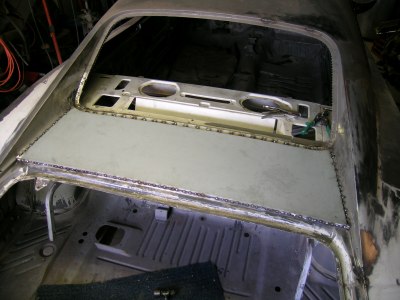
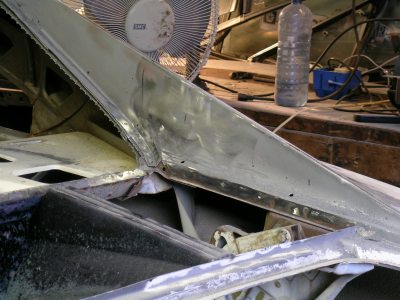
The driver's side sail panel area was one of the first areas on the car that I realized had extensive rust. Now all the metal in that area is brand new and is awaiting only some very fine filler work to smooth over where the welds have been ground down smoothly. The welding process was done slowly to minimize warping, and a bit tedious, but the results should be well worth it.
The passenger side had significant rust, though not as serious as the driver's side. However, it too now gleams with new shiny metal. The rear-window opening has been rebuilt and will do a much better job sealing out the rain than it used to.
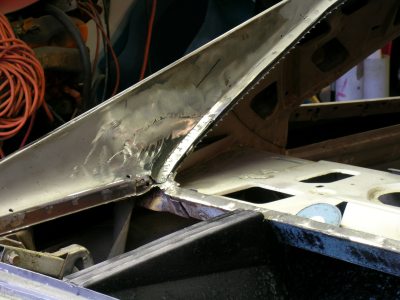
The tack-welding process is nearly complete! Hopefully my metal wizard buddy will be able to help me do the final smoothing on this quarter panel, as we have recently learned that due to a new job he'll be moving away. BUMMER! (for more reasons than that).
There was quite a bit of hand-forming that had to be done in the area of the recess for the bumper. This was handled extremely well by my very helpful metal wizard. Using the quarter panel extension piece as a guide, he obtained the correct alignment, and as this picture shows, the welding over most of the panel is finished, awaiting only final smoothing. I am very happy to have this worst part of my car become one of the nicest.

With my metal work coach leaving, I am moving aggressively to attack the driver's side quarter next. This picture is the quarter before I started drilling spot welds and separating the panels, which I now have completed. When my buddy shows me where to cut, I'll have another picture, with another gaping hole in the side of my car. Stay tuned.
--------
Posted in 2004-present | RESTORATION | body | rust & rust repair | sanding | sheet-metal replacement | link to this page | | Comments (0)
January 10, 2006
Rear quarter panel installation
It was finally time to cover up the gaping hole in the side of my car. While paying very close attention to the alignment of the main body lines, and also focusing on the wheel opening and bottom flanged edge alignment, we carefully figured out how much of the reproduction quarter panel would have to be cut off and discarded. A friend of mine, James, who has worked in the automotive restoration field for a number of years, gave us a suggestion which saved us a lot of grief. We were puzzling over how to get the new piece and the opening it would fill trimmed as precisely as they would need to be. His suggestion was to overlap the pieces by as much as possible, and then using a 4" grinder with the thinnest available cut-off wheel, cut both the new panel and the car at the same time. To maintain our alignment, we used a number of cleco temporary clamping devices, which I purchased from Eastwood's.
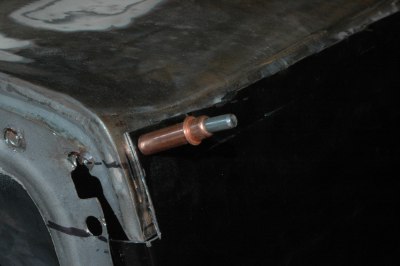
For those who are wondering, this is a Cleco, purchased in a kit with special pliers to install and remove them, these are a reusable temporary clamping device. First you drill a small hole through both items to be held. Then squeeze the Cleco with the pliers, slide it into the hole, and release. When you're ready to remove it, simply grab it with the special pliers, squeeze, and slide it out of the hole. If you're going to be doing a lot of metal replacement and welding or fabrication work, a set of these is really handy. I bought these at Eastwood's, although I understand they are available elsewhere.
Using Eastwood's intergrip panel clamps, the new panel was held in place for tacking, which we did very carefully, putting a tack only every twelve inches or so initially, in order to avoid overheating the material. Once the edges were well-tacked after several passes, we glued all the lower flanged edges with panel-bonding adhesive, also purchased from Eastwood's. The rear quarter was now in its final resting position. The body lines lined up very nicely, and it would just be up to me to patiently continue the tack-welding and smoothing process until we had a seamless welded bond.
EDIT, OCTOBER 2010
While trimming the wheel lips to the proper dimensions (the after-market quarter panels had an excessively wide wheel lip), I discovered that the panel bonding adhesive, for whatever reason, had not bonded the quarter panel to the wheel house in many places. I removed the panel bonding adhesive, which wasn't that difficult, and drilled holes, then spot-welded the two pieces together just like we did on the driver's side from the beginning. Not sure what the failure was, but I'm glad to have discovered it before getting everything painted.
Posted in 2004-present | RESTORATION | body | rust & rust repair | sheet-metal replacement | link to this page | | Comments (0)
October 01, 2005
October 2005: sheet-metal work resumes
With all the metal prep work done, and the new piece formed and fitted, it was finally time to weld in the piece that would complete the rear-window opening and cover the expanse between the window and the trunk. To get this right, we temporarily reinstalled the deck lid, in order to match the slight crown the original piece had. Carefully tacked in place so as to avoid warping, the piece looked great when it was finally pinned down.
Even though I've been looking forward to this moment for years, I had to swallow hard, grit my teeth, and just go with it when my buddy put his cutoff wheel into the quarter panel. The passenger side had more extensive rust and much more previous body damage (hidden by up to half an inch of filler), so it was decided that full replacement was best.
Out with the old, in with the new, so they say. Here's the veteran quarter panel lying next to its replacement.
One more reason we totally removed the passenger-side quarter panel was to get at the inner fender rust on the forward edge of this piece. Only total replacement of all defective material will be good enough to achieve the results we are hoping for.
My buddy, the metal wizard, never ceases to amaze me. This was a case in point. He used some of the complex compound curvature left over from the sail panel repair pieces to fabricate an identical steel replacement section for the rusted area in the previous picture. Once welded in and ground off smooth, it was truly amazing how well he had matched the original shape.
To help prevent any future problems, the inner fender, inner rocker panel, and several other areas which are impossible to access under ordinary circumstances, were given a generous coating of the same rust encapsulator used on the floor.
--------
Posted in 2004-present | RESTORATION | body | rust & rust repair | sheet-metal replacement | link to this page | | Comments (0)
March 10, 2005
Sail panels
The next time my friend and I work on the Charger, we will start out by replacing the flat panel that lives between the sail panels. Test fitting the Charger Specialties piece indicates that once our surface preparation is complete, it should be a perfect fit. I highly recommend this company if you happen to need the sheet metal pieces they offer.
--------
Posted in RESTORATION | body | rust & rust repair | sheet-metal replacement | link to this page | | Comments (0)
Passenger-side sail panel, repaired
The passenger side has much less rust and only a tiny 3" x 1.5" piece of the repair section was needed. The welding, grinding, and sanding went so well on this side that absolutely no filler will be needed at all.
--------
Posted in 2004-present | RESTORATION | body | rust & rust repair | sheet-metal replacement | link to this page | | Comments (1)
Sail-panel and window tray repair: complete
The final product: welded, ground, and high-speed sanded, looks stunning. Little or no filler will be required on the weld seam area. You will never know how great a job my friend did once this is covered up with a vinyl top again, so I'm glad I have pictures.
--------
Posted in 2004-present | RESTORATION | body | rust & rust repair | sheet-metal replacement | link to this page | | Comments (0)
Sail panel repair: ready to weld
After the rusted material was removed, only a relatively small section of each of the repair panels I'd purchased from Charger Specialties was needed. The fit and form of the pieces was quite good, and required no exceptional massaging for a nice fit. Here, the trimmed and fitted repair piece is shown in place, ready for welding.
--------
Posted in 2004-present | RESTORATION | body | rust & rust repair | sheet-metal replacement | link to this page | | Comments (0)
Sail-panel and window tray repair
(just as a reminder, a few entries before this one in the 'sheet-metal replacement' category, you'll find a shot of the rust in this area as we initially uncovered it.)
At long last, the exciting day arrived and my metal-wizard friend brought all his welding and fabricating equipment over to my garage. First step was to remove the large flat panel covering the area between the rear window and the trunk lid. Next the rusted-out areas of the sail panels had to be removed. The driver's side was much worse than the passenger side, so we started there.
--------
Posted in 2004-present | RESTORATION | body | rust & rust repair | sheet-metal replacement | link to this page | | Comments (0)
September 10, 2004
Rear valance quarters
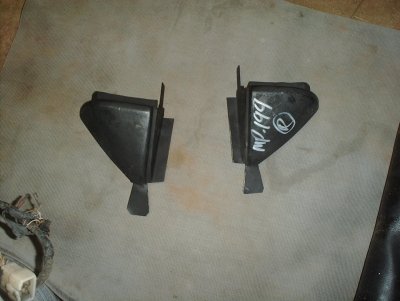
Finishing off my current inventory of rust repair parts is this pair of rear valance corners. The passenger side rear valance corner is badly rusted, and once fitted, these will nicely tie in the new quarter panels with the rear valance, which had been replaced previously.
--------
Posted in 2004-present | RESTORATION | body | disassembly | rust & rust repair | sheet-metal replacement | link to this page | | Comments (0)
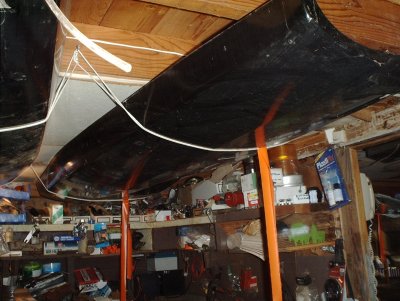
Trunk floor extension
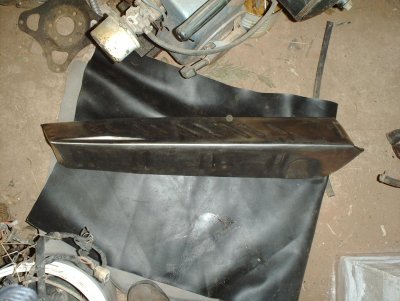
On the passenger side where the rear quarter panel was more severely rusted, the trunk floor extension was rusted out as well, where it met the quarter panel. This piece purchased from Auto Body Specialties will give a solid backing for the new quarter panel on that side.
--------
Posted in 2004-present | RESTORATION | body | disassembly | rust & rust repair | sheet-metal replacement | link to this page | | Comments (0)
Rear window channel replacement piece
This other piece of metal required to complete the replacement of the rusted portions of the rear window channel was also purchased from Charger Specialties. This too seems to be of excellent workmanship. I will be very happy to have these pieces finally part of my car.
--------
Posted in 2004-present | RESTORATION | body | disassembly | rust & rust repair | sheet-metal replacement | link to this page | | Comments (0)
Window channel replacement pieces
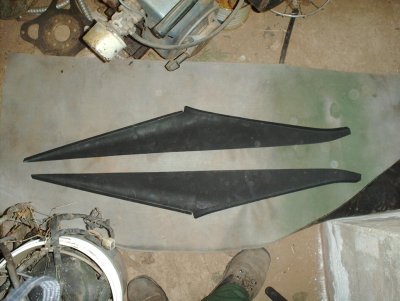
Next I purchased this seemingly very well-made pair of sail panel/rear window channel pieces, made by Charger Specialties in Montana. Not only was I impressed with the parts themselves, but the packing and shipping were very well-thought-out, with my order arriving in a handmade wooden box to keep it safe.
--------
Posted in 2004-present | RESTORATION | body | disassembly | rust & rust repair | sheet-metal replacement | link to this page | | Comments (0)
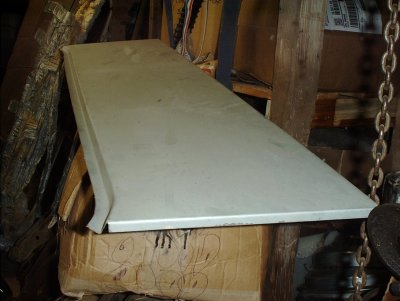
Replacement quarter panels
These quarter panels were my first major sheet metal acquisition. They were made by Goodmark Industries. I got a great deal on them on Ebay, which allowed my son and me to have a fun trip together to go get them in the truck. I was impressed with the quality of work on these. The real test will be fitting them to the car later, though. We are considering using an Eastwood Company weldless panel repair process to help make this easier. If anyone reading this has experience with this process, good or bad, I would be interested to hear what you have to say; please feel free to email me about it.
--------
Posted in 2004-present | RESTORATION | body | disassembly | rust & rust repair | sheet-metal replacement | link to this page | | Comments (0)