


June 09, 2018
Charger at the body shop
A little later than I thought, but finally an update.
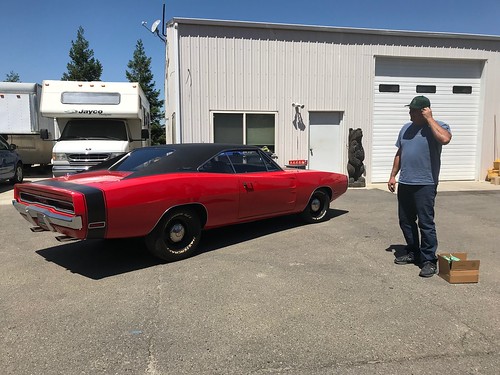
Mopar Ed was very busy so it has taken longer than he planned to get a space for my car in his shop.
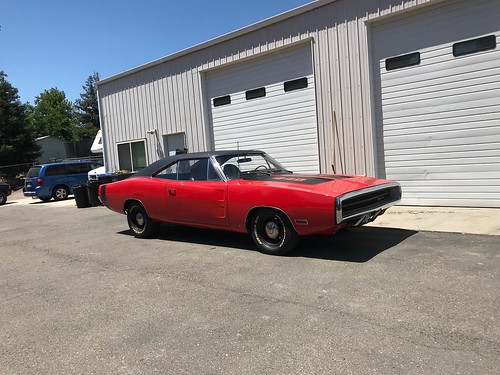
However Friday was the day, and I was able to get my Charger down to his shop (about 1 1/4 hours from my house).
Not sure how long it will take to get the bodywork and paint done but if it is done in the next 3 weeks I'll be really happy.
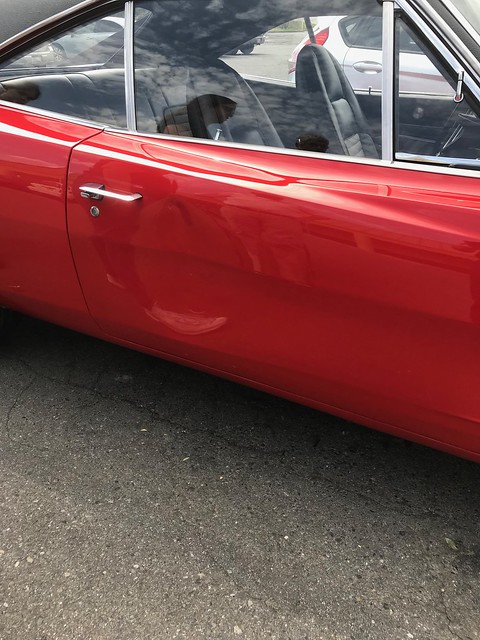
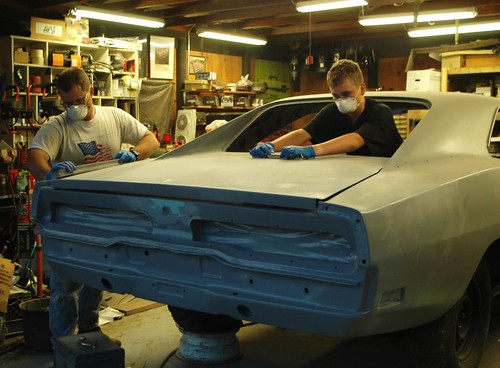
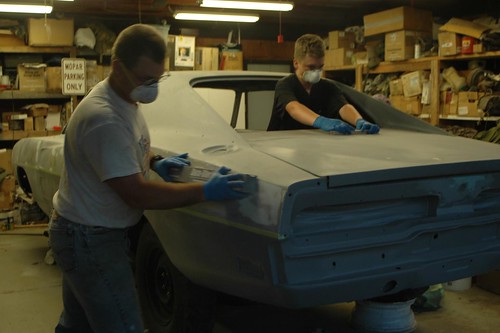
I was able to take one of my suction pullers to the worst part of the dent and it sprang back surprisingly well, but still requires attention to get the door back to being perfect. But it was less embarrassing when driving past someone who happened to be looking.
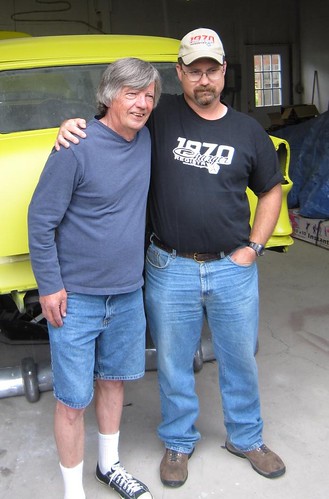
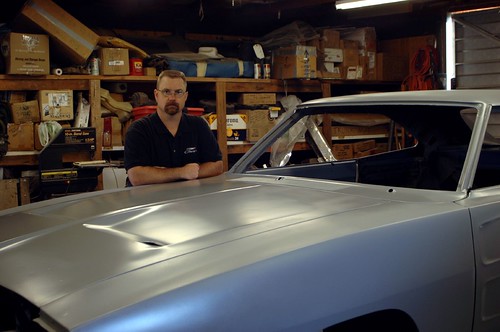
Here is "Mopar Ed" himself after having taken a look at the work he has before him.
So long for now Charger, I'll see you again soon!
Stay tuned for another update hopefully soon, - Completion!
Posted in 2004-present | Family Helpers | Reassembly | body | primer and paint | link to this page | | Comments (0)
April 15, 2018
Shopping cart vs 70 Charger
Well it has been a while since I have had anything new to post here. But sadly, now I do...
The Saturday before Easter since our kids were about to head back to college after their Spring Break at home we decided to go to the next town over for lunch. Since it was a nice day, I decided we'd head over in the Charger to make it an even more special occasion.
After lunch we stopped off at the store where I carefully chose a parking spot at the end of a row figuring that with nobody parking next to us the car would be a bit safer.
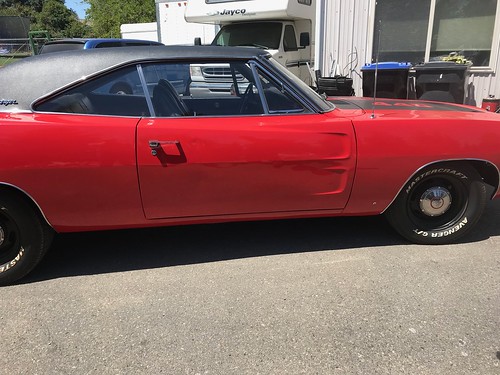
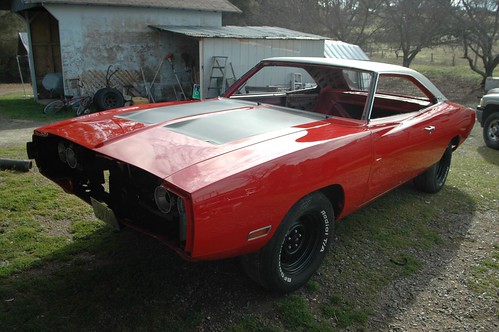
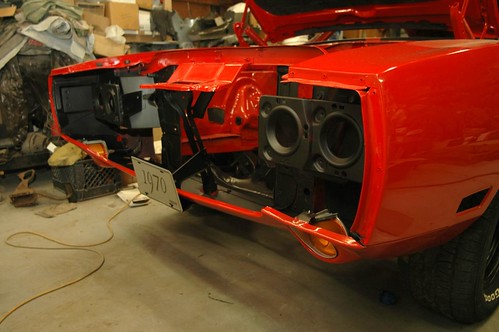
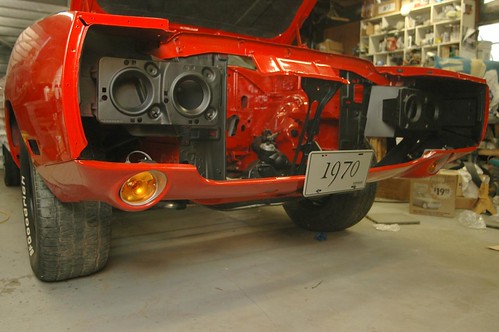
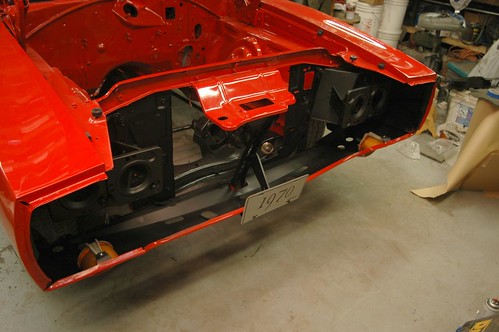
After we came out of the store I was putting a couple of things in the trunk and I heard a "THUNK" sort of noise. I also immediately heard my daughter totally losing it on somebody. I shut the trunk and came around to the passenger side where people were starting to gather. What greeted me was a pretty large dent in my passenger door.
When I got everyone calmed down (I was in shock and disbelief myself), I got the older guys information and found out that he had just helped his wife into his vehicle, loaded her walker, and when he turned around to grab his groceries, his loaded shopping cart had rolled downhill into the side of my Charger.
The dent is uglier than this picture makes it look. It is pushed in far enough that my door gap is noticeably off in the rear although it opens and shuts fine.
So far my collector car insurance company has been very helpful. The adjuster who came out a couple days after the incident to document everything at my house was very complimentary. He sees a lot of cool cars and he thought he had not encountered one as nice as mine in a long time.
I talked to "Mopar Ed" (the gentleman who painted my Charger) a week ago Friday and he will be making an opening in his schedule for me in early May after he is done with Spring Fling in Van Nuys, and Mopars at the Strip in Las Vegas.
I think the door will survive and not need replacement or an excessive amount of filler. But we'll see. I will update this blog as repairs are underway and completed.
Keep an eye on your beauties when you take them out!
Posted in 2004-present | Family Helpers | body | primer and paint | link to this page | | Comments (0)
March 26, 2013
A Special Guest!
Something I've been encouraging my son to do for a long time is to create a web presence about the ongoing restoration of his 1967 Plymouth Satellite.
Well the last merit badge he needs to finish before he can submit his Eagle Scout package is Communications. One of the ways to meet one of the requirements is to design a web site. The requirements state you do not even have to post it, and it does not have to be more than a few paragraphs of information. However, with a little nudge from his Dad (and Assistant Scoutmaster) he put it on the web.
Here he is at age 7 when I bought him his first Mopar! (he is almost 17 yrs old now and 6'3" tall)
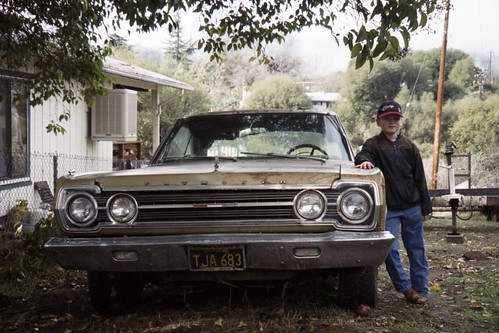
It is basic, and he'll be adding to it as we go, we have many hundreds of photos, but most are references for when we put it back together.
It is a blog, so just like my Charger blog, the newest posts are on top, you scroll down to see older stuff - all the way back to the beginning.
Here is a link to see it... Tolley's Satellite Restoration
Let him know what you think, or if there is anything any of you want to know.
Posted in 2004-present | Family Helpers | RESTORATION | disassembly | glass | interior | primer and paint | rust & rust repair | sandblasting | sanding | sheet-metal replacement | link to this page | | Comments (0)
March 17, 2013
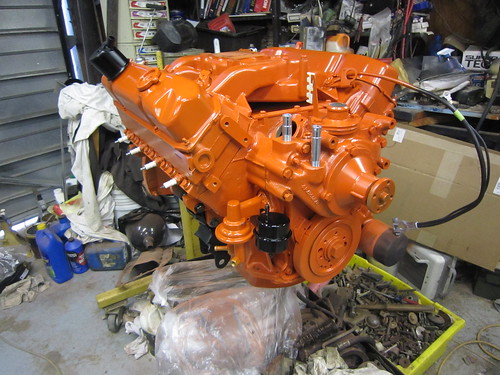
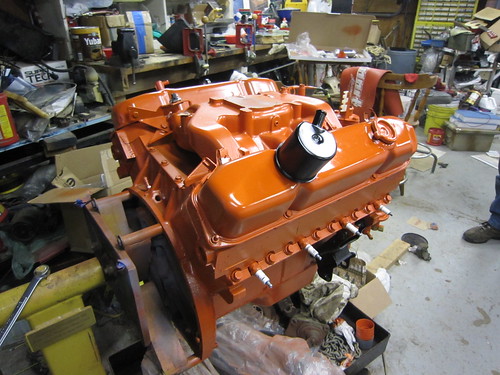
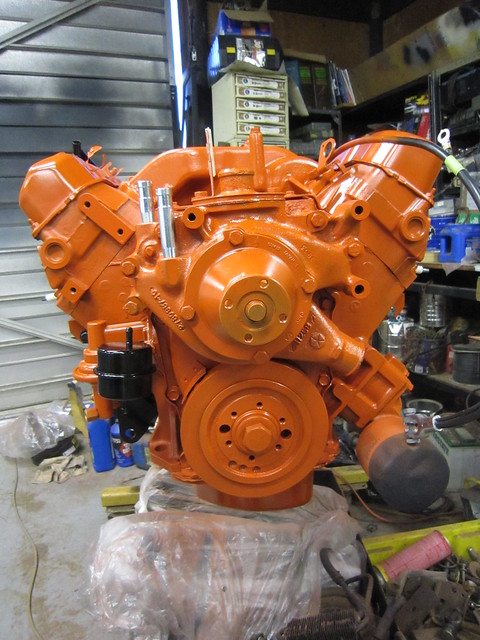
Final engine assembly!
Well, I believe everything is right and torqued and and all the pieces are as correct as my son and I can get them to be, so it was finally time to prime and paint the engine!
I used Duplicolor Chrysler Hemi orange, on top of Duplicolor gray engine primer. then once the orange was done I used Duplicolor clear engine paint on everything to help with durability, and ease of cleaning the engine in the future.
I bought all from a local auto parts store. It took four cans of the orange to get the coverage I was after, but one can of primer, and one can of clear were plenty.
Now I will start cleaning, checking, and painting all my brackets and pulleys Stay tuned!

Posted in 2004-present | Family Helpers | RESTORATION | Reassembly | engine | primer and paint | link to this page | | Comments (0)
July 04, 2012
Meeting a Mentor
While on a family vacation up north this year, I was able to tie-in with some really neat folks. One of them I had wanted to meet for a number of years. My body-work instructor guru, and pal Howard Holland of Howard's Backyard Auto Body. His DVD's are really great at helping a person go from pretty near zero to actually doing a good job, in a fun and informative way.
My family and I really enjoyed getting to meet Howard, and take a tour of his shop, his home and band room. Howard is even nicer in person.
We had a lot of fun, thanks Howard!
Posted in 2004-present | Family Helpers | body | primer and paint | sanding | link to this page | | Comments (0)
December 28, 2011
Christmas goodies
OK, well I have not made much progress on my Charger lately, been busy saving every penny for my set of all new glass which I plan to buy in February. But for Christmas, I got an assortment of Charger care & beautification items I had requested from my wife and kids.
I got a waxing kit with Meguiar's Ultimate Liquid Wax, an applicator and buffing cloth, a "California Car Duster", and an assortment of car washing, and detailing supplies.
So, today since it was nice outside, we pushed my Charger outside and started in. It had gotten fairly dusty since I have never washed it since it was painted about a year ago. It is covered, and indoors, but everything here outside is dirt, or gravel, so over time dust creeps on to everything.
First thing we did, was very carefully give my Charger a proper bath, I dried it off with a large micro-fiber towel I got with my goodies. Then my son and I applied the "Ultimate Wax", and then buffed it off by hand with the Meguiar's micro-fiber buffing cloth from the kit.
It really came out nice. The pictures below are quite good, and taken by my wife, but even she says they really aren't as stunning as the car is in person. As always, you can click on each image to see it larger.
It was a lot of fun bring the shine out, and knowing the finish is now protected somewhat, is nice too.
It has been a very merry Christmas for my Charger indeed. (and me!)


Oh, and since all my buddies, and everyone in my family keep asking me about the engine, I dropped in an engine today too. And YES, It's a HEMI!
I need to finalize the engine mounts, but check it out!
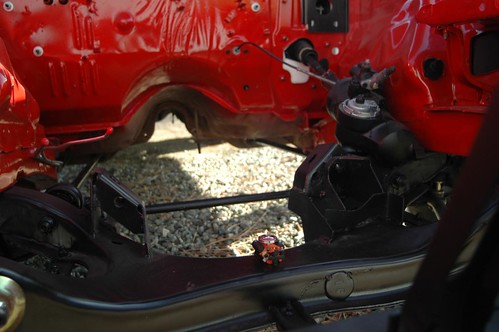
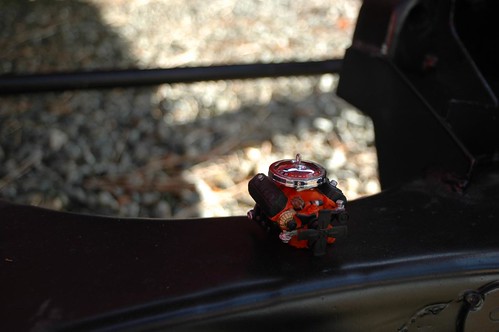
Well, on second thought, I guess I'll have to keep the "Holy Hemi" on our Christmas tree, and wait to overhaul my 440.
Posted in 2004-present | RESTORATION | body | engine | interior | primer and paint | link to this page | | Comments (0)
June 03, 2011
A long-awaited day
A bit more progress to report. A long awaited day.
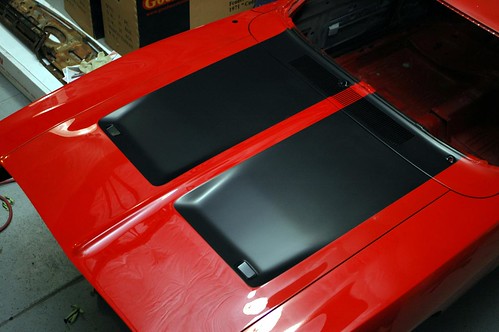
My son and I installed the new matte black tail-stripe from Performance Car Graphics.
Weather was iffy, so we just pulled it out enough to photograph the stripe work.
Tail stripe, passenger side:
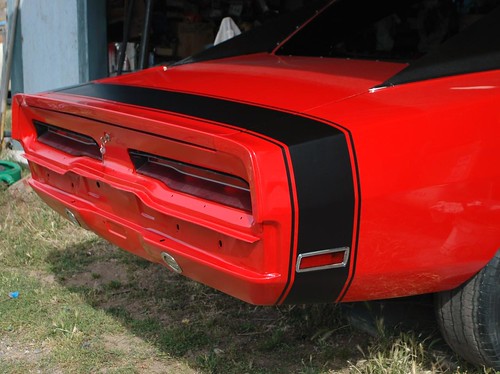
Deck lid with tail stripe:
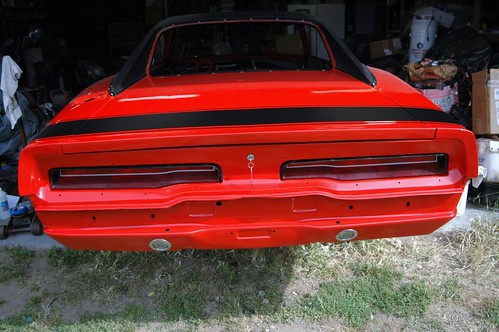
Tail stripe, driver's side close-up
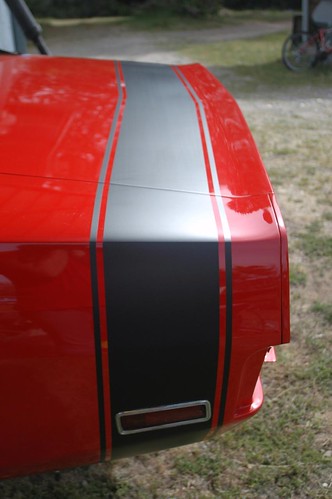
Tail stripe, driver's side looking backward

I had to re-order a driver's side section, when I put it on at first I messed up badly. The other two pieces went on fine (tried different method) PCG will sell individual parts. So when it arrived, we put it on slowly and gradually, and it went fine. Looks even better in person, if I do say so myself.
Tolley
Posted in 2004-present | RESTORATION | Reassembly | body | primer and paint | trim | link to this page | | Comments (0)
February 21, 2011
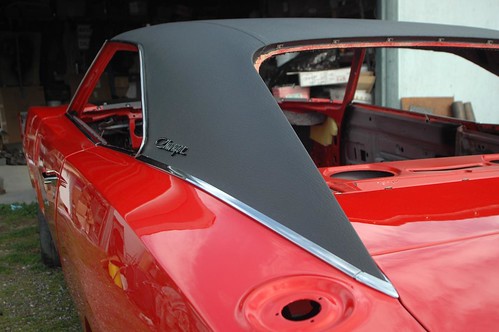
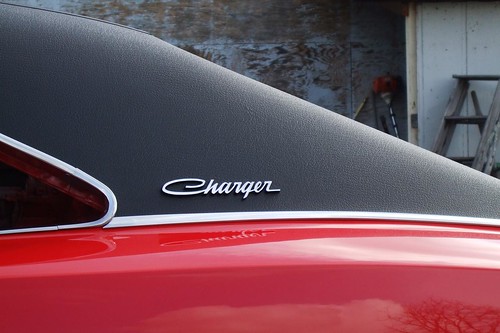
Trim and detail work
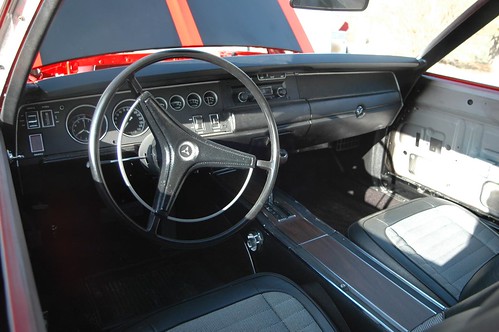
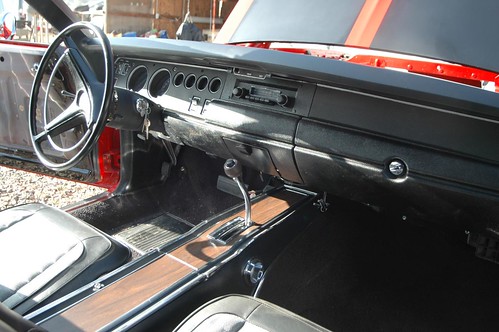
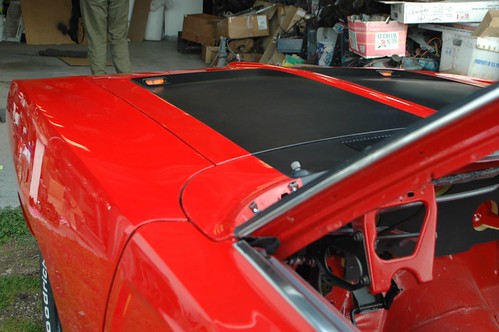
Work has been continuing full-speed on my Charger. The sorts of detail work that make up the phase I'm in right now require a large number of hours for a relatively small difference on the car, but I realize that attention to these details will add up to a terrific final product. The most time-consuming part of the project in this phase was straightening, sanding, and polishing the stainless steel trim that surrounds the border of the vinyl top. The materials I had read online gave tips for smoothing out dents, then sanding the pieces with progressively finer grits of sandpaper, and then buffing the pieces, all prior to installation. I am still learning, but so far I am happy with the results.
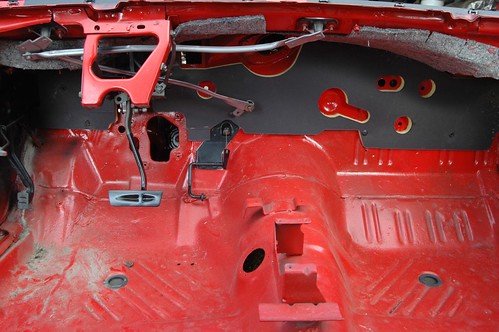
I have also been polishing the plastic lenses and have been able to now install a number of them. The firewall is also coming together nicely, with the brake pedal assembly and wiper pivots rebuilt and detailed. Next should be the heater box.
This morning my wife asked me to push the car outside the garage so that she could take a fresh round of pictures. Here are some shots that show what I've been doing lately on the Charger.

Posted in 2004-present | RESTORATION | Reassembly | body | interior | primer and paint | trim | link to this page | | Comments (2)
January 23, 2011
Front valance and blackening
Didn't have much time this week to work on the car until today, but my son and I did reinstall the front valance and mask everything off, carefully, to black out the area behind the grill and bumper. Also, I wanted to see what my new parking light lenses would look like installed, so we put those together and installed them with new hardware in the valance. I think it all came out well and looks really cool.
Posted in 2004-present | RESTORATION | Reassembly | body | primer and paint | link to this page | | Comments (0)
January 17, 2011
Reassembly begins
It is wonderful to finally be at the reassembly stage. Boxes, envelopes, containers of new and restored parts, will now be freed from their captivity to adorn my Charger.
The very first part I installed on my newly repainted Charger was the passenger side fender emblem, the symbol of Mopar, the pentastar.

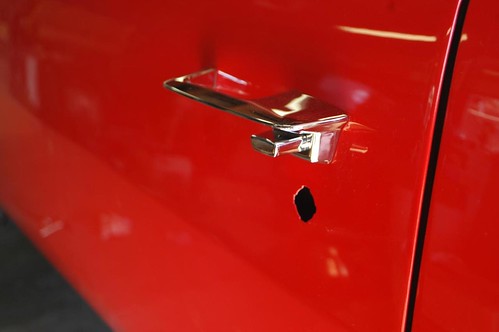
Next I installed my new reproduction outside door handles, to encourage people to not put their hands all over the paint when they want to open the door and look inside. They sure look nice to me.
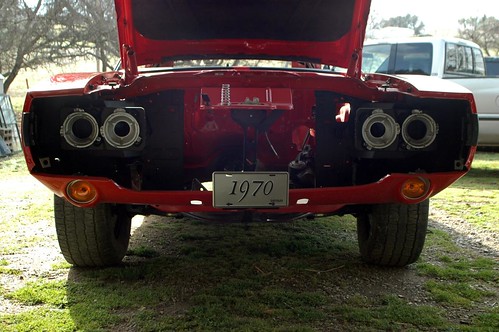
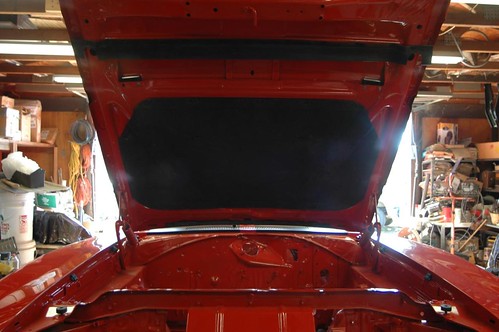
Here's a shot under the hood, with new weatherstripping, bumpers, and hood insulation, with new clips.
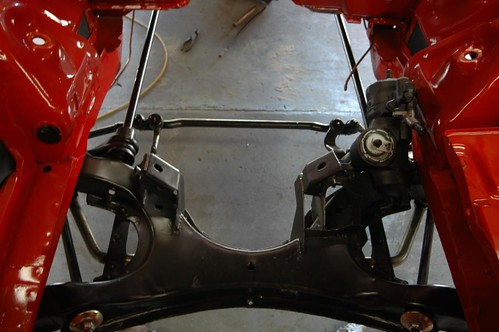
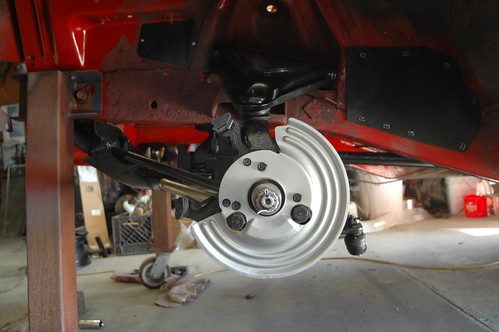
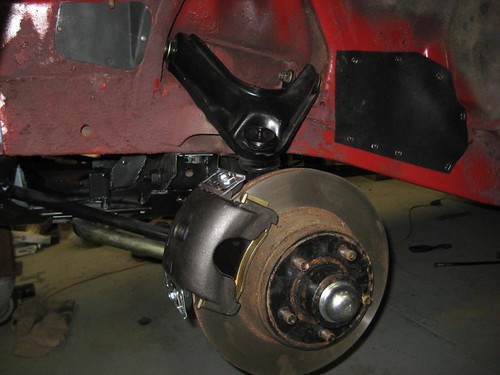
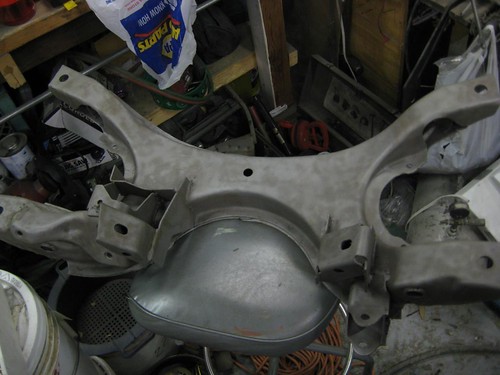
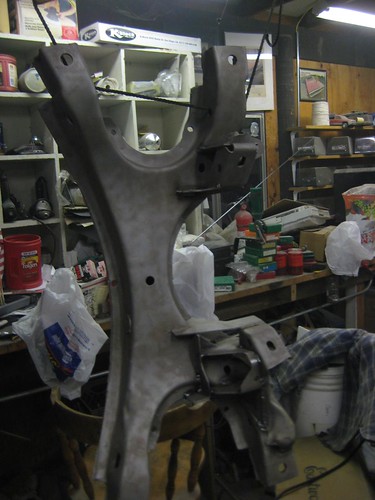
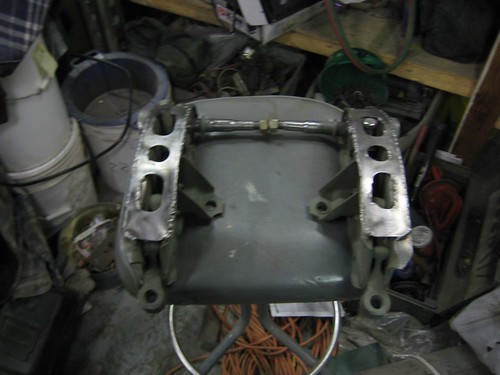
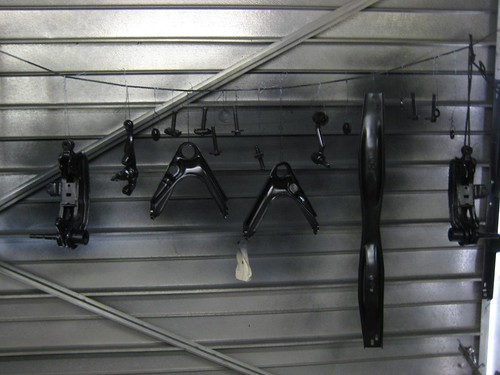
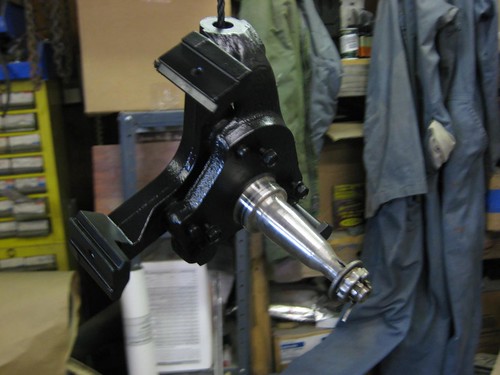
With help from my brother-in-law, son, and nephew, we jacked up the assembled K-member and bolted the front suspension in. I installed the .96-inch torsion bars with new seals and clips, and began to assemble the brakes. These are 11.75-inch Cordoba brakes, and will do the job very nicely, I'm sure. The rotors are used, but have been turned. All other parts, including bearings, seals, calipers, and hardware are all new.
After installing the front suspension, my son and nephew were itching to put something else on the car, so I let them install the new body plugs.
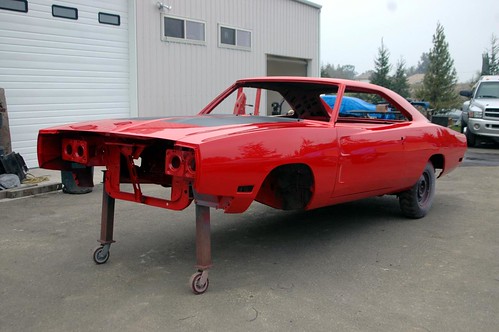
I really appreciated the use of Mopar Ed's dollies for the front end of my car, and wanted to free them up to return to him as soon as possible. The most fun way to do that was to get the car sitting on its tires again. I remounted my old BFGs on the newly painted rims, and installed them with new chrome lug nuts. At some future time, I will install the stainless steel red-line dog-dish hubcaps, to see if I like that look as much as I think I will. I really like the look of the car sitting on its tires. To me it looks more like a car than a "project" this way. I think this combination looks really sharp, and is the look I have been hoping to achieve.
Posted in 2004-present | RESTORATION | Reassembly | Reassembly | body | primer and paint | link to this page | | Comments (1)
January 15, 2011
Happiness in the garage!
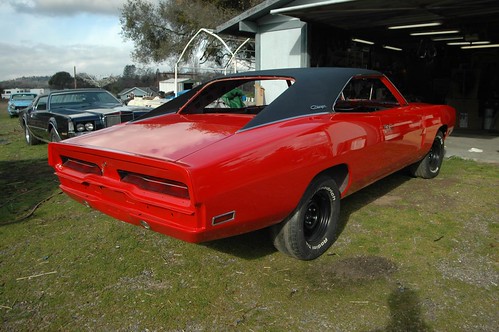
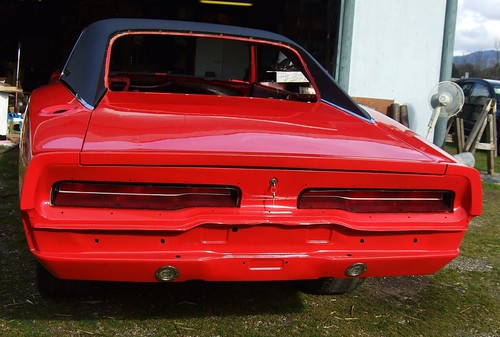
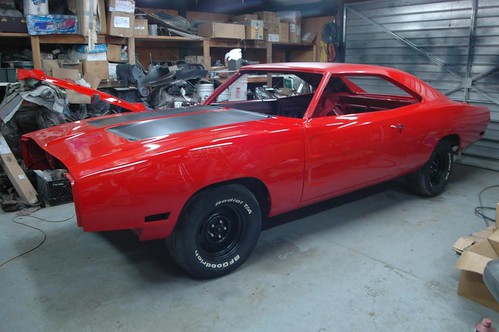
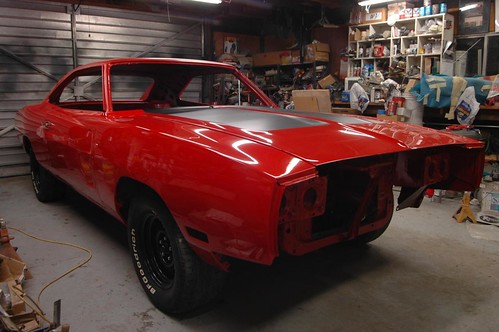
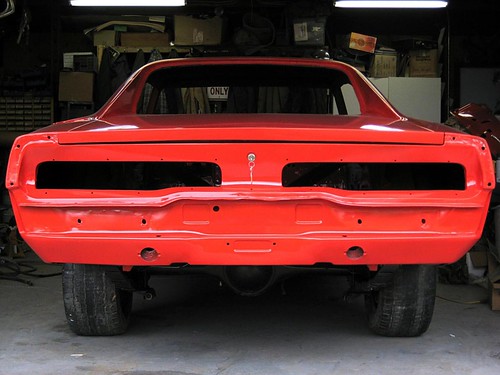
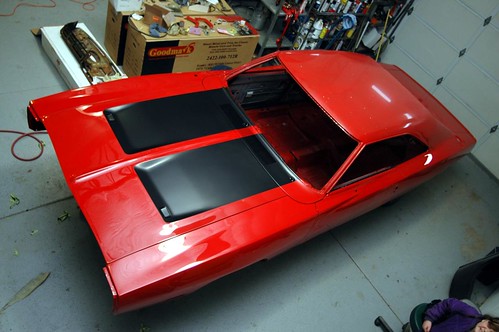
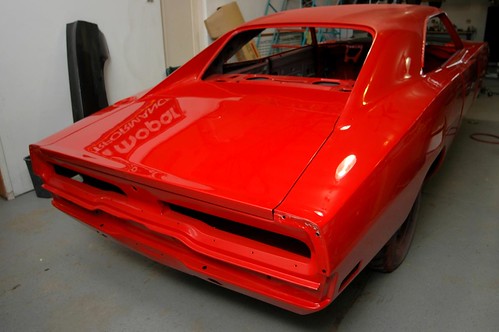
Today was to be the day! Mopar Ed said if we could give him a little while to finish buffing and detailing a few areas, we could bring the Charger home today. Here are some views from inside his shop. My family and I were stunned with how beautiful the car was, how great a job Ed and his team did, and how totally cool the colors looked together in real life, after imagining them or seeing examples on paper for all these years.
Here is my buddy, the famous Mopar Ed, doing some last-minute dusting prior to taking some pictures for his records and his Facebook page. I cannot recommend Ed's work highly enough. I encourage all my Mopar buddies to give Ed a holler for your Mopar parts or painting needs. His shop pretty much does it all.

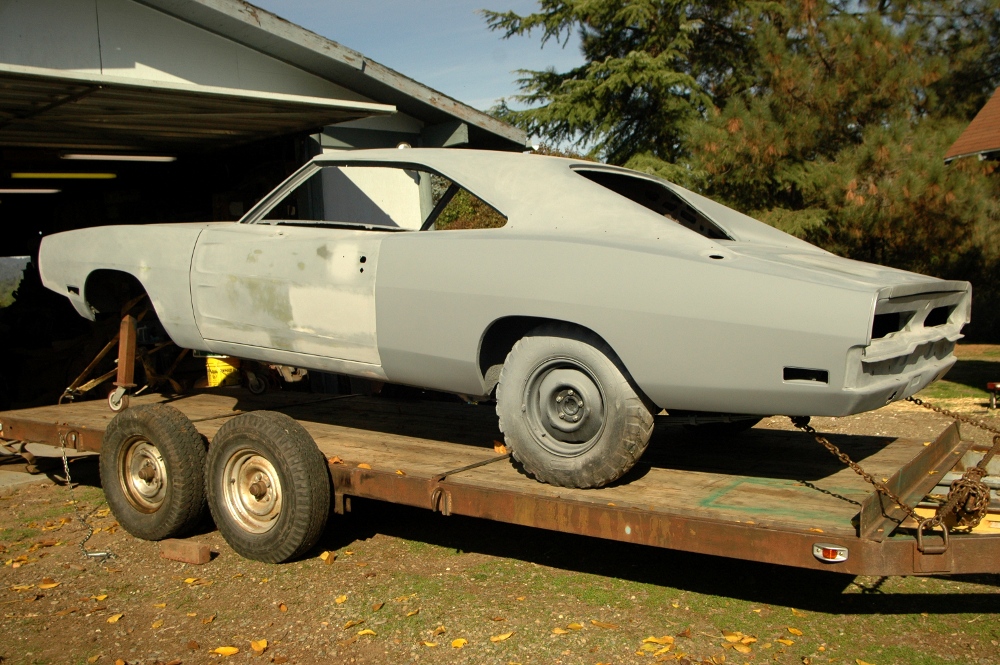
Here are a few more pictures of the car outside at Ed's and on the trailer preparing to come home:

AT LONG LAST, with the help of some wonderful friends and family, here is my Charger, beautifully painted and safely unloaded in my own garage. The boxes you see in the background of one of these photos are full of parts, new and/or restored, waiting their turns to complete my Charger's restoration, inside and out.
We've been home for about three hours as of this writing, and I've already run outside six or eight times just to look and let it sink in.
Posted in 2004-present | RESTORATION | body | primer and paint | link to this page | | Comments (1)
January 14, 2011
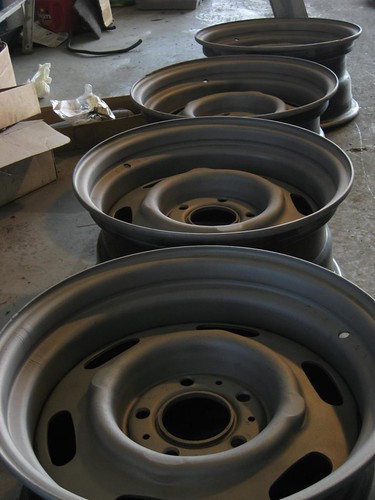
Wheels
In preparation for the arrival of the Charger, I sandblasted these "cop wheels". They are a Mopar item from the mid-1980s, usually found on Diplomats and Grand Furys. They are nice, stout, ventilated 15x7.5" wheels with great backspacing, making tire selection a breeze. After sandblasting, I coated them with etching primer and then three coats of satin black. These will be set aside until needed.
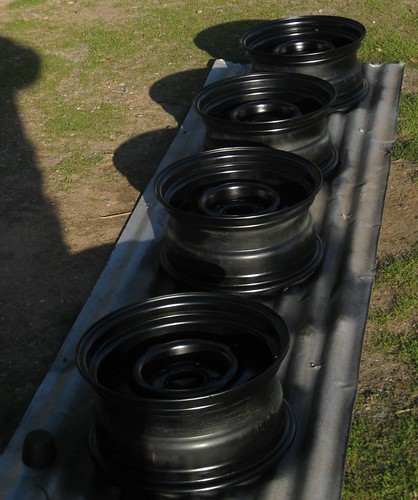
Posted in 2004-present | RESTORATION | primer and paint | sandblasting | suspension, brakes, tires, and wheels | link to this page | | Comments (0)
January 08, 2011
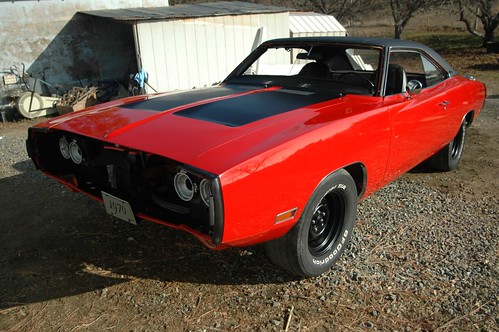
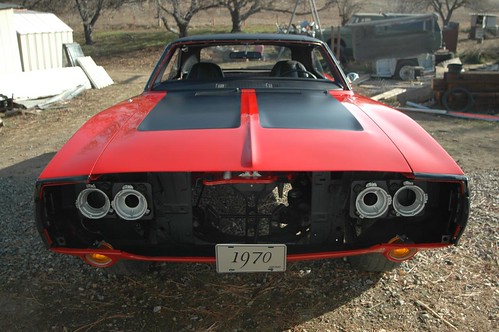
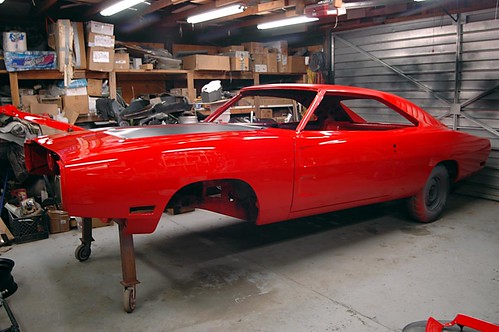
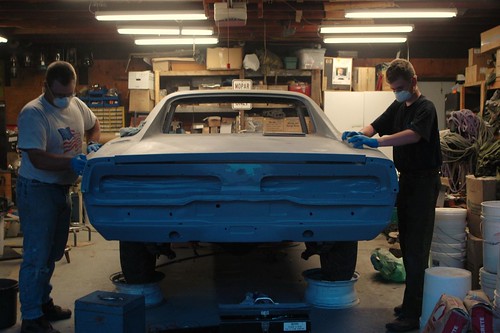
RED update
We took our first road trip down to see the car. Mopar Ed and his team continue to work on my Charger, as time allows, and things are really starting to look sharp. They are in the process of "cutting and buffing" the paint. The paint has a luster in person that is hard to capture in these photos; however, the shiny paint catches reflections in a frustrating way. (This last is according to my wife, the photographer.)
Perhaps in a week, the car may be reassembled and ready to come home. We will update this page as soon as we have new information.


(This is me, laying hands on the red paint for the first time. Hard to tell, but I am definitely smiling. This is a happy moment.)
Posted in 2004-present | RESTORATION | body | primer and paint | link to this page | | Comments (0)
December 27, 2010
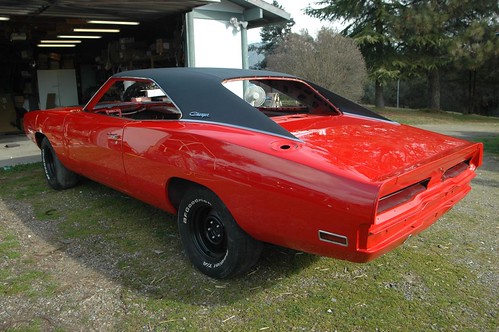
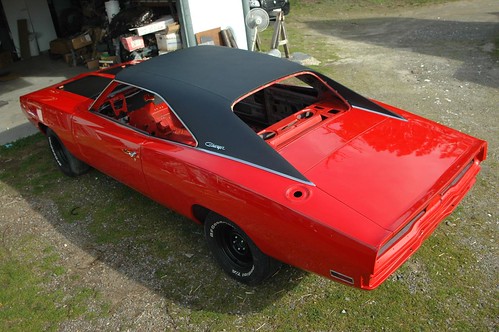
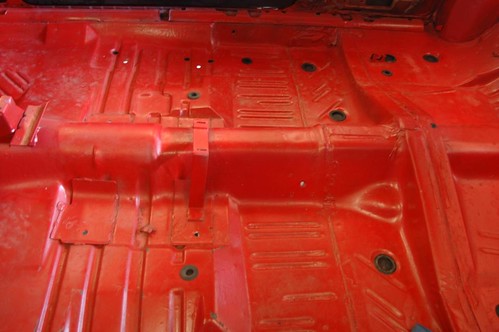
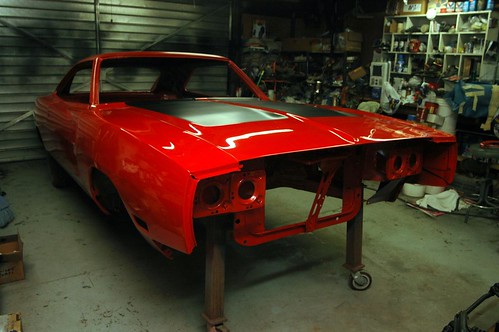
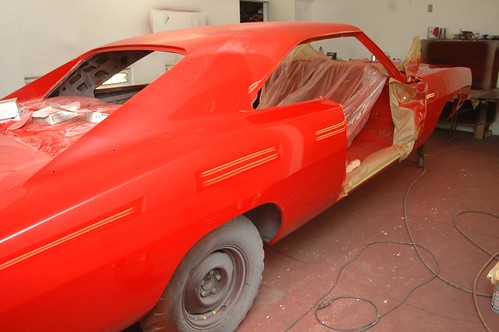
RED!
I knew that Mopar Ed was getting very close to painting my car, but today I got an email from him with the following pictures. Needless to say, I am very, very happy.
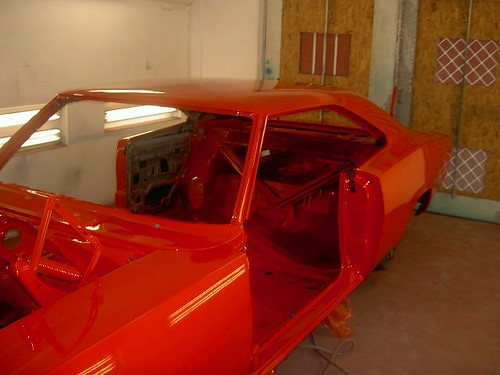
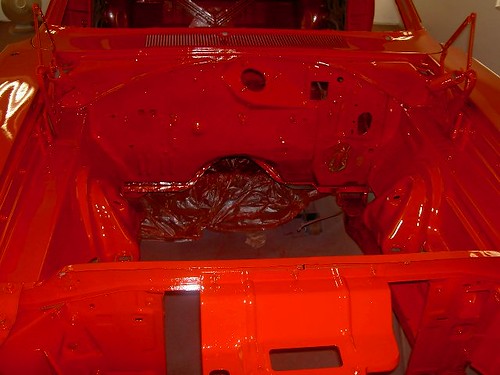
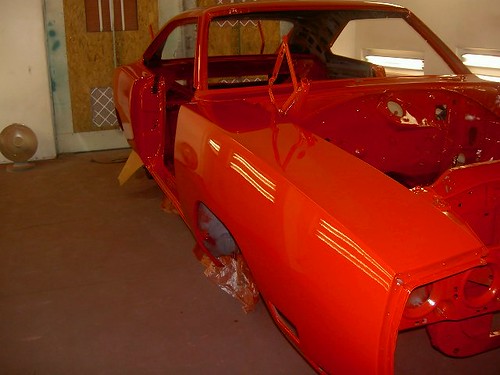
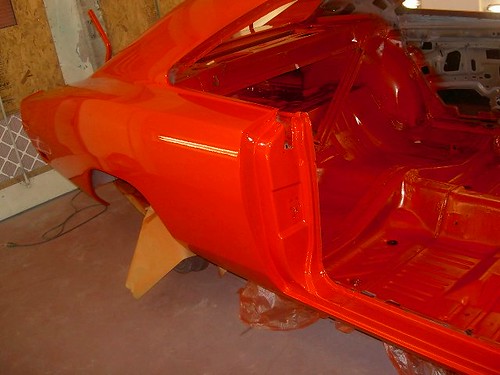
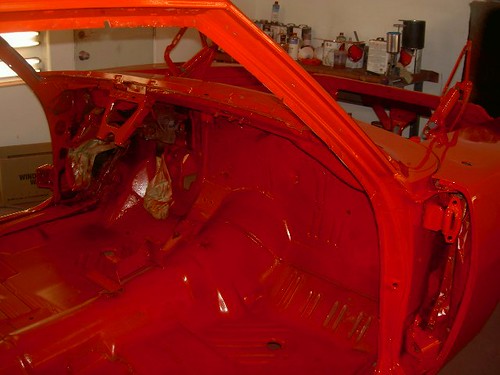
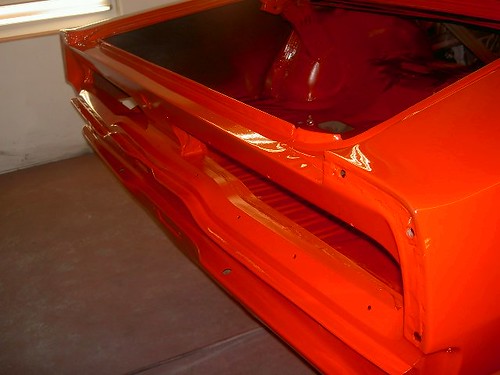
Posted in 2004-present | RESTORATION | body | primer and paint | link to this page | | Comments (1)
December 22, 2010
Visit to Mopar Ed
Mopar Ed had contacted me and said that he was just about done on the remaining body work on my Charger. He wanted some input from me about a couple of things, so we made the short trip down to his shop, and I was very pleased with the work that he and his team had done on the Charger. Once they finish up this current round, the car will move to paint.
Despite my best efforts, there was still a little bodywork for them to do on the rear quarters and hood, but they sure look great now.
Posted in 2004-present | RESTORATION | body | primer and paint | sanding | link to this page | | Comments (0)
December 10, 2010
Refinishing suspension
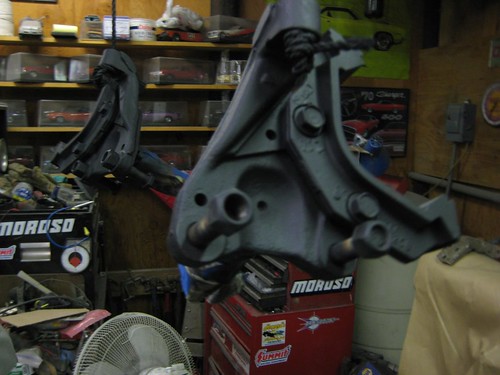
While my Charger is away at the paint shop, in addition to spending some excellent time getting some work done on my son's '67 Plymouth Satellite, I took this time to sandblast, prime, and paint the front-end suspension parts that I will use when my Charger goes back together. Also, while I was at it, I did the same procedure to the bumper brackets and a few other metal parts of the car that usually aren't seen. After sandblasting, all the parts were primed with self-etching primer, then primed again with conventional 2K primer because I learned that you aren't supposed to apply Eastwood's Extreme Chassis Black over self-etching primer. I am not sure why, but I'll take their word for it.
I did take the time to carefully inspect and reinforce some of the components. On the K-member I added new welds and improved some existing welds, and boxed in the steering box mount to eliminate flex that is common in that area. I also installed a set of reinforcement plates on the lower control arms that i ordered from Mancini Racing. Everything I read said that if you're going to increase the size of the front sway bar, which I am, you really need to box in the lower control arms.

Posted in 2004-present | RESTORATION | primer and paint | sandblasting | suspension, brakes, tires, and wheels | link to this page | | Comments (0)
November 12, 2010
Special Thanks to Howard!
I am LONG overdue in giving proper thanks to a mentor, teacher, guide and friend who I have seen countless times, spoken to on the phone, spent hours and hours listening to, but never actually met.
When my good friend the "metal wizard" Frank moved away I was just beginning some very serious work on my Charger. I was feeling lost, and unsure how I would be able to proceed. I went online in search of some more books, or preferably some videos to help me along as I continued to learn body work.
Well, praise the Lord that I found Howard Holland's "Backyard Autobody" instructional DVD's. Right away in a very personable, and down to earth way, Howard's teaching reenforced what my friend Frank had been showing me, and being able to go over and over the DVD's helped immensely. Getting one of Howard's DVD's (there are currently three volumes) is more than just buying some good practical instruction, Howard himself is available via telephone or email to help you through any questions you may have. The only warning I have to offer though is, when you start talking to Howard on the phone, sit down and get comfortable because your not talking to some generic "tech help line" you are about to make a friend with someone who is as interested in your success as you are!
Howard teaches more than "just" hammer and dolly work, but goes into panel replacement, patch fabrication, filler uses (pro's and con's), priming and painting too! In fact it was my having watched Howard talking about, and demonstrating the use and benefits of single stage Urethane paints that allowed me to so easily accept Mopar Ed's suggestion that we go that route on my Charger's upcoming paint job.
I simply can't recommend highly enough that anyone wanting to learn the ropes in the auto-body universe consider giving Howard's videos a try. You may be amazed by what you can learn to do yourself.... and don't be surprised if the phone rings and it is Howard asking you how your project is going!
I get nothing from Howard for recommending him; he does not even know I am posting this, but I do so in hopes that some of you might get your projects a little further down the road (or back on the road!) through the unique kind of help he has to offer.If you want to you can click on his logo below to go to his website.

Posted in 2004-present | RESTORATION | body | primer and paint | rust & rust repair | sanding | link to this page | | Comments (0)
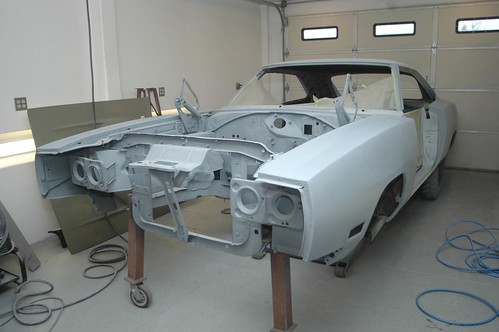
November 11, 2010
Seeing RED... very soon!
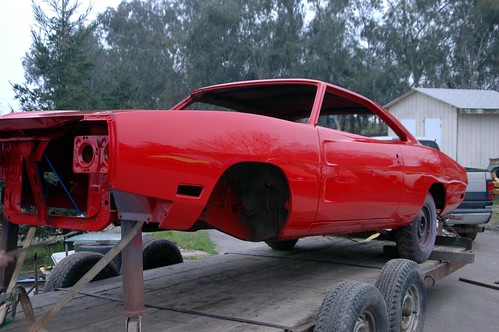
Well today was a really monumental day in the "life" of my Charger, and in my life too. A couple weeks ago on Halloween day, I had Ed, the owner and operator of E-Body Parts and Restoration come to my house and look my Charger over. He agreed to come and inspect my body work to ascertain if I was ready to hand it over to him for painting. He rubbed the car over quite a while, pointed out a few things I'd overlooked, and told me "Very good work, especially if this is your first time, that's really great. If you fix those things, I'll have space in my shop to get your car in in Mid November" This was a pleasant surprise, I had not expected him to have time so soon. Well, needless to say I worked every available moment to get the things done that he had noticed. Well today being Veterans Day, I was off work, so I drove down to his shop (a bit over one hour away) and picked up a pair of casters that bolted to my frame at the front bumper mounts so that my car could roll. Then loaded it up for a trip to FE5 heaven.
Here is the car loaded and ready to go in front of my garage.
Here we are after having unloaded the car at Ed's shop,
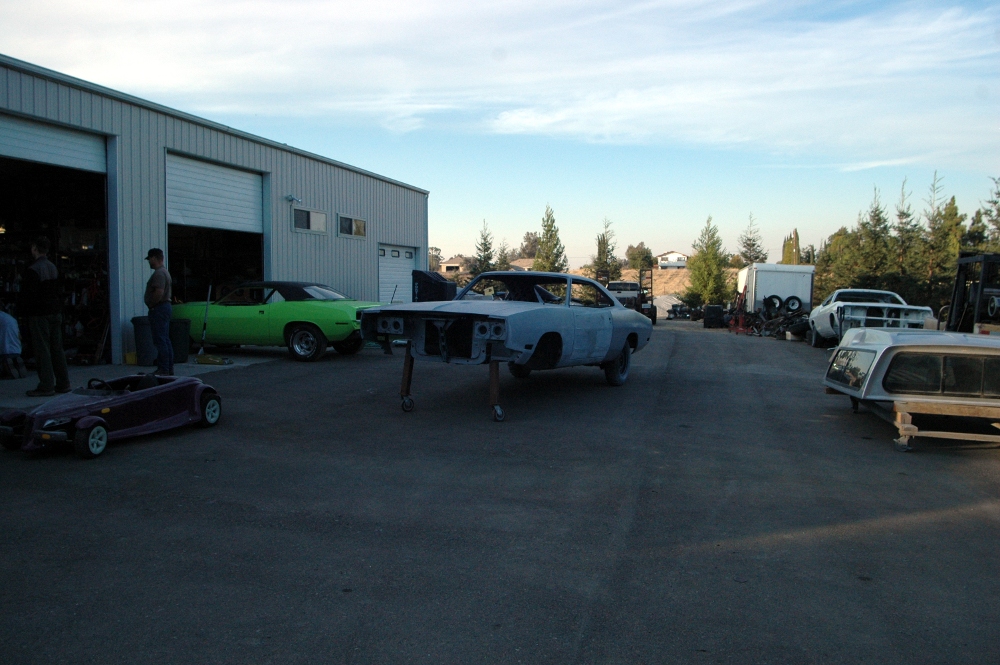
Here is the car snug in the paint booth!
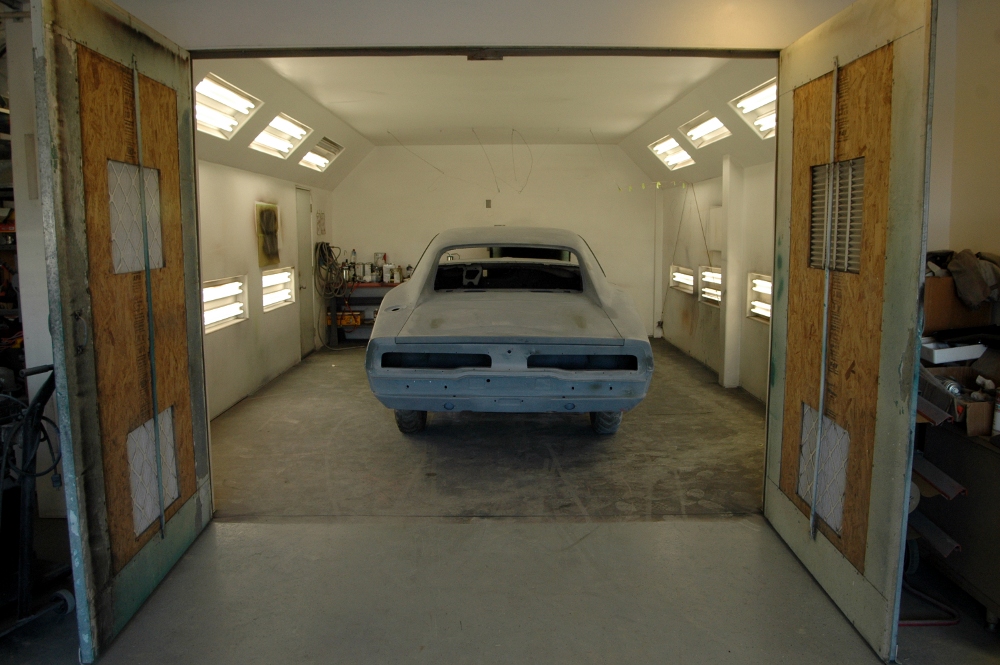
Ed and his staff will shoot the car one more time in primer, block the body out, fix any minor things I still missed, then he will disassemble the car, paint everything then put it all back together. He promised he'd try to take pictures, but added that my wife and I are welcome to stop by and check things out anytime.
His shop is really amazing! He must have had more than a dozen awesome Mopars inside, with dozens more outside. I will update my Charger web page and this thread as things progress rapidly from here.
Posted in 2004-present | RESTORATION | body | primer and paint | link to this page | | Comments (0)
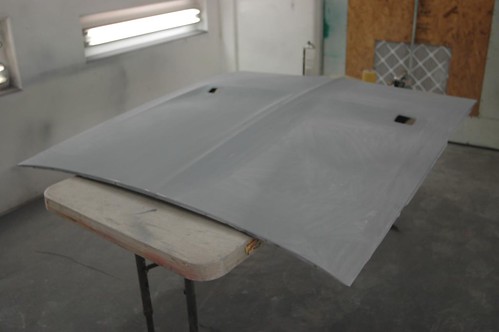
August 15, 2010
NOPE!
The previous time I updated my page last fall, I had hoped that I was done priming and was on my last go-around with block sanding. I wasn't there yet! Really things are going quite well, but the doors (especially the passenger side door) still had some issues to resolve. When using my longest Dura-Block (about 24") I found some unhappiness that had somehow escaped detection in my previous attempts. After many nights of re-working the doors, I am now confident that things can resume.
I have reprimed the reworked areas, and am eager to begin blocking them again. You really can't tell much difference from the pictures, so I'm not posting new ones yet. I do have some good news to report however, I have spoken to a guy I trust who owns a Mopar restoration shop nearby (about 45 minutes away) and he is willing (and more than able) to paint my Charger when I'm done sanding!
One of the reasons for the lack of progress lately has been how busy we've been as a family. Since spring we've been helping an elderly lady by cleaning up her property. Her late husband (who died about 20 years ago) was a mechanic, collector, and accumulator of lots and lots of stuff. Well she figured it was time to sell the place, so my family and I volunteered to help out. It was fun, and rewarding, but most of all, a lot of work! We sorted and hauled a bit over 90,000 lbs of scrap metal off her place to a scrap yard about 1 hour from there (each way). We hauled off several tons of trash (not included in the 90,000lb figure), over 125 tires (also not included in the 90,000lb figure), lots of cars, appliances, and assorted scrap metal. I did get a '67 Plymouth Belvedere which sadly had been mostly crushed but still had a few salvageable parts for my son's '67 Satellite, a '74 Dart Sport, and a '63 Dodge Dart GT both in decent shape. Some of these funds have given a boost to my "Charger paint job fund" and I hope and pray that before the close of 2010 my car will be very very RED! Please stay tuned.
Posted in 2004-present | RESTORATION | body | primer and paint | sanding | link to this page | | Comments (0)
November 22, 2009
Third time's the charm...?
When you mention bodywork, especially block sanding, to most people, they imagine and/or describe something that goes on and on and on, seemingly with no end in sight. While I am still enjoying seeing my Charger get better and better with each stage of progress, I am looking forward to that final block-sanding in the sky when I can sand the entire car and see nothing but primer. Then I should know I'm done. Will I get that this time? I hope to know the answer to that in the next six weeks or so. This next round of blocking will be done with 600-grit paper, and things keep looking better and better. Stay tuned.
Posted in 2004-present | RESTORATION | body | primer and paint | sanding | link to this page | | Comments (1)
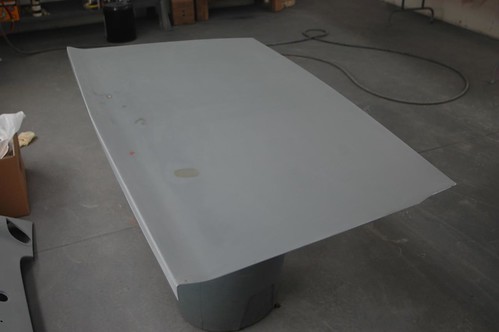
November 17, 2009
Second block sanding all done
The second block sanding was done with 320-grit paper on Durablock sanding blocks in varying sizes and shapes. It is gratifying that there were fewer things that needed attention than the last time, and some areas, like the hood, are "there".
Posted in 2004-present | RESTORATION | body | primer and paint | sanding | link to this page | | Comments (0)
August 17, 2009
Second round of 2K primer
The work continues. The application of the primer went well. I didn't repeat some of the mistakes I made last time, though I did make a couple of new mistakes. The good thing about the primer is that you end up sanding off your mistakes. It is very gratifying to see the panels coming out straighter and straighter. The next round of block sanding will begin shortly. While it was 150 grit last time, this time we'll be using 320 grit and we will be avoiding cutting down to bare metal. I'm not anticipating a problem with any severe high spots, but time and work will tell if I'm right.
Here's a slide show of a walkaround of the car with the second round of primer on it.
Posted in 2004-present | RESTORATION | body | primer and paint | sanding | link to this page | | Comments (1)
Just before the second round of 2K primer
Well, my son and I finally finished the first round of block sanding on my Charger. After blowing the car off really well with compressed air and using a tack cloth on the body, I covered bare metal areas with self-etching primer. Then, after letting it dry for a day or two, I blew the car off with air again, washed it down with wax and grease remover, and tacked it off again one final time, in preparation for the second application of 2K primer.
Here's a slideshow of a walkaround of the car just before I started spraying. The various highs and lows exposed during block sanding are now much more level than before and are about to be covered up again.
Posted in 2004-present | RESTORATION | body | primer and paint | sanding | sheet-metal replacement | link to this page | | Comments (0)
July 29, 2009
Dividing the work, multiplying the fun
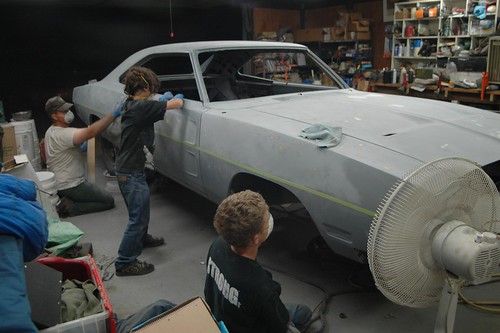
We recently had the treat of having my niece and nephew over at our house for a couple of days. While they were here, my son and I took my nephew out to the garage and showed him how much fun it is to sand on my Charger. The boys both did a really good job, and it was fun to teach them some of the things I've learned the hard way - not to mention it was really great for me to see that side of the car being sanded much more rapidly than when I'm working alone. Thank you, kids!
Posted in 2004-present | Family Helpers | RESTORATION | body | primer and paint | sanding | link to this page | | Comments (0)
June 03, 2009
Block Sanding 101
This summer, with our Bible study on vacation until fall, I find myself with some extra time on some evenings. My son and I have embarked on a project to get the block sanding moving at a quicker pace: I am teaching him what I have learned, and he is being a HUGE help. We are having a lot of fun together. We're making rapid progress on completing our first go-round of the car, and I anticipate during August putting on the next layers of 2K primer, and blocking the car out again, but then with 320-grit paper (we are using 150-grit on our first pass).
Not only is it wonderful to spend time with my son and get things done, but an added bonus is seeing his growing enthusiasm for about the upcoming restoration of his 1967 Satellite. (You can see a picture of his car here.) Working on my Charger together is excellent training for him, because when we're done with my car, his is next and he will be doing much of the work on that project.
Posted in 2004-present | Family Helpers | RESTORATION | body | primer and paint | sanding | link to this page | | Comments (0)
December 14, 2008
2K Primer
Here I am admiring the beautiful lines of my Dodge Charger. I happen to have been wearing my Charger-logo polo shirt while my wife was taking photos of the 2K primer job on the car, and she asked me to pose. (I am smiling.) All those boxes on the shelves in the background are full of parts to go on/in my Charger once the final paint job is done.
Well, finally I was able to get my 2K primer on my Charger. I am a year and a half or more behind where I thought I would be, but I spent that time learning better ways to straighten and perfect the body of the Charger. I am glad that I waited, as things are looking fairly good now, with three coats of the high-build primer on the car. I have begun the blocking-out process, and so far it is a lot of fun. Once the blocking-out is done, another several coats of primer will go on, and the car will be blocked out again. Hopefully by that point the body will be ready for paint. However, experience has shown me not to get in a rush, and to take time to do it right no matter how long (or how many tries) it takes.
Posted in 2004-present | RESTORATION | body | primer and paint | link to this page | | Comments (0)