


« Carpet, console, and front seats | Main
September 10, 2011
My Mopar Miniatures
My love for Mopars and enjoyment of them extends beyond real cars to include a growing collection of miniature Mopars -- many purchased in the large 1/18th scale die cast that has become popular, down to the traditional 1/64-scale ("Hot Wheels") style cars. Some I have made for Awana Grand Prix and Scout Pinewood Derby, as well as model kits (usually in 1/25th scale) and one LEGO labor of love. Here are pictures and a bit of information about some of my favorites.
In the summer of 2011, I finally got around to doing something I've been thinking about making for several years. I have wanted to make a diorama showing different stages of my Charger's progression, from the time I bought it in 1986 to completion. When I go to car shows, I often see people who have built a model, or have a diecast car that matches their real one, and sometimes people will have a photo album of work they've done / had done, on their car for people to look at. What I wanted to make was sort of a hybrid of these two ideas.
This summer I decided to try to build it, and enter it into our County Fair.
Here are some pictures of the effort. It was well received, I won first place from the judges, and more significantly, won first place People's Choice award for my building (people vote for their favorite exhibit in that building). Curious what my fellow Charger brethren think.
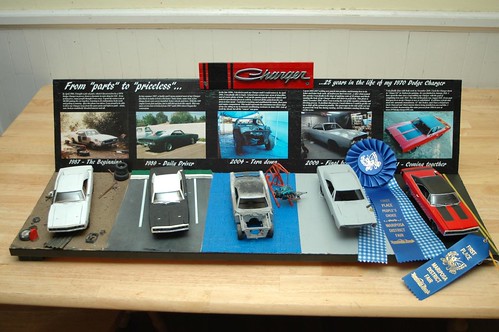
I called it "Parts to Priceless … 25 years in the life of my 1970 Dodge Charger"
Here is an overall picture:
I started with a picture from 1987, about the time I got my car put together and drivable for the first time, and the model that depicted that era
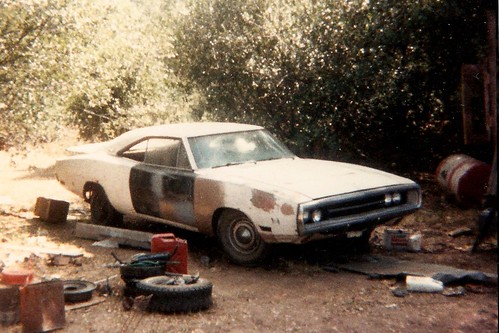
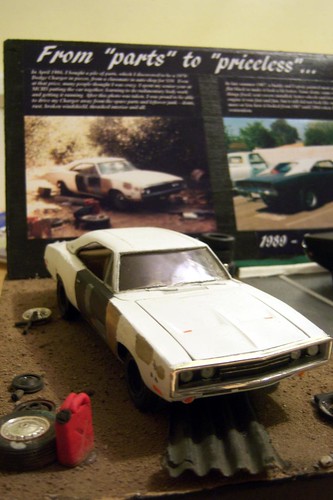
Here's the text above this picture and model:
In April 1986, I bought a pile of parts, which I discovered to be a 1970 Dodge Charger in pieces, from a classmate in auto shop for $10. Even at that price, many people thought I was crazy. I spent my senior year at MCHS putting the car together, learning to do rudimentary body work and getting it running. After this photo was taken, I was proud to be able to drive my Charger away from the spare parts and leftover junk – dents, rust, broken windshield, thrashed interior and all.
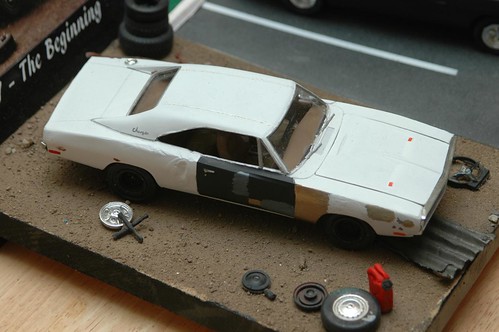
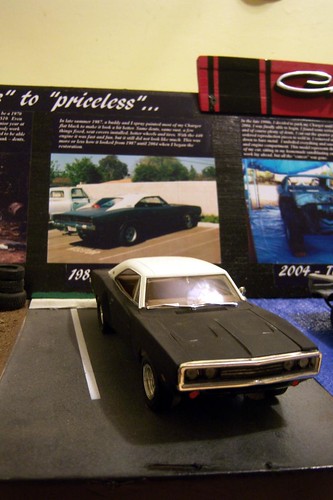
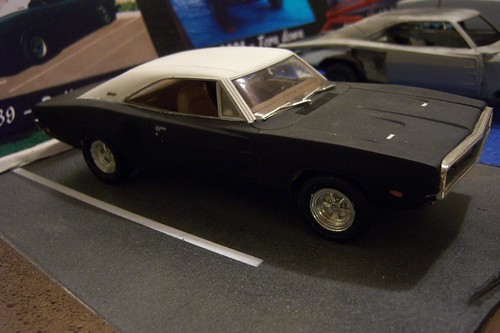
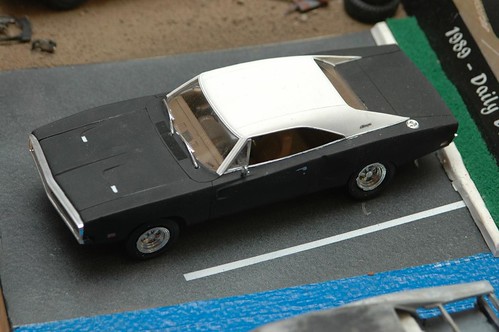
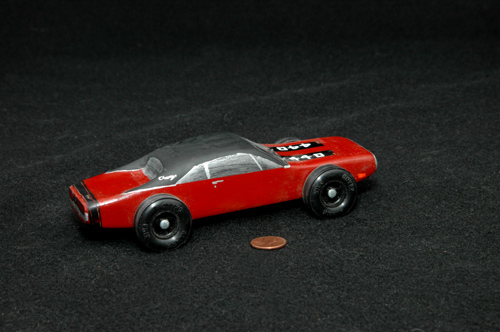
Next I chose a photo representative of the time period 1987-2004 when I drove my Charger most of the time and built a model to match.
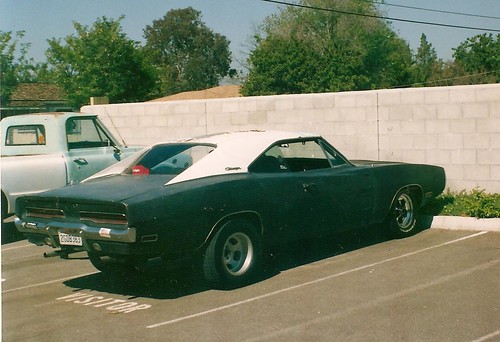
The text for this stage is as follows:
In late summer 1987, a buddy and I spray painted most of my Charger flat black to make it look a bit better. Same dents, same rust, a few things fixed, seat covers installed, better wheels and tires. With the 440 engine it was fast and fun, but it still did not look like much. This was more or less how it looked from 1987 until 2004 when I began the restoration.
Next I wanted to show the tear-down phase, I built a model cut apart like my Charger was, at its maximum state of disassembly.
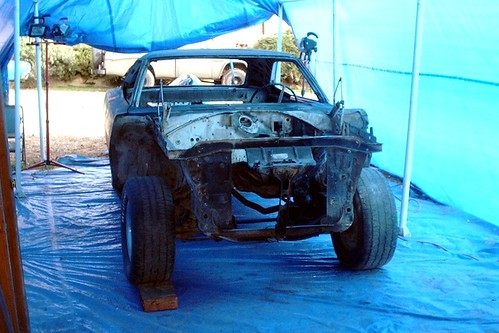
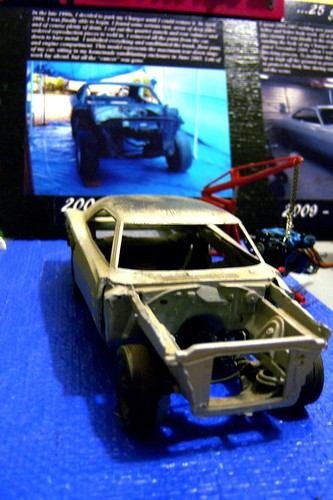
In the late 1990s, I decided to park my Charger until I could restore it. In April 2004, I was finally able to begin. I found some serious rust, areas of deep filler, and of course plenty of dents. I cut out the quarter panels and rear valance and ordered reproduction pieces to weld in. I removed all the paint from the car, down to bare metal. I unbolted everything and sandblasted the trunk, floor pans and engine compartment. This model represents the maximum tear-down stage of my car, sitting in my homemade sandblasting enclosure in June 2005. Lots of work lay ahead, but all the “cancer” was gone.

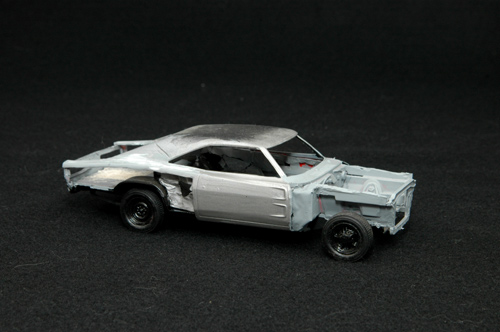
Then I displayed what seemed like the longest phase, steel panels welded in, then the body work and block sanding that went on FOREVER!
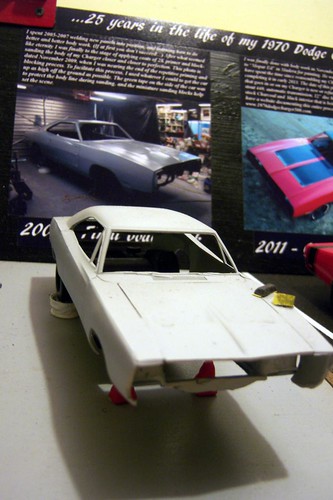
I spent 2005-2007 welding new panels into position, and learning how to do better and better body work. (If at first you don’t succeed…) After what seemed like eternity I was finally to the stage of applying coats of 2K primer and block-sanding the body of my Charger closer and closer to perfection. This photo is dated November 2009, when I was nearing the end of the repetitive priming and blocking process. To facilitate this process, I used whatever I could to get the car up as high off the ground as possible. The green tape on the side of the car was to protect the body line during sanding, and the miniature sanding blocks help set the scene.
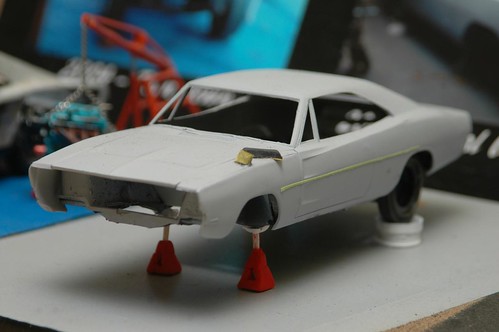
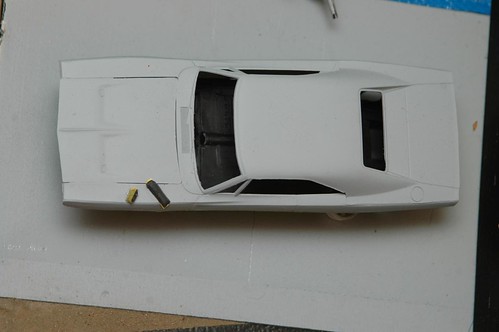
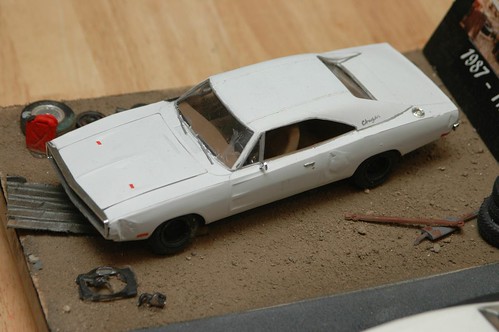
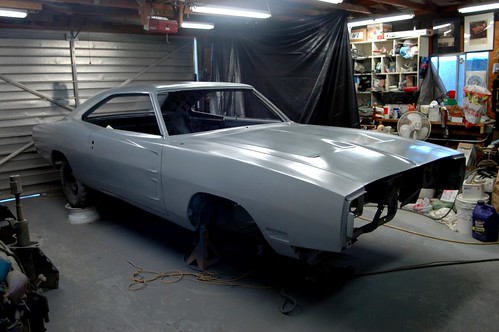
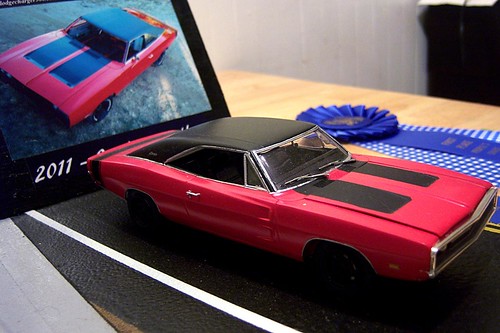
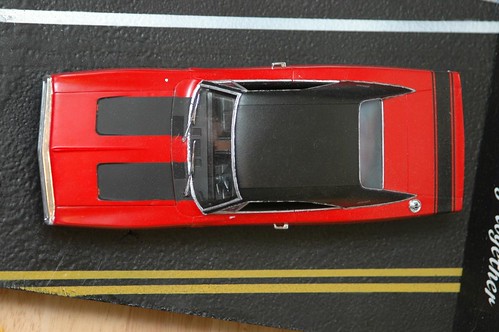
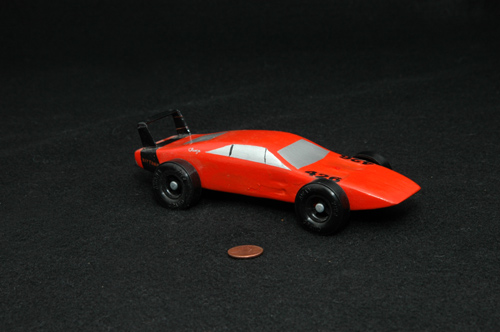
Lastly, using a photo of what it looked like in August 2011, I built a model of what it should be like when done.
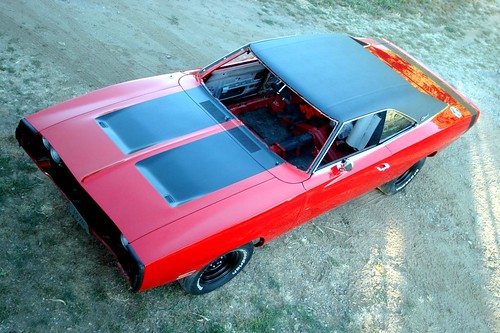
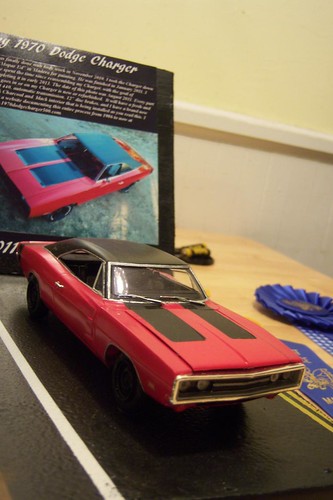
I was finally done with body work in November 2010. I took the Charger down to “Mopar Ed” in Madera for painting. He was finished in January 2011. I have spent the time since reassembling my Charger, with the goal of completing it in early 2013. The date of this photo was August 2011. Every part that goes in or on my Charger is new or refurbished. It will have a fresh and stout 440, automatic transmission, 12” disc brakes, and I have a brand new stock Charcoal and black interior that is being installed as you read this. I have a website documenting this entire process from 1986 to now at www.1970dodgecharger500.com.
On to the rest of my collection....
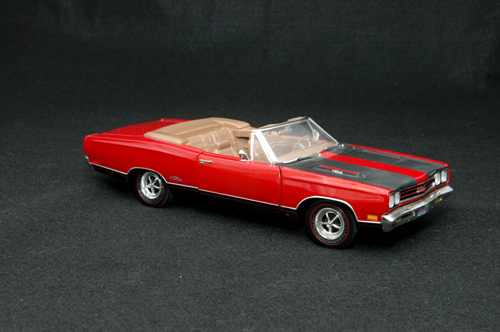
ERTL 1/18th-scale Hemi GTX Convertible
This is a beautiful color combination and I sure wouldn't complain much if I had a real one of these in the garage next to my Charger someday.
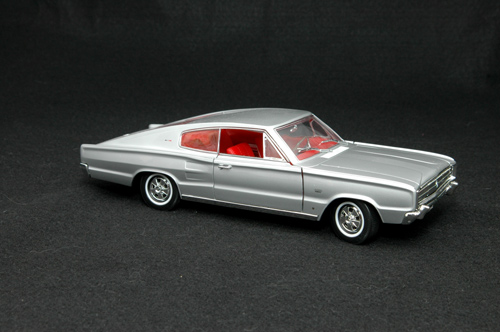
Yat Ming 1/18th-scale '66 Hemi Charger
I had long wanted a first-generation Charger in this collection. This example was very reasonably priced and had some nice details such as headlights that really do roll away 180 degrees, revealing a flush grille just like the real ones.
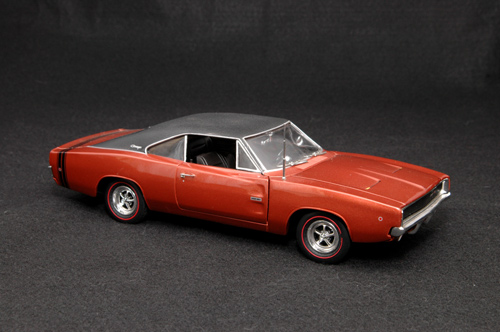
ERTL 1/18th-scale '68 Hemi Charger
A beautiful example of the first second-generation Charger. This is the first one I had with a vinyl top, which I really like.
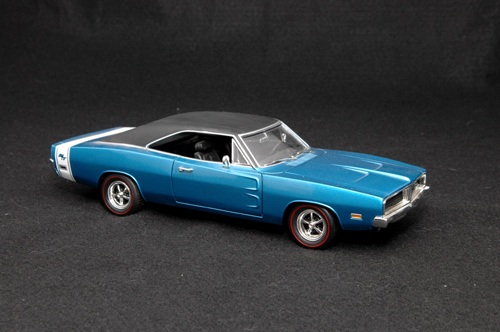
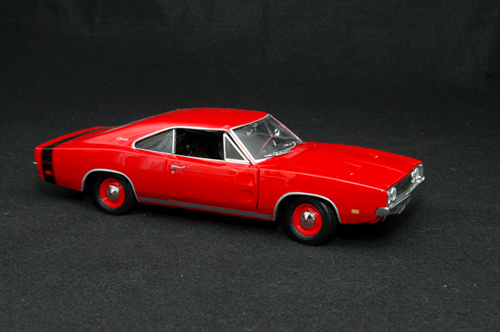
ERTL 1/18th-scale '69 Hemi Charger R/T
I just don't think you can beat the lines of the '69 Charger. The '69 is my favorite grille of all the second-generation Chargers.
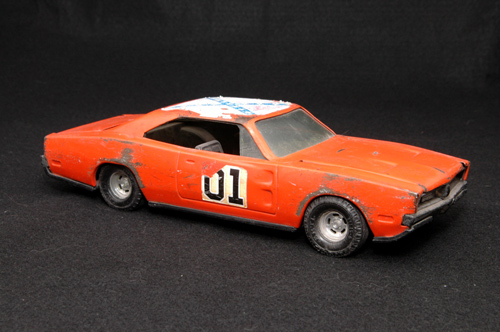
Early 1980's ERTL General Lee
This General Lee was the first large-scale Dodge Charger of any sort I collected. I got it at a flea market a number of years back for $5, and the car has enjoyed a retirement of display use, except for occasional play by my children, who love the Dukes of Hazzard TV series on DVD at least as much as I loved it on TV as a kid.
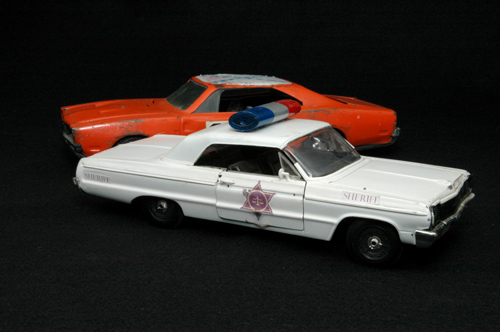
This is a 1/18th-scale homemade Hazzard County Sheriff car. Watching my kids play with the General Lee, I realized they needed something for Roscoe and Enos to cruise around in, so converted this Chevy that my son had gotten from a friend. I disassembled and painted the car, my wife helped me make decals on our computer, and the light bar is made out of an old Bic lighter. Hours of fun and who cares if they crash it, right?
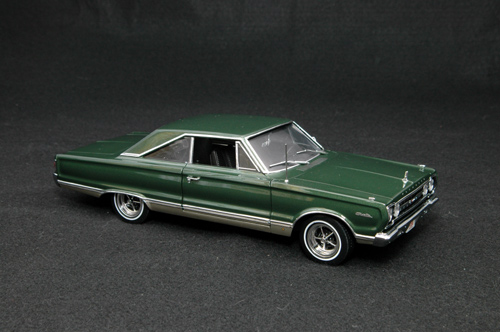
Highway 61 1/18th-scale '67 Satellite
Ever since my son became the proud owner of a '67 Satellite at the age of six, I have wanted to get him a large-scale die-cast model of his car. The Highway 61 cars are truly superior in detail and realism.
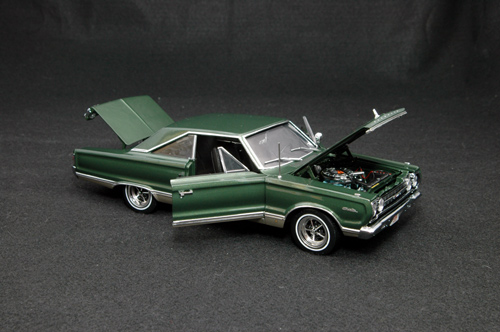
Some of the exceptional details include: the doors, hood, and trunk all open and close on realistic hinges. The hood even has very small coil springs in the correct locations. The wheels even have small black valve stems. The trunk has an accurate trunk mat and a fuel-filler tube. The rear end has an actual ring and pinion inside, and the wheels move when you turn the driveline. The various hoses, battery cables, etc. under the hood are really amazing, as is the exceptional detail of the dash and interior.
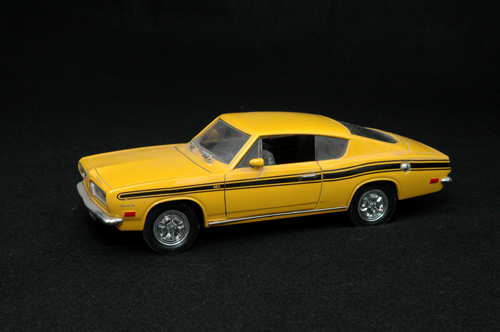
Road Champs 1/18th-scale '69 383 Barracuda
Another bargain-priced find. This Barracuda is currently the only A-body in the collection, although if I could find a nice '69 Dart Swinger I'd love to include that as well.
ERTL 1/18th-scale '69 Hemi Charger 500
For a long time an actual '69 500 was the 'missing link' in my Charger chronology. I pull out this car frequently to illustrate to people the differences between the '69 500 and the typical '69 Charger body.
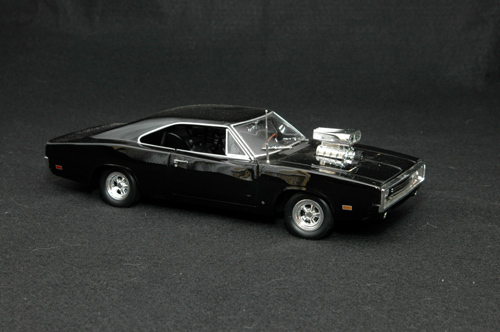
ERTL 1/18th-scale '70 Charger (Fast and the Furious)
Even though the detailing is somewhat weak, especially in the grille area, and I'm not real excited about the 'hood cutout with blower sticking out' look, this was the first thing resembling a '70 Charger to come along in 1/18th scale, so, like thousands of other Charger owners and fans, I bought it. I pre-ordered it for over six months.
ERTL 1/18th-scale '70 Charger R/T
When I bought the Fast and Furious Charger from a place online, I signed up for their email updates. After getting them for probably a couple of years, I finally got what I was really looking for, a notice that a much more detailed and accurate '70 Charger would be released. I was one of the first people in line to pre-order this car, and have been fairly happy and impressed with it. It has been helpful while my real car is apart to be able to show visitors to my garage the basic lines of the finished product.
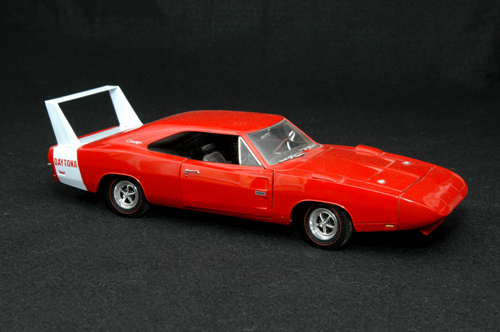
ERTL 1/18th-scale '69 Hemi Charger Daytona
This was perhaps the first die-cast Mopar collectible I was able to find. Back in the '90s, I thought this might be as good as it gets and eagerly purchased this monument to Mopar innovation and commitment to Nascar superiority.
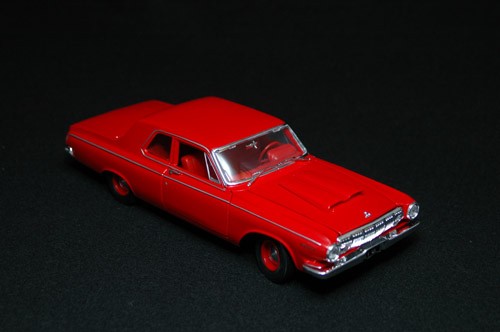
Maisto 1/18th-scale 1963 Dodge Polara
This was a wonderful birthday present from my kids this last year. Anybody familiar with drag racing history or classic Mopars recognizes this 1963 Polara 2-door 426 Max Wedge car. The Dodge and Plymouth mid-sized cars like these completely dominated drag racing with their 413 and 426 Max Wedge engines, before the introduction of the 426 Hemi partway through 1964. This car features opening hood, trunk, and doors, and is a sturdy, nicely detailed model.
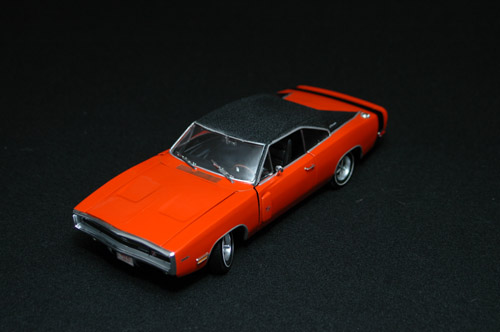
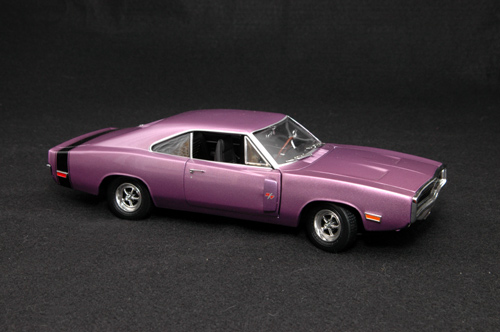
Ertl 1/18th-scale 1970 Dodge Charger R/T
It is doubtful that I would easily ever turn down another nice die-cast Charger, especially a '70 Charger, but when I saw this color combination come available, with the black vinyl top and stripe, I just had to get it. This model features a fairly well-detailed 426 Hemi, which oddly enough came with a 440 Six Pack sticker on the air cleaner, which I deleted. I would actually like it quite a bit if they would put 440s in these cars, since that's what most of us have in them anyway. This model gives me an opportunity to show people who come in my garage an example of what I hope my car will look like, with the exception that I plan to have mine red where this one is orange.
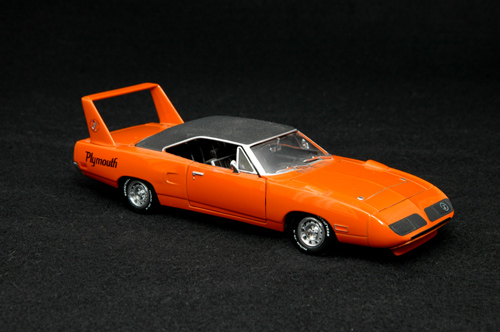
Johnny Lightning 1/24th-scale '70 Superbird
This is actually my son's car, and he uses it to show his friends a Mopar that's faster than all the cars they like. The Johnny Lightning cars have superb detail, and at 1/24th scale are a bit easier to store and display than the 1/18th-scale cars. I anxiously await a Johnny Lightning '70 Charger someday.
My family (my wife, my kids, and myself) are very involved in our local AWANA club. One of the many fun events they have for the kids (and family members) is what they call AWANA Grand Prix. Anyone who is familiar with Pinewood Derby in Boy Scouts will have an idea what this is, as it's the same thing. Thankfully, there is a division for the parents and leaders to build cars and enter them, and mine have a definite Mopar flavor. This was my attempt at a '69 Daytona Charger. It was very fast on the track and everybody really liked the way it looked. A penny is included in the picture for scale.
My next year's entry into the AWANA Grand Prix would need to be a Mopar as well, of course. I settled on trying to build a 7" wooden replica of my '70 Charger. The most difficult part was for me to carve out the area by the back window and sail panels. This car was perhaps better-looking than the Daytona, but not as fast because I built my car after my kids' cars and didn't have much time to polish the axles and wheels, etc.
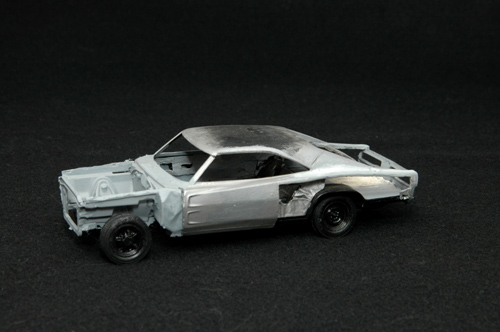
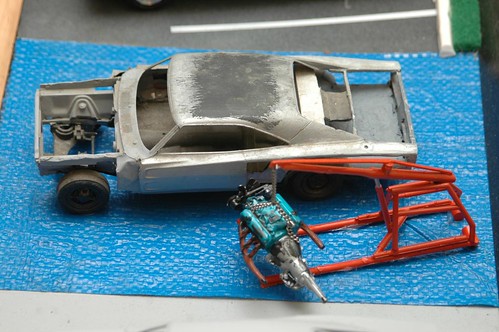
I had an MPC 1/24th-scale '69 Charger model kit for a while, and the paint had been hopelessly messed up on it. While I was laid up nursing my injured back this last summer, I had the idea to carve up that model and create a representation of my car in its maximum disassembled state.
As you can see, this model shows the rear quarter panels cut out, the trunk lid removed, the rusty areas removed around the rear window, the front clip removed, and I attempt to show which parts of the car had been sandblasted (dull gray), which had been sanded (shinier gray), and which parts had yet to be sanded (flat black or white). My intention is to preserve in a presentable way what my car used to look like.

1/25th-scale '67 Plymouth GTX (model kit)
One thing my son and I had a lot of fun doing this last summer was working on building a model of his Satellite, using this GTX kit. He got to paint and assemble some of it, and he selected the colors according to how he says he would like his '67 Satellite to look when he is done. The model now sits proudly in a display case on his Mopar shelf above his workbench in the garage.
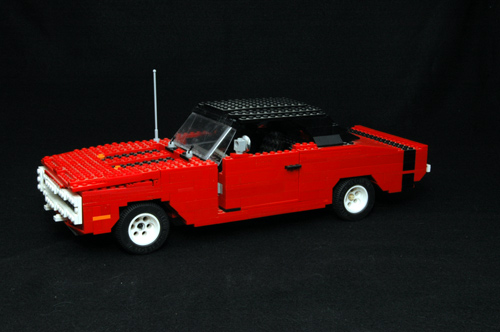
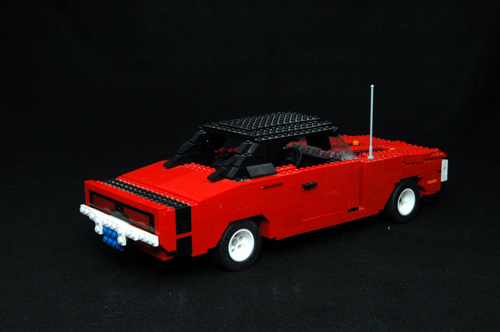
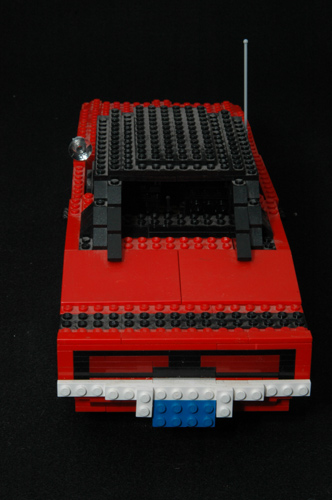
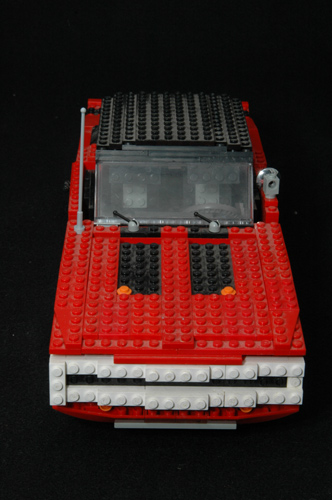
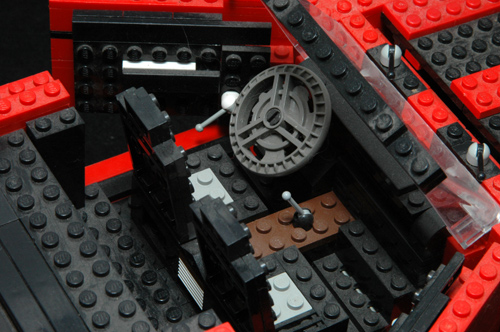
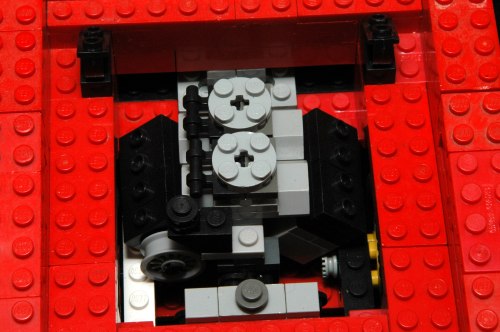
While I have been a Mopar guy since I got my first car at age 15 (in 1985), I have been a Legomaniac far longer than that. It was only a matter of time before the two pursuits would merge. This creation represents zillions of hours and 90% of my son's red Legos. (Since he got part of his collection from what had been my collection when I was his age, I figure this is fair.) In using Legos, you're somewhat limited as to shapes you can create without making things too gigantic. As it is, this car is about 20 inches long. I built a number of details into the car, some of which you can't really see unless you are looking at it in person. The seats tilt forward. There are working window visors, rearview and side mirrors, windshield wipers, detailed upper and lower door panels with armrests and window cranks, a center console with a wood-grain insert and a properly-positioned shifter, a Hemi V-8 (look at the closeup). The engine has spark plug holes in the valve covers, a properly-positioned alternator, water pump and fan, a distributor, dual carbs, a radiator with cap, etc. The first part of the car I constructed was actually the transmission. There are side-marker lights all the way around, parking light lenses, dark-red tail lights. The bucket seats have the gray inserts like my real seats do. This was a ton of fun to build and I continue to improve the realism when I figure out a way to do it. Due to a lack of chrome Legos, think "chrome" anytime you see white on this car.
Posted in Miniatures