


August 30, 2019
Mopar diecast car collection 2019 Mariposa County Fair
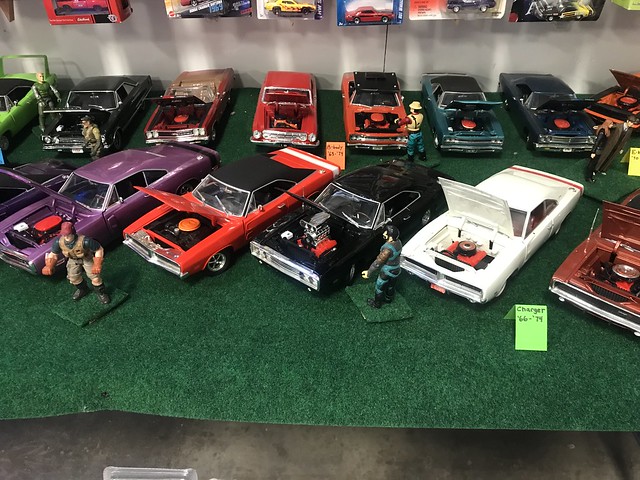
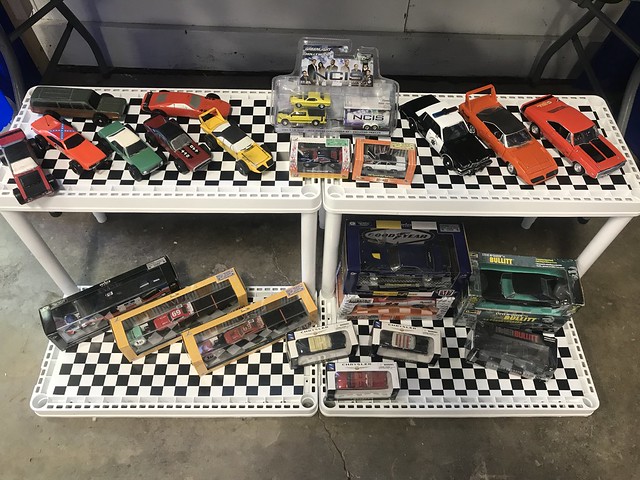
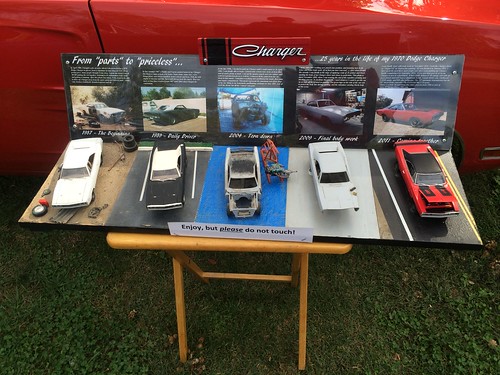
I had a lot of fun building this display for most of my collection. Many people told me they enjoyed it also.
I put the small 1/64 scale (Hot Wheel / Matchbox sized) cars on the back boards. I made a small "2019 Mariposa Mopar Car Show" diorama for the 1/18 scale cars I have. The staggered shelves below had a few special cars. sets etc.
I hope you enjoy it too.


Posted in 2004-present | Car Shows | Family Helpers | Miniatures | link to this page | | Comments (0)
December 25, 2018
Merry Mopar Christmas 2018
This year for Christmas my wife splurged and bought me a new reproduction replacement Tic-Toc-Tac for my Charger. The original clock never worked since I had owned it, and some time ago the tachometer got erratic and stopped working too. (after almost 50 years who could fault it?)
The new one fit right in, and connected just like the original. While I had the cluster out, I replaced all the instrument panel lights with new LED units I bought online.
The end result was a VAST improvement and it is SO COOL to have both the clock and tachometer working. Merry Christmas everyone!
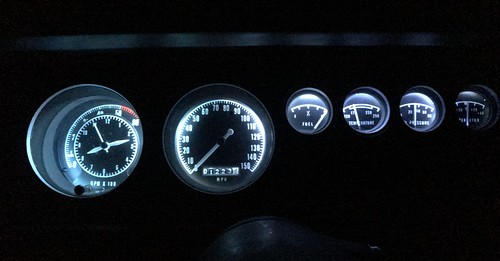
And I must say thanks so much to my lovely wife for such an awesome gift!
Posted in 2004-present | Family Helpers | RESTORATION | interior | wiring | link to this page | | Comments (0)
October 20, 2018
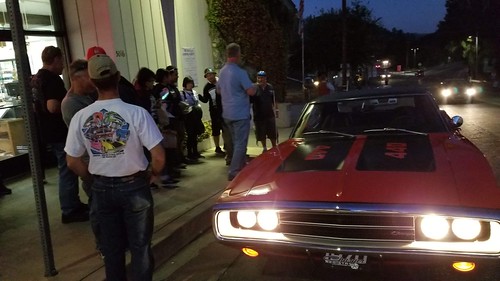
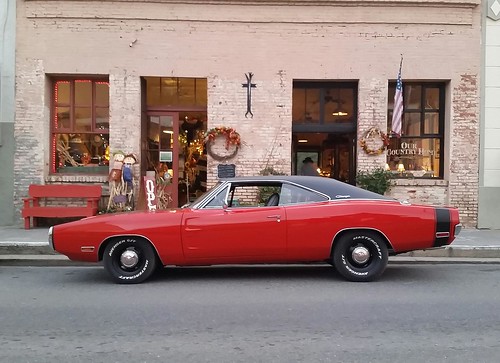
2018 Mariposa car show and cruise
It was time again for our hometown cruise and car show. All brands are welcome. This year there were a bit over 130 cars at the show on Saturday Oct 20th.
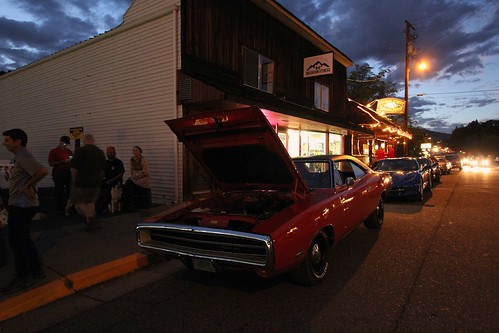
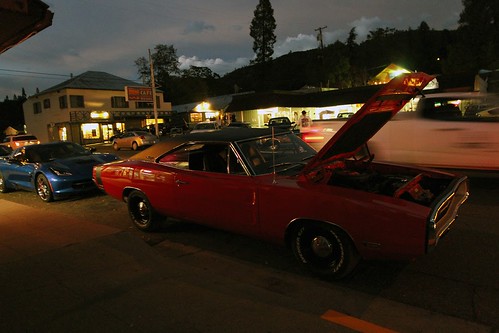
Friday night is the cruise, we gather at our local auto parts store then make a couple laps through town and park for the evening talking to locals and tourists about our vehicles. It was a fun evening.
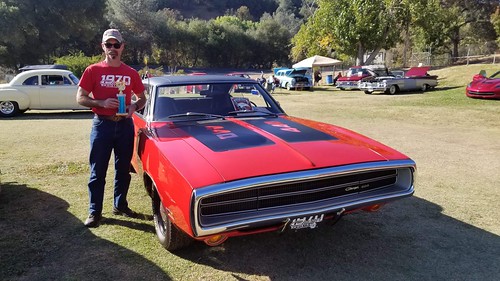
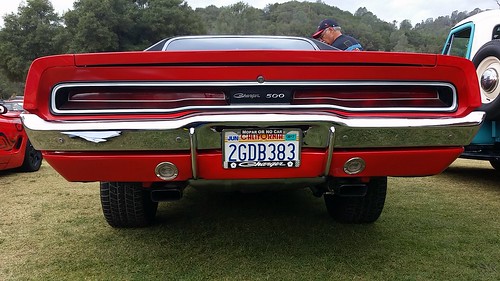
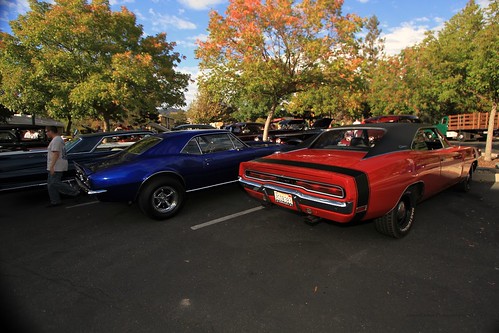
Here are a couple pictures of my Charger on display downtown.
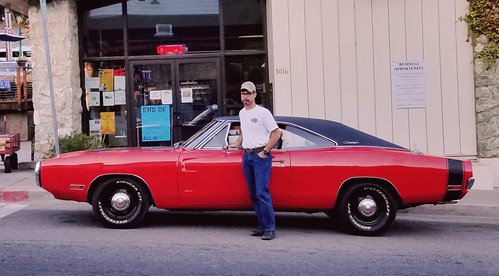
The next day was the show itself. It was a good day, with nice weather. My wife and I were pretty busy all most all day talking to people about my Charger, my Charger diorama, and hearing stories about their cars, and projects both past and present.
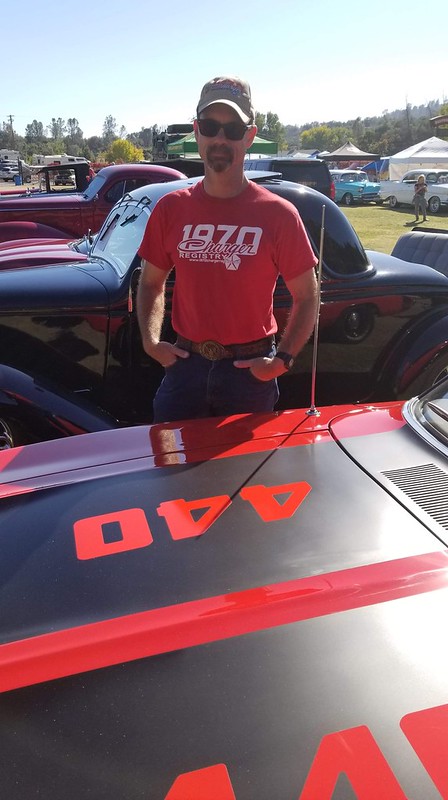
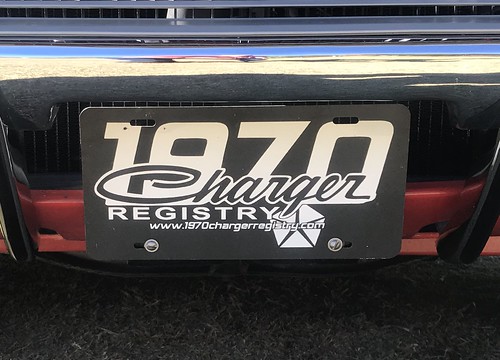
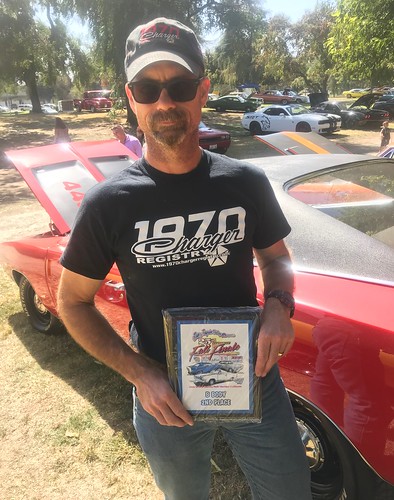
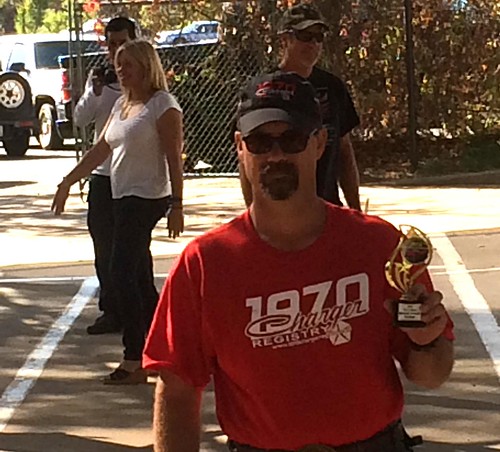
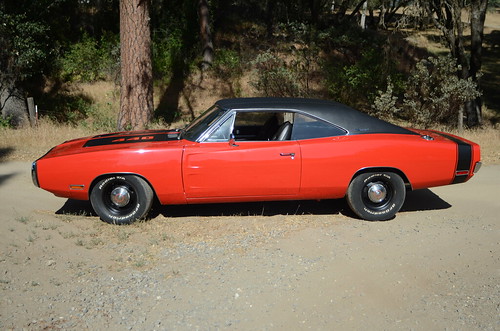
Proudly flying the 70 Charger Registry colors!
This year I was pleased to win the Mopar class, there were not a lot of Mopars in our class, but the others were very nice cars also.
Posted in 2004-present | Car Shows | Family Helpers | link to this page | | Comments (0)
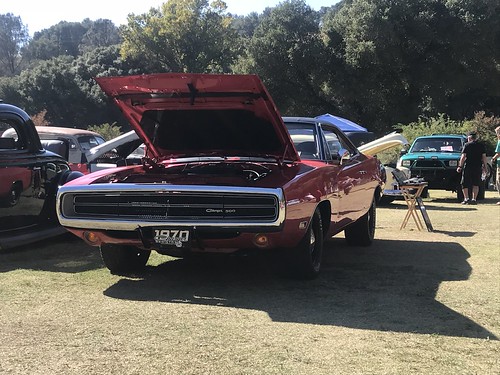
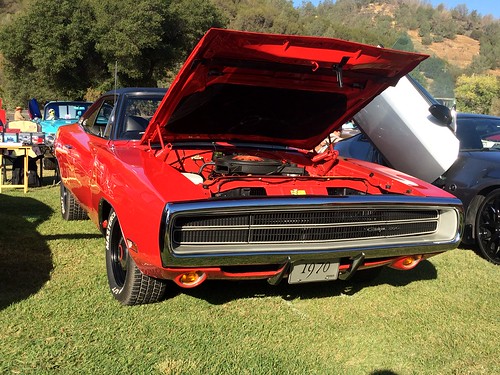
September 29, 2018
2018 San Joaquin Valley Mopar Show
Since I was thankfully able to get my Charger back from the body shop in time, my wife and I headed down to enter the closest all Mopar show to home for us. The San Joaquin Valley Mopar Club's Fall Finale.
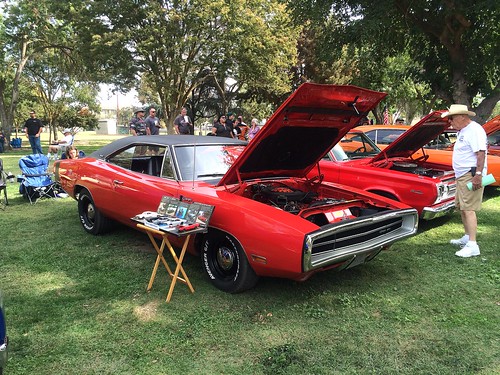
There were probably 80-100 Mopars in attendance.
The class I entered was for all B-bodies. There were about 20 cars in this class. Actually nearly all of them were pretty nice cars. There were a total of three 70 Chargers including mine in addition there were several '69's, and at least one '68 which was in the 50th anniversary class.
It was a fun show, great weather, and I got to talk to quite a few folks about the 70ChargerRegistry including a couple of '70 Charger owners who did not bring their cars today.
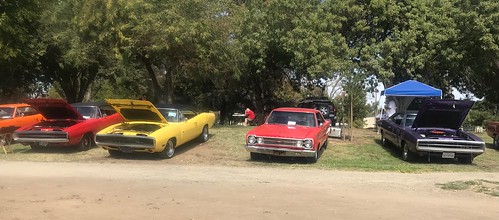
I brought my diorama depicting the history and progression of my Charger, and it was a big hit with many who came by.
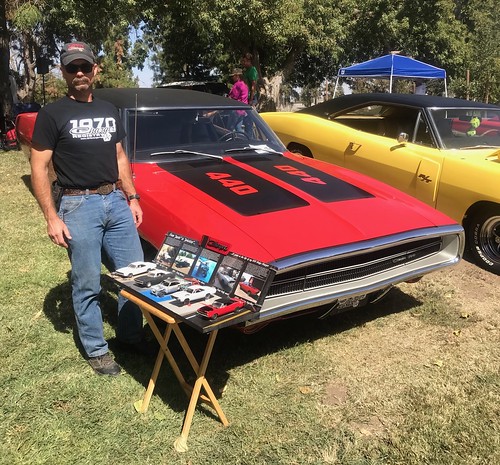
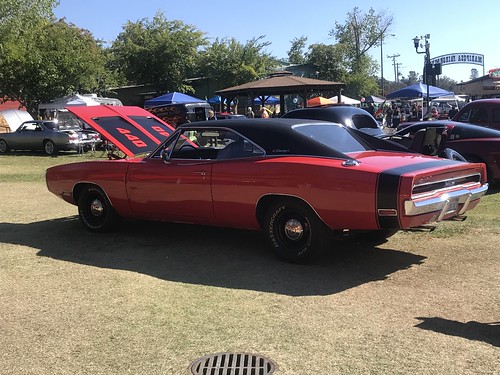
All three 70 Chargers in attendance today are visible in this photo.
And I was very happy to have won second in the B-body class. There was some serious competition this year.
Posted in 2004-present | Car Shows | Family Helpers | Miniatures | link to this page | | Comments (0)
June 09, 2018
Charger at the body shop
A little later than I thought, but finally an update.
Mopar Ed was very busy so it has taken longer than he planned to get a space for my car in his shop.
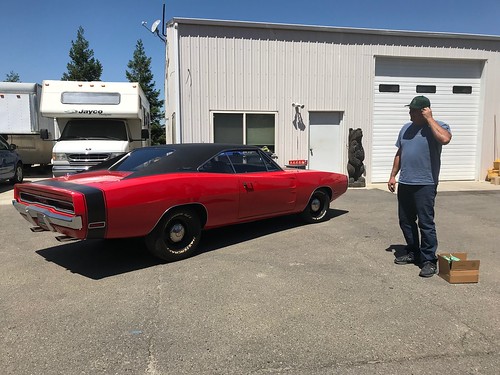
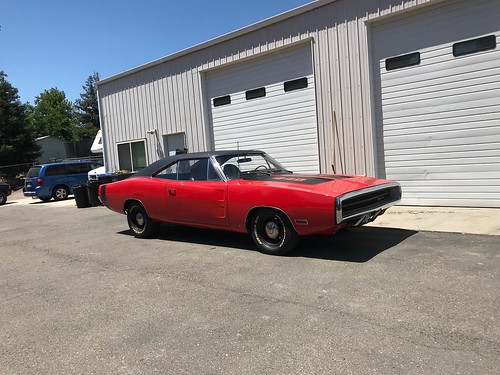
However Friday was the day, and I was able to get my Charger down to his shop (about 1 1/4 hours from my house).
Not sure how long it will take to get the bodywork and paint done but if it is done in the next 3 weeks I'll be really happy.
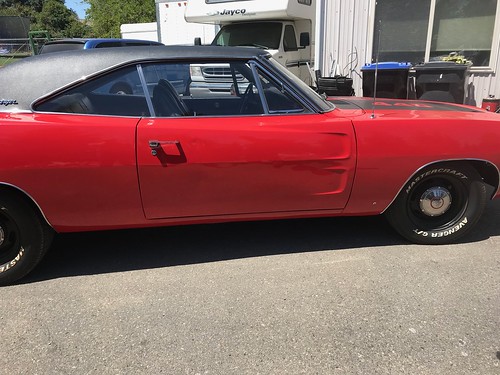
I was able to take one of my suction pullers to the worst part of the dent and it sprang back surprisingly well, but still requires attention to get the door back to being perfect. But it was less embarrassing when driving past someone who happened to be looking.
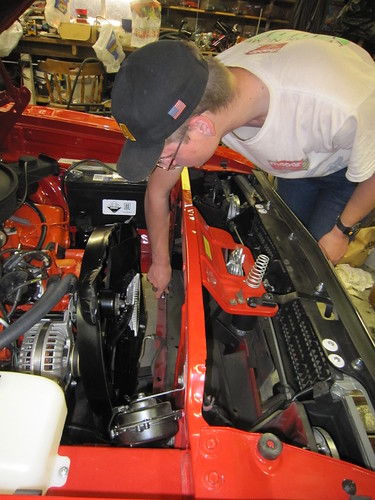
Here is "Mopar Ed" himself after having taken a look at the work he has before him.
So long for now Charger, I'll see you again soon!
Stay tuned for another update hopefully soon, - Completion!
Posted in 2004-present | Family Helpers | Reassembly | body | primer and paint | link to this page | | Comments (0)
April 15, 2018
Shopping cart vs 70 Charger
Well it has been a while since I have had anything new to post here. But sadly, now I do...
The Saturday before Easter since our kids were about to head back to college after their Spring Break at home we decided to go to the next town over for lunch. Since it was a nice day, I decided we'd head over in the Charger to make it an even more special occasion.
After lunch we stopped off at the store where I carefully chose a parking spot at the end of a row figuring that with nobody parking next to us the car would be a bit safer.
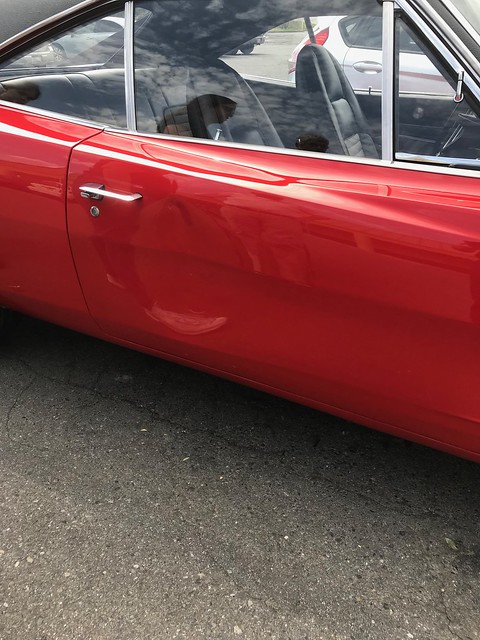
After we came out of the store I was putting a couple of things in the trunk and I heard a "THUNK" sort of noise. I also immediately heard my daughter totally losing it on somebody. I shut the trunk and came around to the passenger side where people were starting to gather. What greeted me was a pretty large dent in my passenger door.
When I got everyone calmed down (I was in shock and disbelief myself), I got the older guys information and found out that he had just helped his wife into his vehicle, loaded her walker, and when he turned around to grab his groceries, his loaded shopping cart had rolled downhill into the side of my Charger.
The dent is uglier than this picture makes it look. It is pushed in far enough that my door gap is noticeably off in the rear although it opens and shuts fine.
So far my collector car insurance company has been very helpful. The adjuster who came out a couple days after the incident to document everything at my house was very complimentary. He sees a lot of cool cars and he thought he had not encountered one as nice as mine in a long time.
I talked to "Mopar Ed" (the gentleman who painted my Charger) a week ago Friday and he will be making an opening in his schedule for me in early May after he is done with Spring Fling in Van Nuys, and Mopars at the Strip in Las Vegas.
I think the door will survive and not need replacement or an excessive amount of filler. But we'll see. I will update this blog as repairs are underway and completed.
Keep an eye on your beauties when you take them out!
Posted in 2004-present | Family Helpers | body | primer and paint | link to this page | | Comments (0)
October 15, 2016
Mariposa Car Show 2016
Once again it was time for my hometown car show. All makes are welcome and there were a lot of cars despite the threat of rain, which thankfully held off until later in the evening. (Thank you Lord!) I had a really good time talking to lots of other fine Mopar folks about their cars, and the many visitors who came to check out my Charger.
It was a fun show!
Here are a few photos of my charger at the show.
People continue to enjoy the diorama I made to show major stages in my Charger's journey over the years.
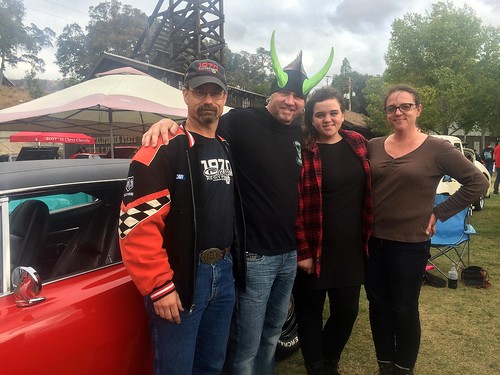
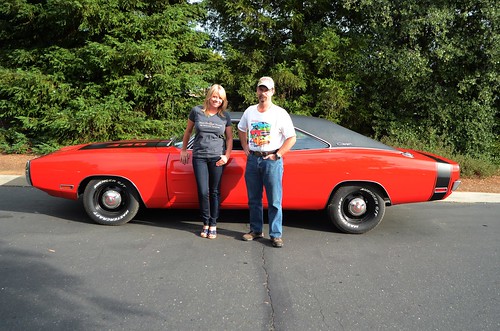
One of the things our Chamber of Commerce (who organizes the show) tries to do each year is to invite a celebrity of some renown in the automotive world. This year we had the chance to meet and talk to "Horny Mike" from the TV show "Counting Cars". He was a neat guy and really likes Mopars and seemed to enjoy my Charger and its back story.
Here is my wife, daughter, and myself with "Horny Mike"
Getting close to time to head home.
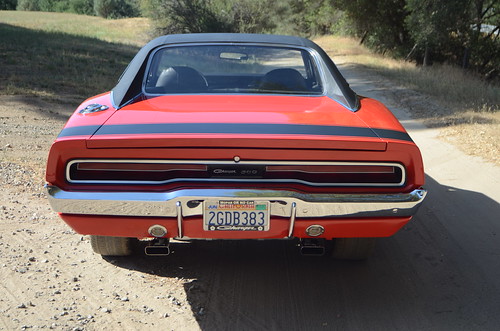
Nothing like the tail of a '70 Charger!
Posted in 2004-present | Car Shows | Family Helpers | link to this page | | Comments (0)
October 07, 2016
Fresno Dodge / San Joaquin Valley Mopars cruise in 2016
One of the Mopar car shows we always try to go to is the San Joaquin Valley Mopars show in Madera, CA. The club also coordinates with Fresno Dodge to have a cruise in, show and BBQ at the dealership the Friday night before the show. This sounded like fun, and we had a good experience buying our new Dodge Caravan at Fresno Dodge in July so I planned to drive the Charger down and participate.
There were at least two dozen cool Mopars that showed up and some really cool folks to talk to.
Here are some pictures from the event, these were taken by me, with my phone, so they are not up to the usual high standards set by my wife with her Nikon.
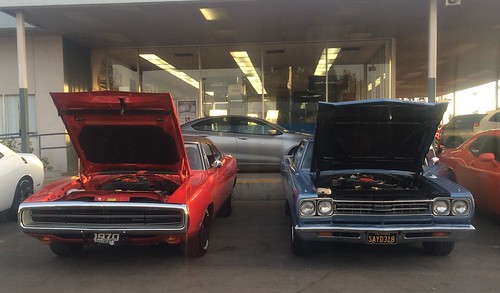
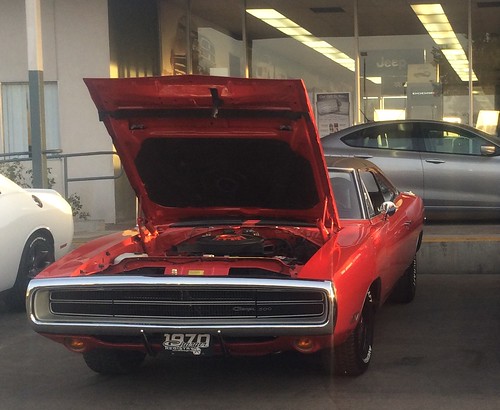
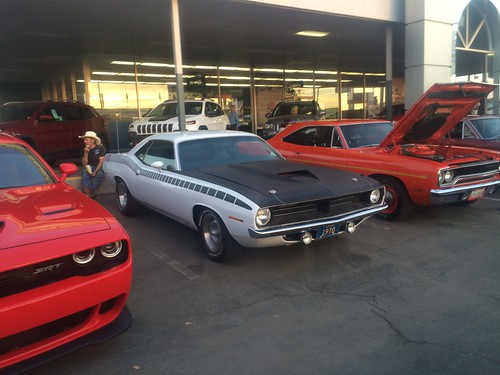
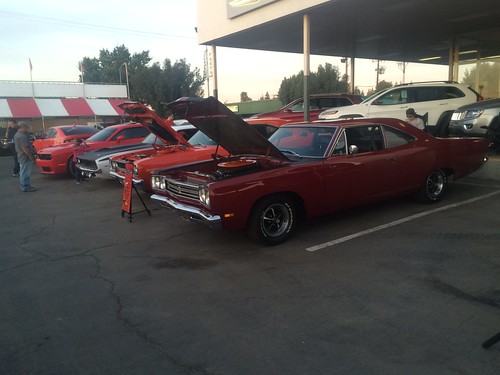
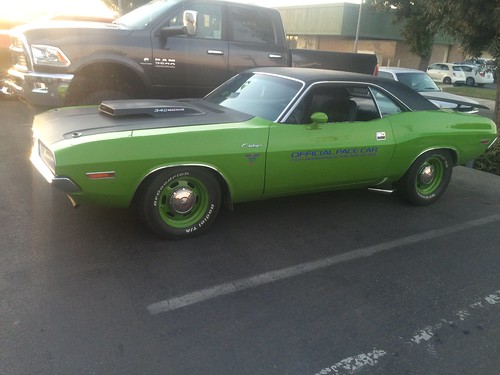
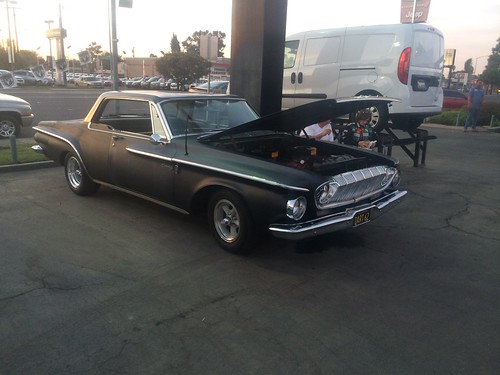
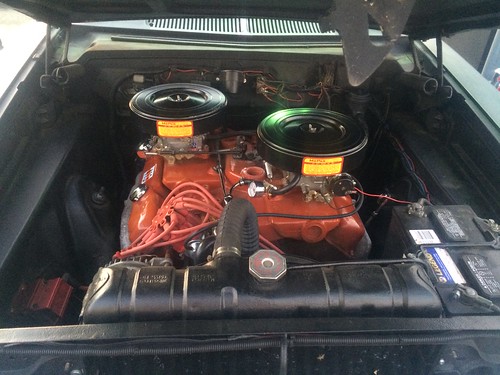
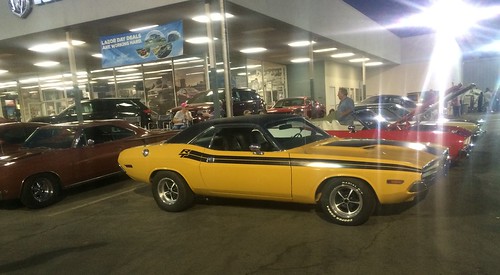
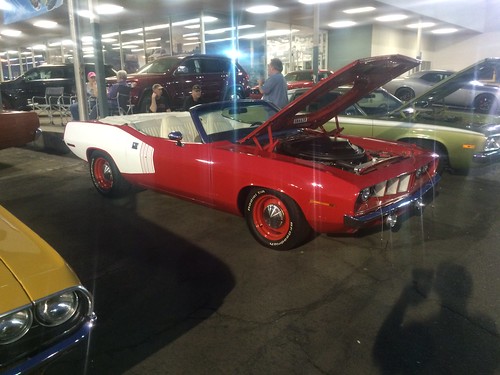
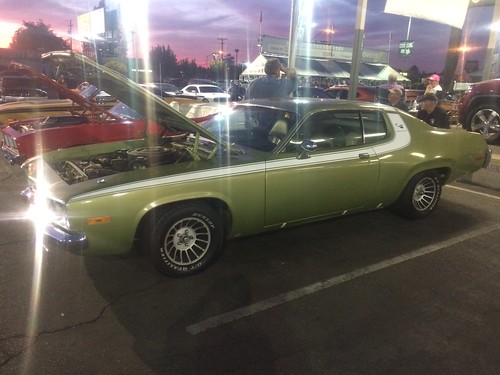
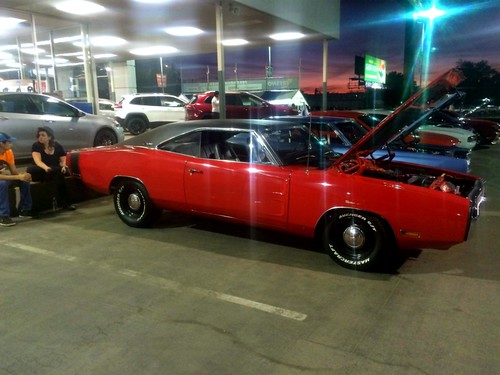
Click on any of the images to see a larger version
Posted in 2004-present | Car Shows | Family Helpers | link to this page | | Comments (0)
September 07, 2016
Our other Mopars
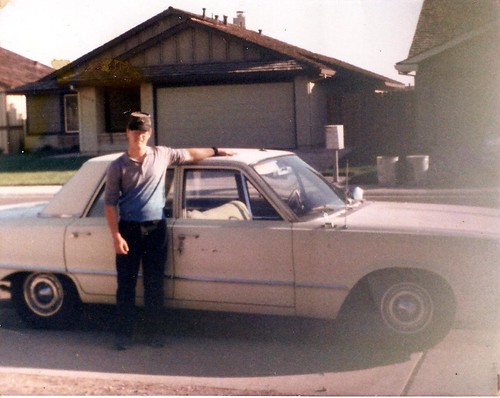
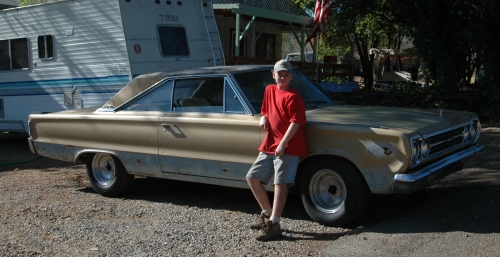
I have owned many Mopars in the past, including a 1965 Polara 4dr with a 383, a 1966 Polara 4dr with a 383, a 1972 D100 2wd long-bed pickup with a 318, and a 1964 Plymouth Barracuda with a 273. My very first car was the '65 Polara mentioned above. I enjoyed that car and it was tough enough to survive my learning many of my first automotive maintenance lessons on it. Since then, I have preferred and promoted classic MoPars of every stripe everywhere I've gone.
With my first car and in the early days of my Charger, I held a fairly uniform appreciation of all American-made muscle-car era automobiles. I found that many of the GM and blue-oval devotees received my praise of their vehicles but had nothing but uninformed condemnation for my own cars. I found this to be true even when their cars could not beat mine in a race. Later on, I met other Mopar owners and found many of them had had the same experiences. It is with these people that I have enjoyed the camaraderie and pride of owning Mopar vehicles over the years.
This may be the only picture I still have of my first car. My trusty 1965 Dodge Polara police car. I was almost 16 in this picture. This is the car that started my love for all things Mopar!
On this page I will feature Mopars currently in our family's fleet.
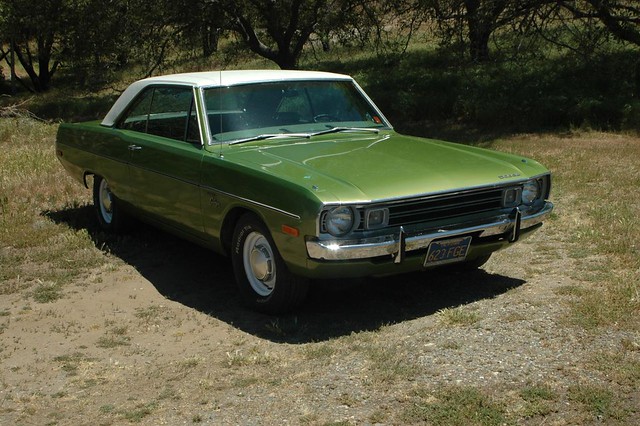
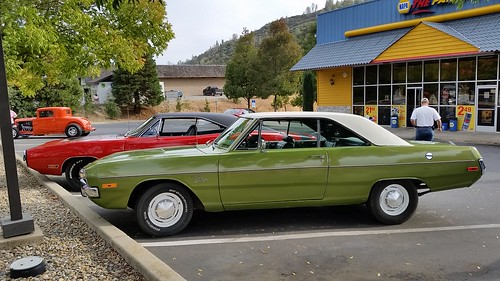
This is my wife's 1972 Dodge Dart Swinger. It has a new 360 CID engine and it runs like a top. We love this car, my wife especially. We bought it in the summer of 2006 from its original owner, a sweet little lady (really) who had kept every scrap of paperwork pertaining to the car all the way back to her original dealership purchase receipt, and who had taken the car in every six months for a checkup or whenever it needed it, whichever was oftener. Other than the new 360, a paint job and new vinyl top in 2004, this car is completely original, and it's virtually immaculate inside and out. The original 318 was great, but after 35 years of service it finally needed to be replaced or rebuilt. This car gets a great deal of well-deserved attention wherever we go in it.

In 2004, I started looking for an economical-to-drive cool-looking older Mopar for regular transportation. I am quite sure we scored a good deal on this 1969 Dodge Dart Western Special. The car is very solid, and needs only a few cosmetic finishing touches. Even in its current unrestored state, this clean, original car still gets us a lot of compliments. Powered by what I believe to be its original 225 CID slant-six, backed up by a 3-speed manual column-shifted transmission, it does very well on gas and doesn't embarrass me going up our local hills. When I restore this car for my daughter, I hope to redo the exterior of the car in its original Q5 Bright Turquoise Metallic paint, with a new vinyl top, and maybe a black tail stripe, and probably install a small block and auto transmission, or maybe I'll just leave it stock. It is still cool, and there aren't too many of these still sporting their original drive train these days.
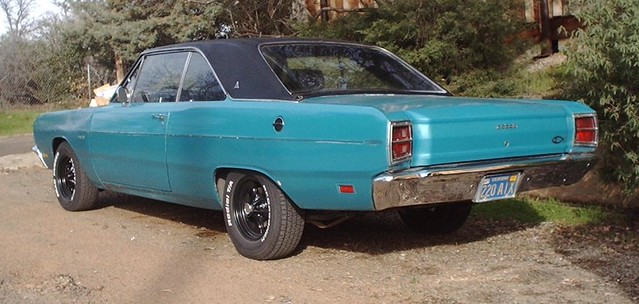
The famous "leaning tower of power" The "Charger 225"

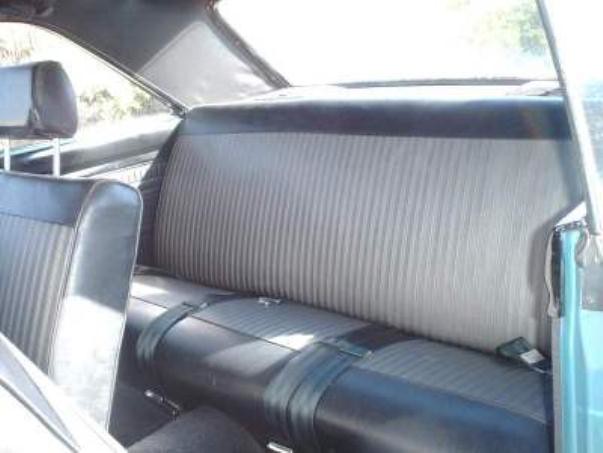
The interior is in great shape and is original!
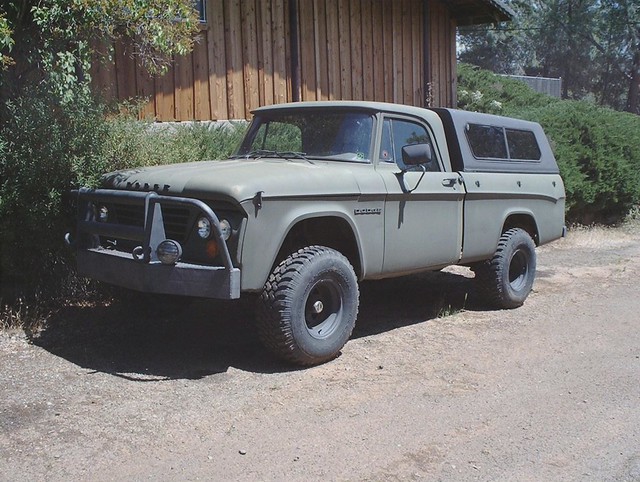
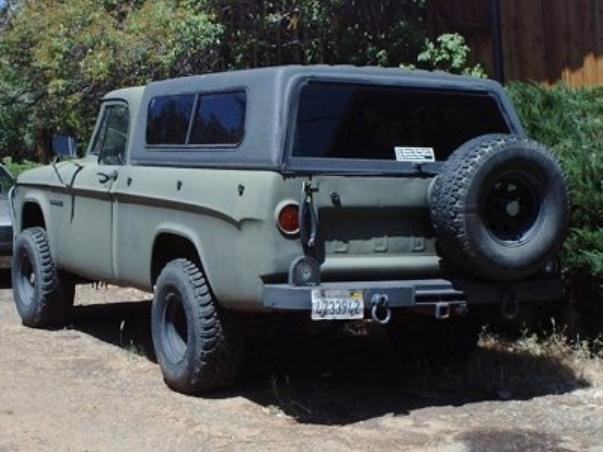
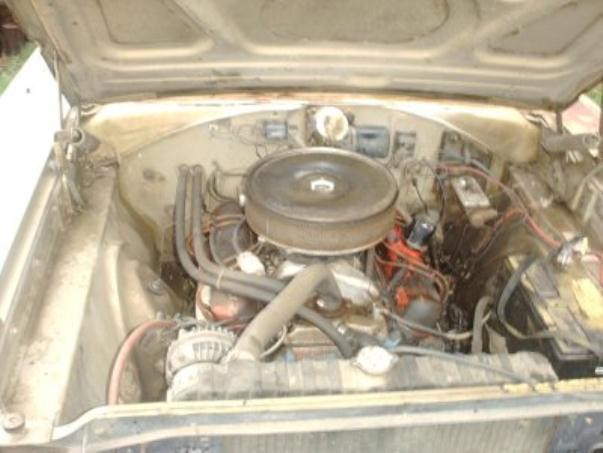
The story of my 1963 D100 probably warrants its own webpage. My buddy and I completely changed the nature and purpose of this vehicle. It started out as a D100 SWB 6-cyl 4spd with manual steering, 2wd, and manual drum brakes all the way around. Over the course of 18 months, we transformed it into what you see in these pictures: a 383 2bbl, 727 auto and an MP205 divorced transfer case Dana 44 front end and 8 3/4 rear from a '74 Power wagon with 3:55 gears were initially used. Since these pictures were taken I have updated both front and rear axles. I beefed up my truck with a Dana 44 front end from an '86 W350 with Warn manual hubs, a Dana 60 rear end (also from the '86 W350) with 4:10 gears all the way around. The steering column with the automatic shifter and floor pan are from a 1969 D200. The brake booster and master cylinder assembly are also from the'86 W350. The front and rear bumpers are custom-made by my friend and myself.
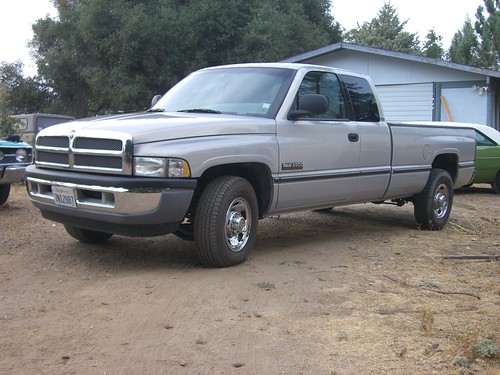
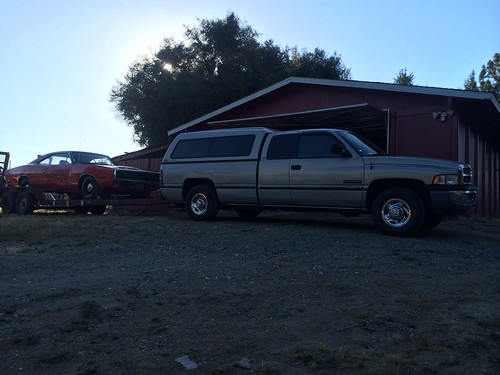
The workhorse of the bunch is my '97 Dodge Ram 2500 with the awesome 5.9l Cummins. I REALLY love this truck!
In 2003, I was able to acquire this complete, running, driving 1967 Plymouth Satellite 2dr HT. It has a 318 4bbl which runs quite well. The interior has bucket seats and an automatic console shift. My son (who was seven years old at the time) is the owner of this car. It had long been my plan when my Charger was done for the two of us to begin restoration of his Satellite together.
You can see some of the major restoration progress we made on my son's '67 Satellite before he headed off for college at his Satellite restoration page here Tolley's 1967 Satellite Restoration Blog

The paperwork that came with the car indicates that this 318 should be the original engine and was overhauled a number of years ago, which could explain why it runs so well. The engine has an after-market aluminum 4bbl intake and an Edelbrock (Carter AFB) carburetor. I have a 1971 440 4bbl engine that has been reserved for my son's future power needs. Unless he continues with his plan to put a HEMI in it one day!
Here's a picture from 2007 with my son leaning against his Satellite, he is 6'4" tall now so he's changed even more than his car has!

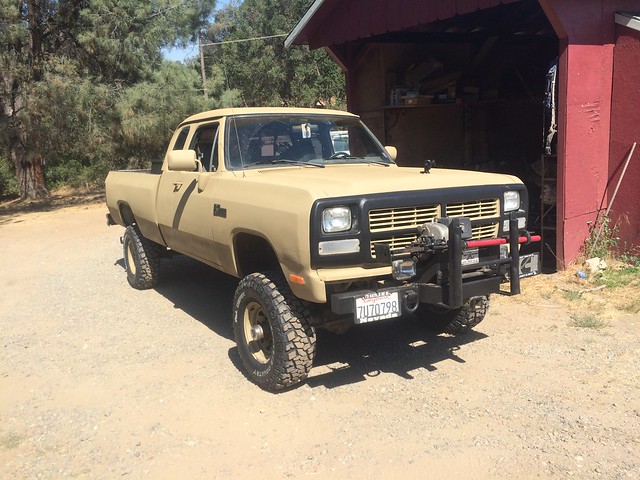
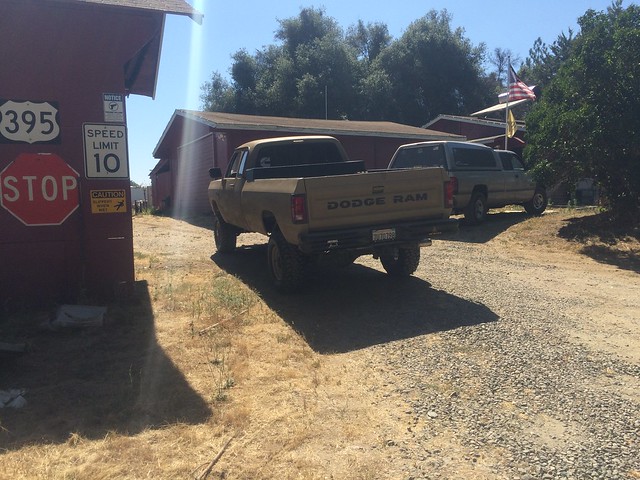
My son is a grown man now and sought out something cool, tough, and practical for his work and daily driver use. He scored with the 1993 Dodge W250 Cummins equipped Power Wagon. It came with a utlity bed which he sold and promptly replaced with a good long bed we had at home. It has a 4" lift and 285/75R16 tires on American Racing spoke wheels. The paint is military surplus desert sand. Everything works perfectly. This thing is an awesome beast!
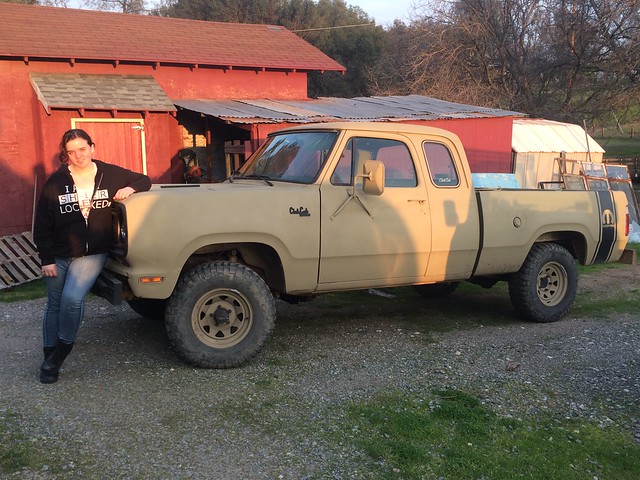
For nearly 20 years my barber and I had an arrangement. I worked on his '76 Power wagon whenever needed and he would cut my family's hair. Well a couple years ago he lost a battle with cancer. His widow insisted that the truck come to live with me. When my daughter wanted something cool to drive to school her first choice was the Barber's old '76 Power Wagon. We cleaned it up, did a tune up and a little maintenance together, (she got her own Craftsman tools for Christmas) and then I painted it like as my son's '93 Power Wagon using the same military surplus paint. I updated the wheels with some American Racing 16 x 6.5" units with 265/75R16's. Came out pretty cool looking and my daughter certainly loved driving the truck she calls "beast".

Posted in Family Helpers | RESTORATION | link to this page | | Comments (0)
October 24, 2015
Mariposa Car show 2015
Each year the all brands car show in my home town grows. Last year there were almost 200 cars, this year I think the number was well over that. I spoke to people who brought cars from Las Vegas, and all parts of California.
This year I again participated in the fun Friday night cruise. First we meet up at our O'Reilly Auto PArts store (used to be a NAPA store, but owned and operated by the same local folks.)
Here are a couple pictures from down town Mariposa. There were lots of folks waling around checking out the cars. Met some really nice folks. Especially some youngsters who were fascinated by classic muscle cars.
Then Saturday was the show itself.
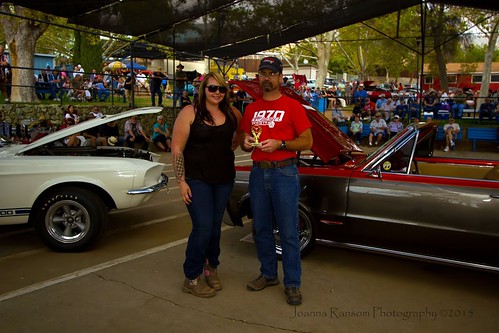
This is a publicity photo for the show organizers with their trophy presenter for 2015.

This year I entered the Mopar category (instead of the general muscle car class like last year). I won 1st place in the Mopar class which was quite an honor. There were many very nice Mopars in attendance.
Click on any of the images to see a larger version.
Posted in 2004-present | Car Shows | Family Helpers | link to this page | | Comments (0)
July 15, 2015
Mopar Alley Mopar Rally 2015
One of the shows that has been an annual pre-Father's day trip for my family for many years is the Mopar Alley club's Mopar Rally. It used to be at Ohlone College near Fremont and we really liked that site. Now for the second year it is at DeAnza college in Cupertino which is OK, but we liked the old location better.
However, this year was the first time my Charger was finally ready for this large show.
I trailered my Charger to Morgan Hill where I met up with a buddy from the 70 Charger Registry, then we caravaned to the show in our Chargers.
Ready for the road.

At the Show with my diorama depicting the history of my Charger since I've owned it.

Click on any of the images to see a larger version.
Posted in 2004-present | Car Shows | Family Helpers | link to this page | | Comments (0)
December 25, 2014
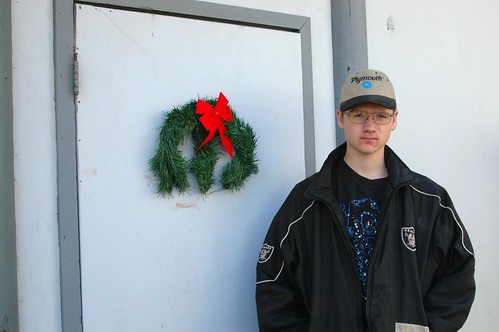
Merry Mopar Christmas 2014
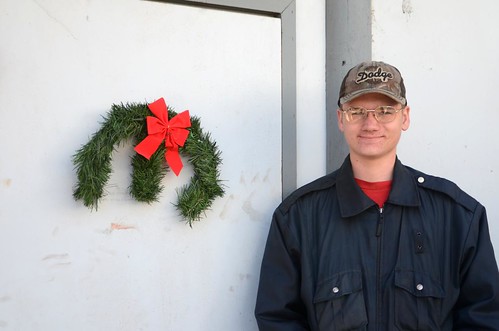
New door, and new paint on the house and garage, but the tradition continues!
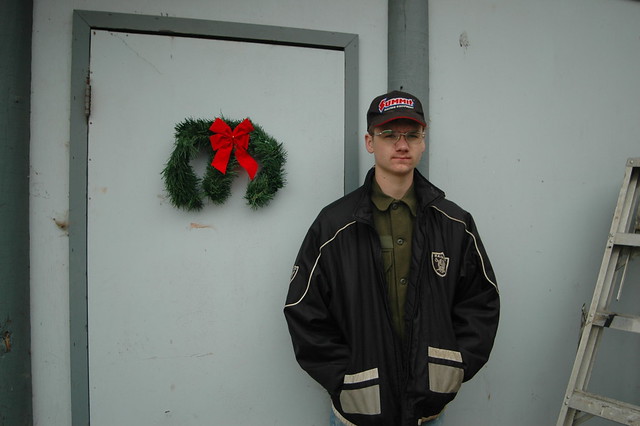
My son, now 18 and nearly 6'4" tall posing next to the wreath he constructed many years ago.
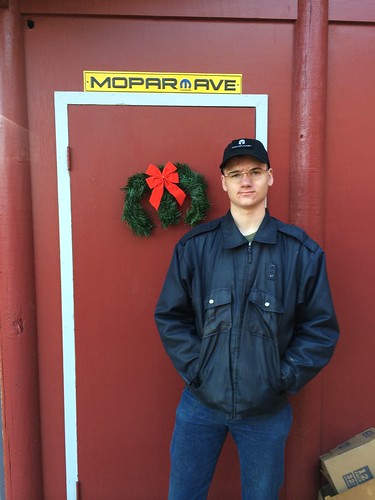
Merry Christ-mas everyone!
Posted in Family Helpers | Miniatures | link to this page | | Comments (0)
October 18, 2014
Next Show - Mariposa
Today was a large (for our area) all brands car show. The show is put on by the Mariposa County Chamber of Commerce. It has been growing each year, and this year there were said to be over 250 cars in attendance.
First though yesterday night was a cruise through our town, with the parking downtown blocked off for us to park and show our cars.
The cruise started at our local NAPA store as they are a major sponsor of the show.
Here my Charger and my wife's '72 Dart Swinger are waiting at NAPA for time to cruise.
Had a fun time with the cruise and park thing tonight. Talked to a lot of people. There was a nice lady who is a regular on Overhaulin' there greeting people and taking pictures with people and their cars. Her name is Cherielynn Westrich, she is it turns out, a lifelong Mopar gal apparently and was VERY excited to get her picture taken with my Charger. Evidently she has a '68 Dart of her own - very cool!
My Charger downtown after the cruise.
Then today it was time for the show - here is my Charger in position.
There were tons of classes including a Mopar class which I knew was likely to have only a few cars (in truth there were six Mopars present including a truck out of over 250 cars!)
I chose to enter the Muscle Car class so as not to compete against my fellow Mopar owners. It worked out well as I managed to win third place in the class.
Posted in 2004-present | Car Shows | Family Helpers | link to this page | | Comments (0)
October 11, 2014
Show time! - Madera
October 11th was time for the annual Fall Finale put on by the San Joaquin Valley Mopars Club in Madera, CA
We really like this show as it is usually great weather, and it is the closest all Mopar show to where I live.
There were not quite 90 Mopars there, which is seemed to be down from the previous few years.
I had the only '70 Charger at the show, there were 1 68, two '69's, and one '73 Chargers. We were all in a general "B-Body" class. There were numerous Road Runners, and a bunch more nice cars in my class.
I did not win anything, which is OK, although I was certainly ready to stride up to the award table if my name had been called.
Here is a picture of my Charger in position.
I finally got to use my diorama for the purpose I made it for. Seemed like it was a hit with the crowd.
A long time friend of ours does a lot of automotive photography and she and the owner of a really nice all numbers matching 1970 Plymouth Superbird were at the show as well, so we positioned our cars for some fun pictures together. Click here to see her photography page.

A very nice day for my Charger's first car show!
Posted in 2004-present | Car Shows | Family Helpers | Miniatures | link to this page | | Comments (0)
September 20, 2014
"ON THE ROAD AGAIN!"
Cue the Willie Nelson... :)
Yep, My Charger is on the road again! Ten and a half years after I started the restoration process I am complete enough to warrant registration and insurance.
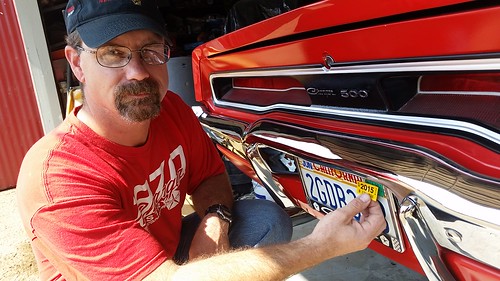
Remember, you can click on my photos if you want to see one in a larger size.
Here is the 2015 tag going on over the 1996 one. (I non-op'd my Charger in 1996 but did not start to restore it until 2004)
Here my wife and I are getting ready to head out on the maiden voyage.
This video (which I forgot we had taken on my wife's phone) is of the VERY first drive of my restored Charger on paved roads since 2004 right before I began to take my Charger apart.
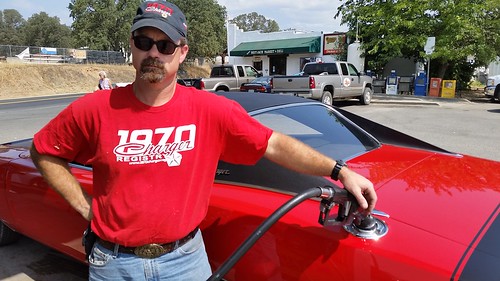
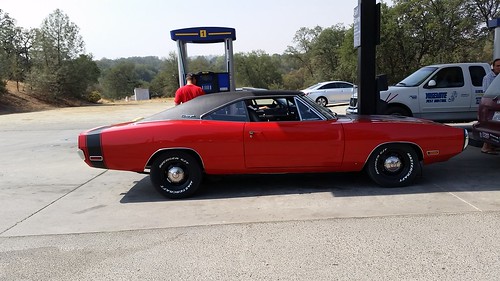
After a quick trip to town, it was time for fuel and a front end alignment appointment... I was very nervous about putting fuel in, I really did not want to spill on the paint.
Here is a video of a quick burn-out in the parking lot of the building where our Church meets.
What a great day, long awaited and lots of fun, I hope to enter a couple of nearby car shows in October.
Stay tuned...
Posted in 2004-present | Family Helpers | RESTORATION | link to this page | | Comments (0)
June 08, 2014
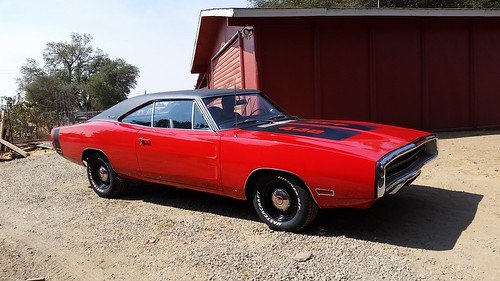
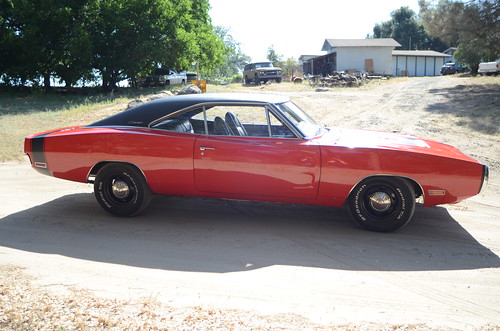
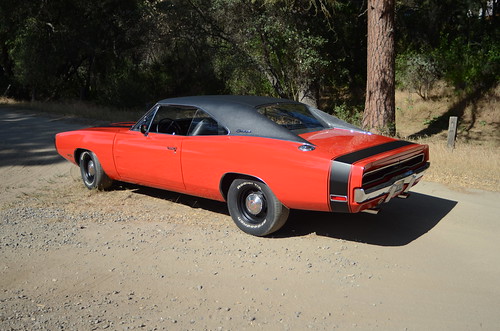
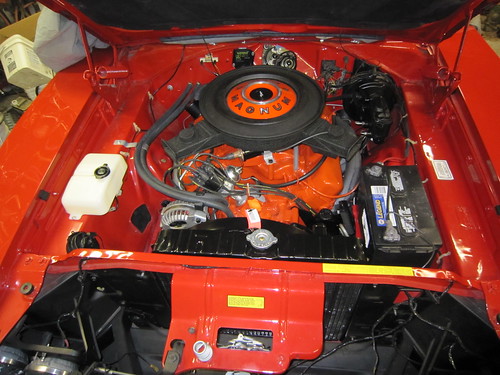
DRIVING my Charger out into the sun!
For the first time in more than 10 years I drove my Charger today. It still needs shocks, tires, insurance etc so I did not go far, but far enough to get my Charger out into the sun for a round of nice pictures. Thanks to my wife for taking the video and photos, and my son for spotting for me.
Into the sunshine!
Down the driveway
If you like, join me on a quick walk around my Charger.
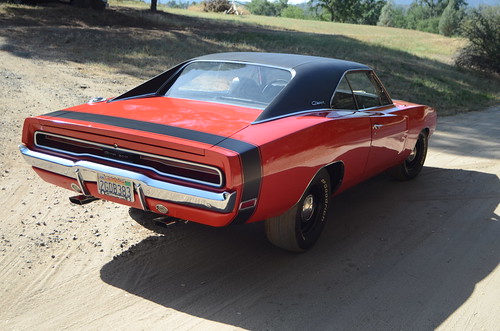
The to-do list is getting shorter and shorter, and my Charger is getting closer to being ready to take to it's first car show, probably in October.
Posted in 2004-present | Family Helpers | RESTORATION | Reassembly | body | engine | glass | suspension, brakes, tires, and wheels | link to this page | | Comments (0)
March 10, 2014
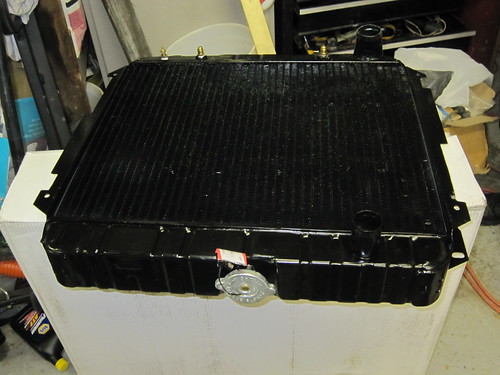
Radiator is in !
Yay! a big piece of the puzzle went into place today!
I got my radiator! It looks great, it fit perfectly, including the shroud. I ordered a U.S. Radiators brand 22" 4 core high efficiency copper / brass radiator with OEM style shroud. I bought it from Mopar Ed at themoparshop.com. It dropped right in the shroud fit perfectly and there was plenty of clearance between the fan & shroud, and the fan clutch and radiator face.
With the shroud
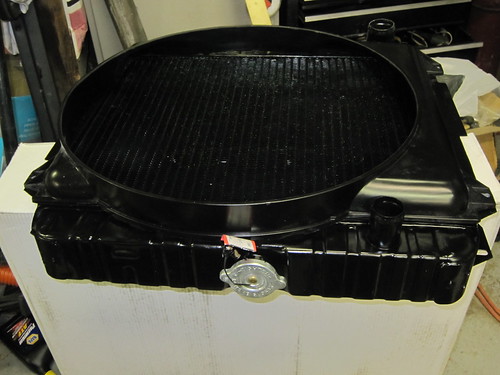
I had my son help me so that nothing went wrong.
In place and topped off with a reproduction style 16lb radiator cap.

Posted in 2004-present | Family Helpers | Reassembly | engine | link to this page | | Comments (0)
February 19, 2014
IT IS ALIVE!!!!
At long last my Charger has roared to life!
I do not yet have a radiator, and my exhaust is still just the manifolds, so I had to keep it short, but man was it nice!
Hurray!!!
Posted in 2004-present | Family Helpers | Reassembly | engine | link to this page | | Comments (0)
December 07, 2013
Merry Mopar Christmas 2013 !
Yep, it is that time again! Christmas is on its way and so for the sixth year we display the Mopar "M" wreath my son made when he was 12. It was a suggestion in my January 2009 Mopar Collector's Guide magazine, and he took it upon himself to make one for the garage door. He is a little taller than last year (he's slowly gaining on 6' 4" tall).
This has been a good year for my family and my Charger. I am looking forward to finding out if 2014 will see the completion of my Charger's restoration. The Lord has blessed us richly in many ways, and it is especially nice to our family to take time to focus on His first coming in a special way each December.
A very Merry Christmas to each of you!
Posted in 2004-present | Family Helpers | link to this page | | Comments (0)
September 12, 2013
Problem solved
OK, so after some other work my son and I had to do, I decided it was time to pull the CH4B and lay it right next to a stock '69 intake I had.
There was not much difference! (about what I had read online, less than 1/2"). So I tried the stock manifold with my carburetor and air cleaner, the hood was still hitting something, so then out comes the hood insulation pad. Still hitting something.
Then I started searching for something that would indicate to me exactly where the contact was. I looked for some soft clay, but the clay my daughter has is really stiff. My son tries pieces of blue masking tape sticky side up, but no go. Then I get a great idea. Hot-Dog buns! They will leave a record of being smashed cut etc and not make a big mess. So I put hot dog buns on the air cleaner housing, I try to close the hood, still there is contact somewhere, then I try the same thing with the carburetor on, but no air cleaner, going nice and slow, I am still coming in contact with something... My son then spots it looking through the grill, the hood is barely contacting the wiper motor in the back. We make some adjustments to the hood (VERY slight I must say) and then everything is OK. Put the air cleaner back on, the hood closes and no squished buns.
Next, I put the aluminum intake back on, carburetor, air cleaner hot dog buns, the hood closes no squished buns.
So, all along a tiny hood misalignment was causing some very minor contact with the wiper motor. When the air cleaner was off and I knew I had tons of room I'd just shut the hood quickly and never noticed the issue. Then when I was being super cautious I would notice the contact and stop.
It never was the air cleaner! So now I'll change the intake gasket, bolt the CH4B back on, and move forward again. Happy ending to a weird story! Thank you Lord!
I was finally able to add a picture this is what our troubleshooting looked like!
Stay tuned!
Posted in 2004-present | Family Helpers | RESTORATION | Reassembly | engine | link to this page | | Comments (0)
August 17, 2013
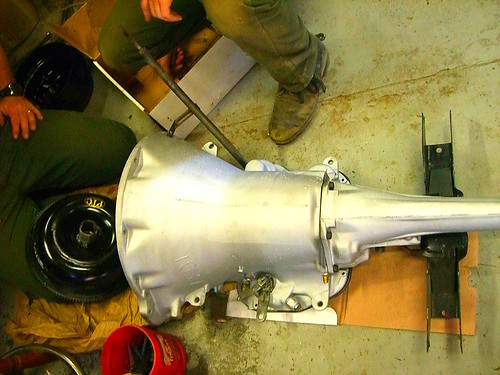
Drive train day!
OK, I just got back in the house (7 PM ) after being in the garage since about 9 AM. My son, one of his friends and I managed to get a few things done on my Charger.
First we rolled the Charger back, removed the hood, jacked it up, and put the transmission in.
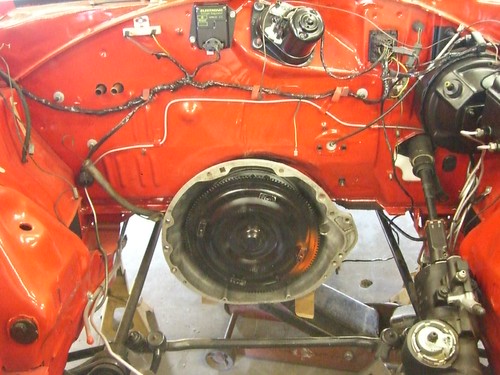
Next we filled the engine with 6 qts of oil and some zinc additive, then we primed the oiling system.
Next we grabbed the engine, got it off the stand, and put the flex-plate on.
Then it was time to put the engine in! YAY!

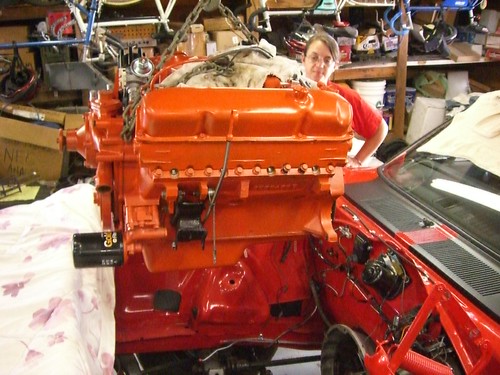
Engine in, and bolted to the transmission, NOTE here, we dropped the transmission back a bit to help get the engine on its mounts.
I spent a while hooking things up underneath, installing the transmission cooler lines, flex plate bolts etc.
Then I installed the new distributor, routed some of the wires, and put the new carburetor on. The carburetor is an 800 CFM Edelbrock Thunder AVS series with electric choke option.
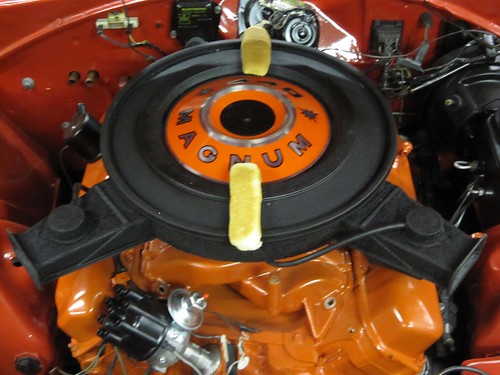
Then the final touch. (- or so I thought)
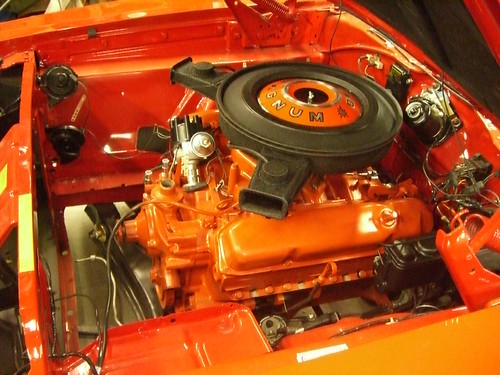
The problem is, it seems the CH4B may be too tall (something is too tall anyhow) I thought it was supposed to be fine (everything I read online said so...) but I can't close the hood because it contacts the air cleaner. At this point, I am thinking I may have to go back to a stock cast iron intake. However I am going to study the problem, and see if I can find an answer first...
Great day, but it ended a bit differently than I expected. I am very thankful that my prayers were answered, and we did the entire job without scratching any part of the Charger, and that we were able to get the hood alignment perfect again when we put it back on. Thank you Jesus!
Stay tuned!
Posted in 2004-present | Family Helpers | RESTORATION | Reassembly | engine | link to this page | | Comments (0)
August 16, 2013
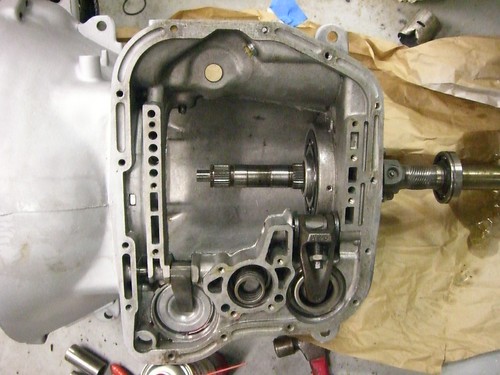
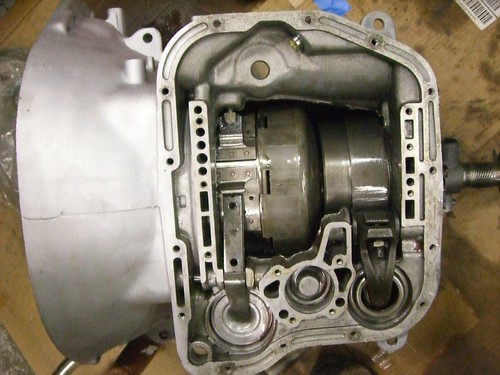
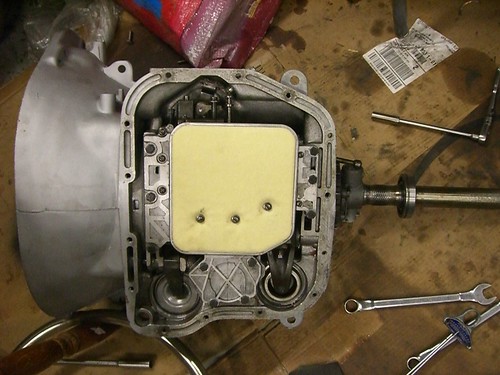
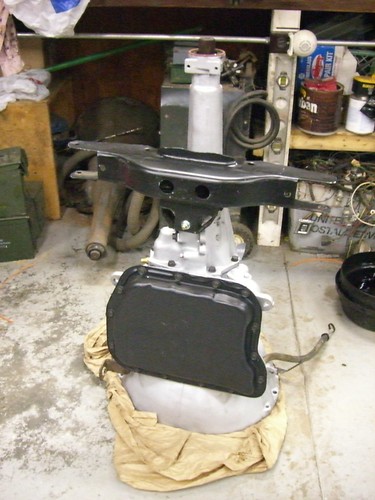
727 Transmission overhaul
Tonight my son and I completed a project we began a week ago (I had to wait for some parts to arrive)
We overhauled the 727 transmission for my Charger. I used red Alto clutches, with Kolene steels, new red Alto front band and a Kevlar rear band, a street Hemi torque converter from PTC (2,800-3,000 stall) and all new seals and bushings etc. And a new poly-loc rear mount.
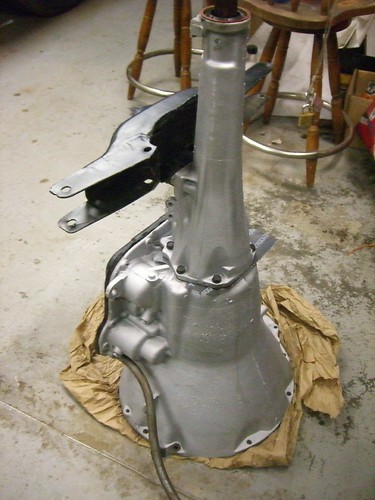
Tomorrow should be a great day, the drive train should go back in my Charger!
Posted in 2004-present | Family Helpers | RESTORATION | Reassembly | engine | link to this page | | Comments (0)
July 28, 2013
Father's Day present and parts gathering
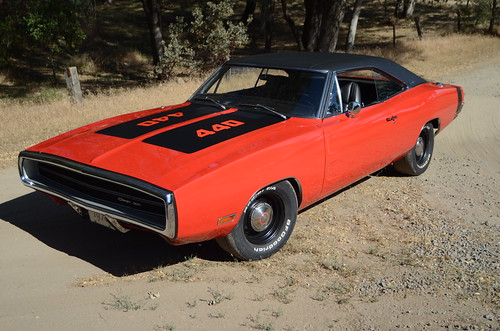
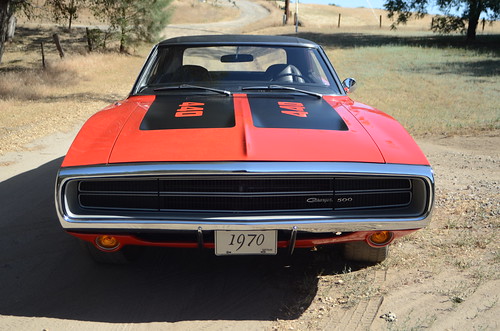
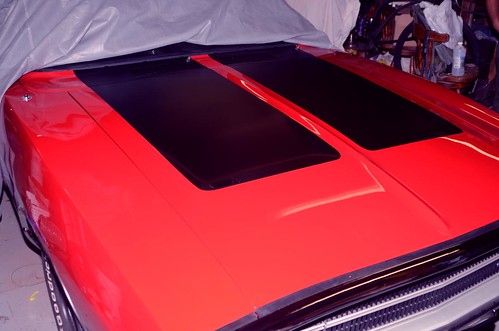
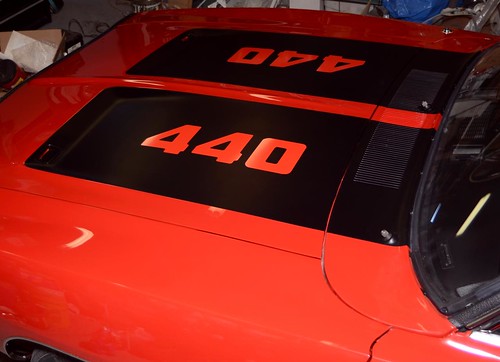
This year for Father's day my family bought me a set of tomato red 440 call outs for the hood of my Charger from Performance Car Graphics- thank you guys!
Finally had some time, and my son and I went out to put them on. It actually went really well, we spent a few moments cleaning the hood, and measuring everything. Sometimes you see these numbers (or the HEMI letters) put off to the side of the hood more. The correct placement is centered. The fine folks at Performance Car Graphics included a print of the factory guide for placement. It seems obscure at first, but after carefully studying it, we were confident about the placement of my numbers.
Here was the hood just prior to installation
Here are my son and I completing the layout process, which again was easy once we knew where they were supposed to go.
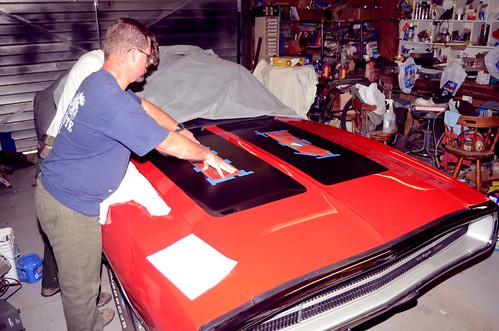

And here is the final product. It took less than an hour start to finish. It was fun, easy, and I think it looks great!

Also, I finally have all the pieces to rebuild my 727 transmission, the torque converter has been ordered from Performance Torque Converters (PTC) It is their copy of the HD 11' street Hemi converter with a stall of about 2,800 - 3,000 RPM., My 800 CFM Edelbrock Thunder AVS carburator should be headed this way tomorrow, I have the sending units for the engine, and a line on a set of original HP exhaust manifolds from Mopar Ed A few other odds and ends are trickling in, so fairly soon, the engine and transmission should be sitting in the car! Stay tuned...
Posted in 2004-present | Family Helpers | Reassembly | body | engine | link to this page | | Comments (0)
March 26, 2013
A Special Guest!
Something I've been encouraging my son to do for a long time is to create a web presence about the ongoing restoration of his 1967 Plymouth Satellite.
Well the last merit badge he needs to finish before he can submit his Eagle Scout package is Communications. One of the ways to meet one of the requirements is to design a web site. The requirements state you do not even have to post it, and it does not have to be more than a few paragraphs of information. However, with a little nudge from his Dad (and Assistant Scoutmaster) he put it on the web.
Here he is at age 7 when I bought him his first Mopar! (he is almost 17 yrs old now and 6'3" tall)
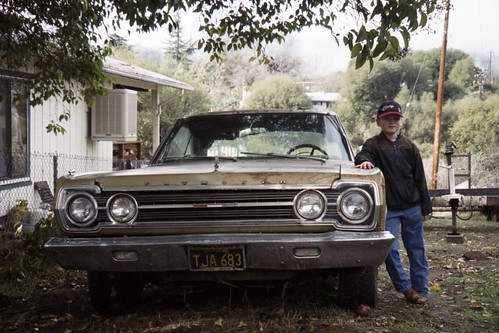
It is basic, and he'll be adding to it as we go, we have many hundreds of photos, but most are references for when we put it back together.
It is a blog, so just like my Charger blog, the newest posts are on top, you scroll down to see older stuff - all the way back to the beginning.
Here is a link to see it... Tolley's Satellite Restoration
Let him know what you think, or if there is anything any of you want to know.
Posted in 2004-present | Family Helpers | RESTORATION | disassembly | glass | interior | primer and paint | rust & rust repair | sandblasting | sanding | sheet-metal replacement | link to this page | | Comments (0)
March 17, 2013
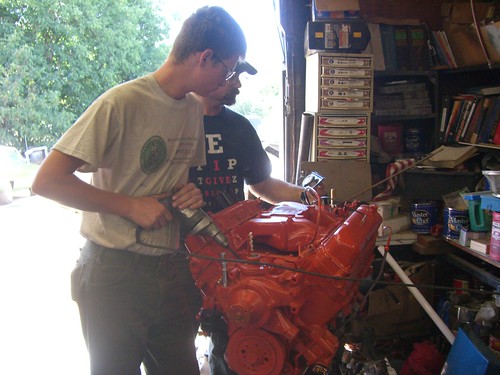
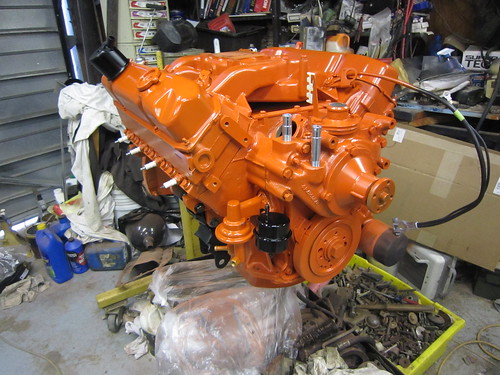
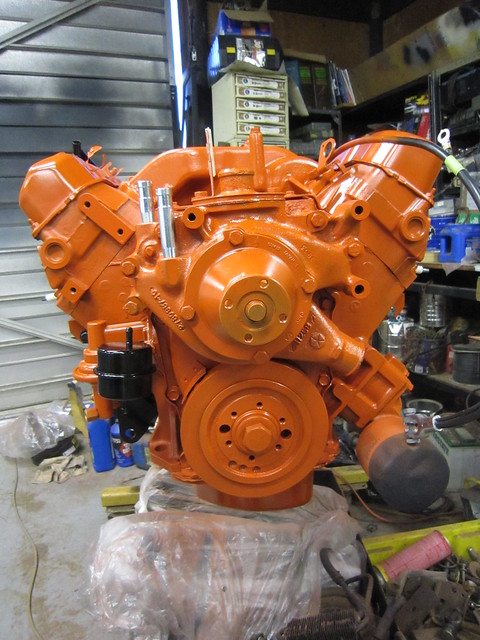
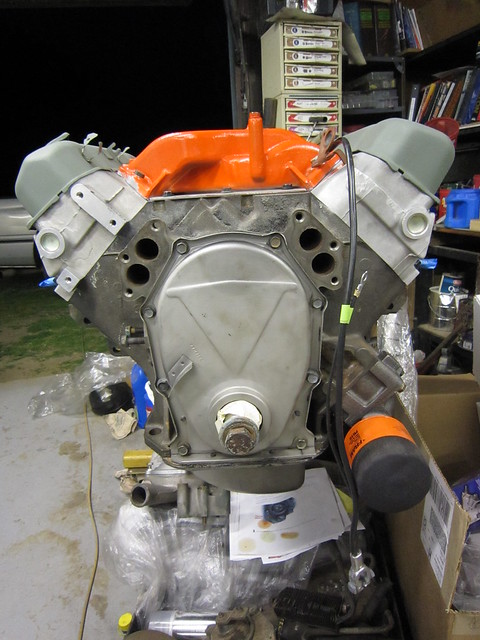
Final engine assembly!
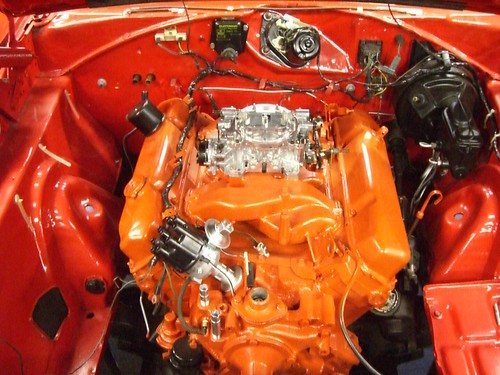
Well, I believe everything is right and torqued and and all the pieces are as correct as my son and I can get them to be, so it was finally time to prime and paint the engine!
I used Duplicolor Chrysler Hemi orange, on top of Duplicolor gray engine primer. then once the orange was done I used Duplicolor clear engine paint on everything to help with durability, and ease of cleaning the engine in the future.
I bought all from a local auto parts store. It took four cans of the orange to get the coverage I was after, but one can of primer, and one can of clear were plenty.
Now I will start cleaning, checking, and painting all my brackets and pulleys Stay tuned!

Posted in 2004-present | Family Helpers | RESTORATION | Reassembly | engine | primer and paint | link to this page | | Comments (0)
March 14, 2013
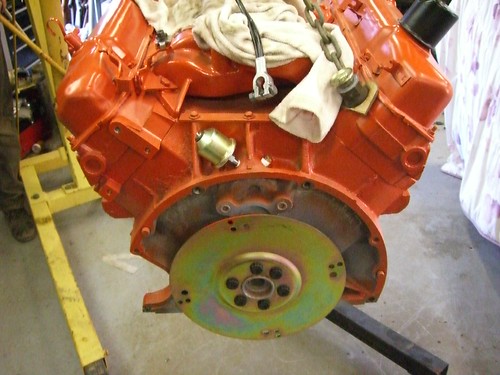
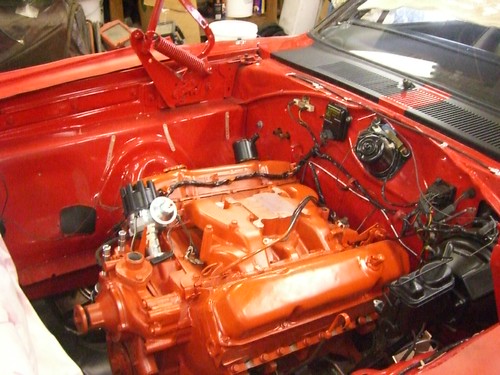
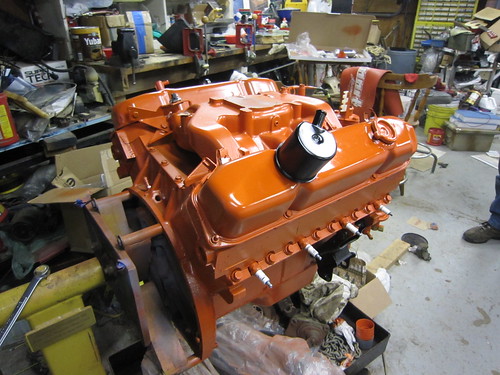
More Engine Assembly
A few more pieces on... Everything is "permanently" attached except the valve covers which are just on for the picture.
Factory windage tray, new 440 source pickup (which I had to heat and bend just a little to clear the windage tray, and have adequate pan clearance still).
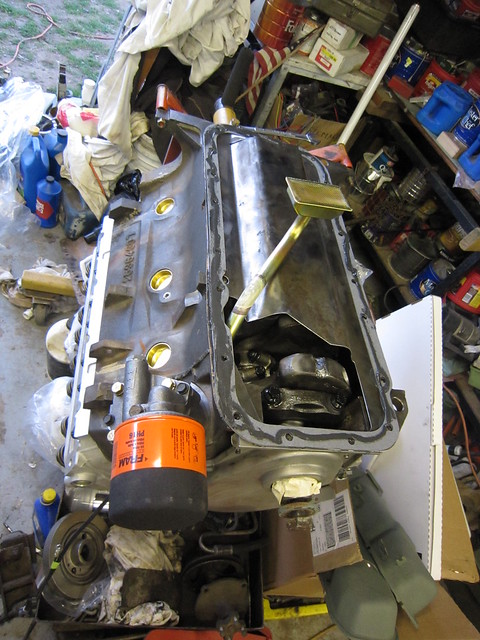
This is the 440 Source 6 Qt. Hemi oil pan for Mopar B/E bodied muscle cars. it has it's own baffles inside too. It looks like a nice pan to me, it fit perfectly and you can't beat the price...
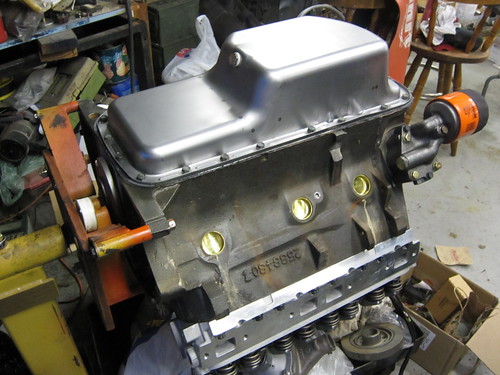
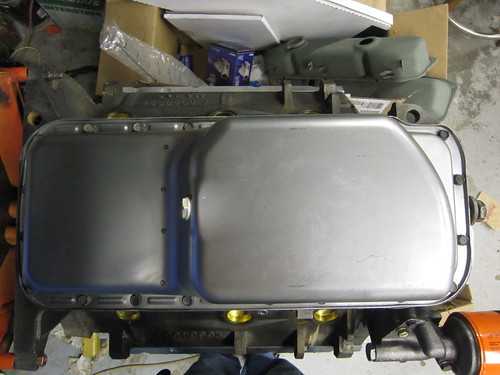
Here it is turned back over, now the intake manifold, and the items that attach to it, as well as the timing chain cover are back home where they belong.
I hope to finish assembly and paint it sometime in the next week... Stay tuned!
Posted in 2004-present | Family Helpers | RESTORATION | Reassembly | engine | link to this page | | Comments (0)
December 14, 2012
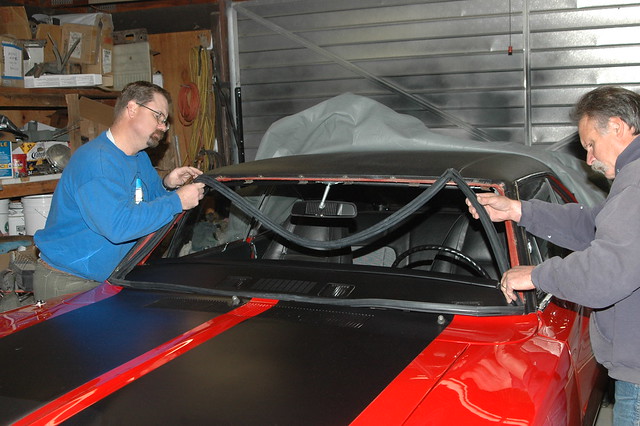
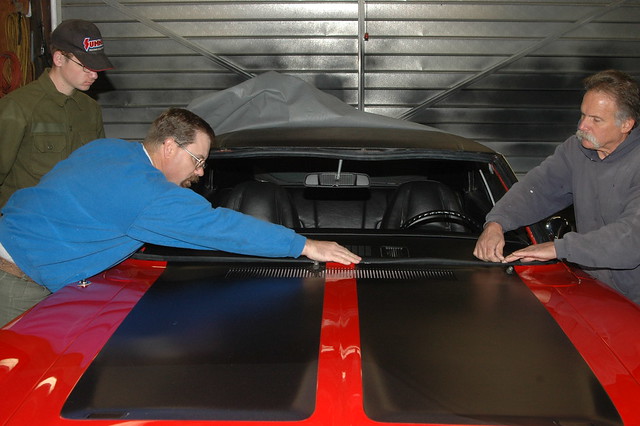
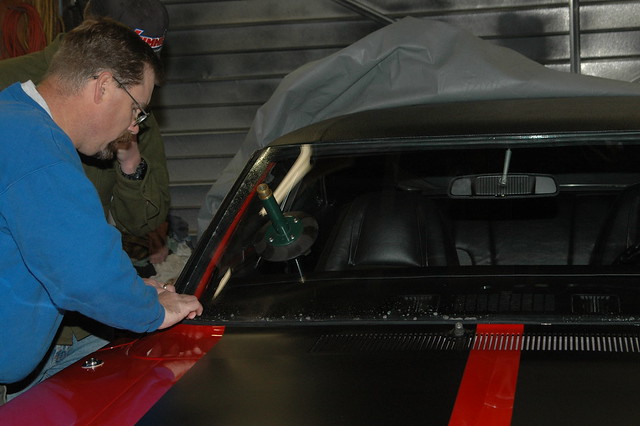
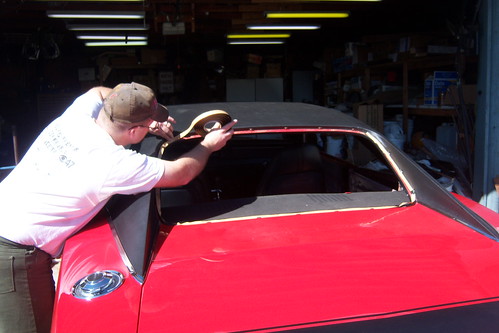
The last glass - Windshield installation
Well, once my electrical systems check was completed successfully I started planning to get my windshield installed.
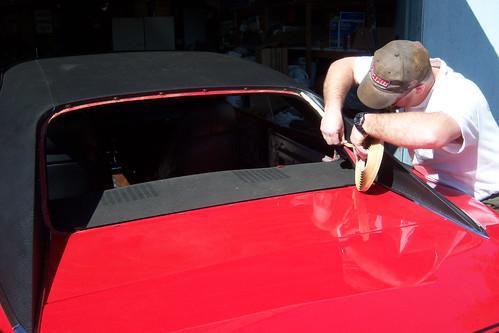
I arranged to once again have a local businessman, George Sgambellone, owner and operator of Mariposa Auto Trim, about installing my windshield (he came to my house and installed my vinyl top and let me help and learn). He was willing to come to my house and put the windshield in, showing me step-by-step how he was doing everything. The job went very smoothly, took an hour, maybe less, and once again, his rates were EXTREMELY reasonable. I have again decided to place an image of his business card here at the end of this post in case any people in my area need this sort of work done. I highly recommend George.
Here are a progression of pictures from the windshield installation. The first image shows George and myself working together putting the gasket in , then the progress forward.
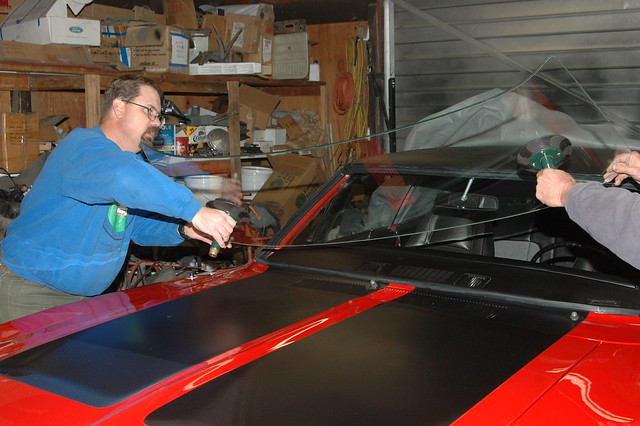
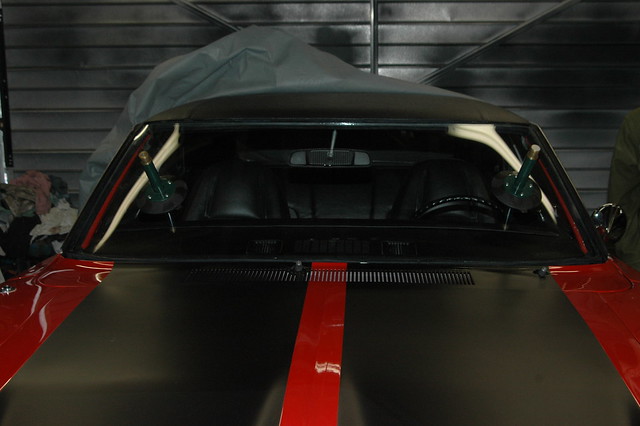
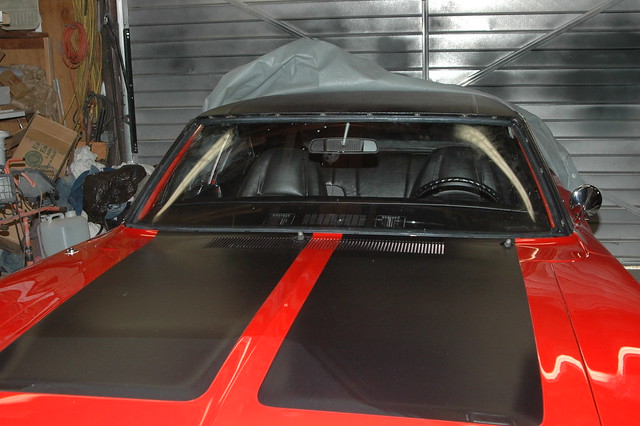
Yay! The glass is complete -The car wlll be much easier to keep clean inside now!
I have begun the process of cleaning and straightening the stainless steel windshield moldings and hope to finish polishing them and get them installed over the next week.
Here is a well deserved plug for George and Mariposa Auto Trim

Posted in 2004-present | Family Helpers | RESTORATION | Reassembly | body | glass | trim | link to this page | | Comments (0)
December 03, 2012
Merry Mopar Christmas 2012
Once again our house (even the garage door) is decorated to celebrate the first coming of our Lord and Savior. As is traditional now we had my son pose for a picture next to the Mopar wreath he made years ago after reading how to do it in Mopar Collector's Guide. He gets taller each year! (He's a little over 6'3" tall now - way taller than me!)
Merry Christmas everyone!
Posted in 2004-present | Family Helpers | link to this page | | Comments (0)
November 08, 2012
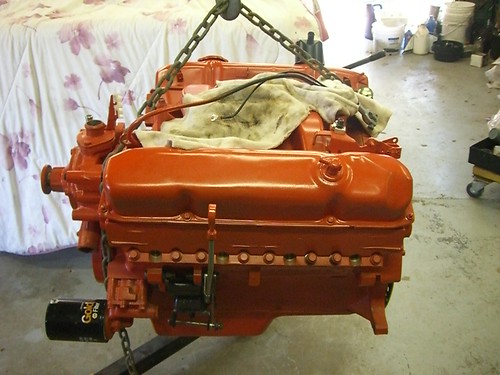
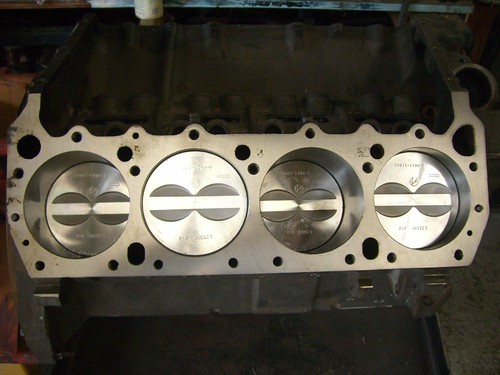
Engine back home!
On Sept 7th, my engine looked like this,
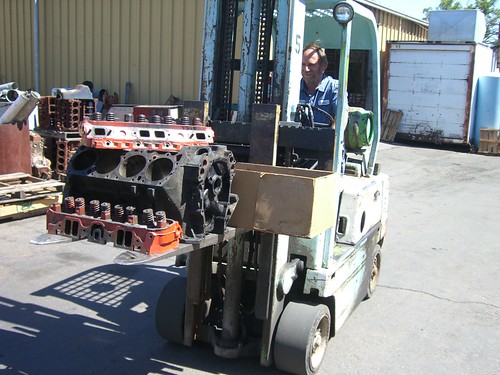
Today it looked like THIS!
The engine shop (Valley Balancing in Ceres, CA) called and told me all that I wanted them to do was done. They did all the machining on the block and heads, balanced everything, assembled the rotating assembly, and wrapped it up for me.
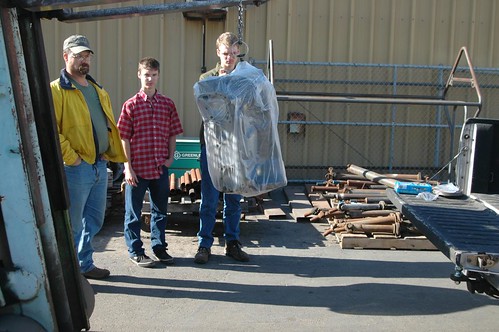
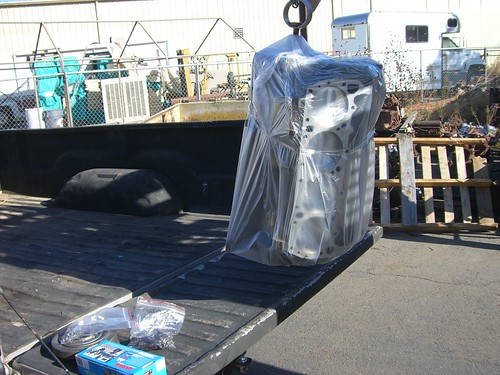
We got it all home safely and put on the engine stand.


Hopefully when I get my tax return I can buy the cam, lifters, push rods, rocker arms, springs etc, the timing chain, oil pump and drive shaft, oil pan, pick-up etc.
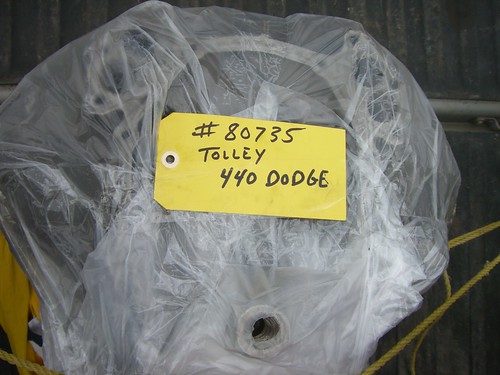
Meanwhile it will stay safe, dry, and bagged in my garage.
Since I have not completed my engine entirely, and some people have had questions, I thought I would list what I have had done thus far.
1. Hot tank block
2. Magnuflux block
3. Touch-up Valve Job - both heads (new stainless valves, hardened exhaust seats, and new guides done recently)
4. True the engine block deck surface
5. Grind crank mains and rods .010
6. Re-size rods
7. Bore & hone cylinders .030 with torque plate
8. Balance all internals
9. R&R cam bearings - new Clevite bearings
10. Tap all bolt holes
11. New ARP rod bolts
12. New ARP main bolts
13. New forged TRW/sealed power pistons
14. New Mahle rings
15. New Clevite main and rod bearings
16. Line bore hone all 5 mains
17. Resurface heads
18. Assemble lower end
19. New main seal and housing
20. Machine heads for positive type valve seals
21. New positive type valve stem seals
22. New oil pump drive bushing
23. Install new brass freeze plugs
The valve stem seal mod was recommended by the shop because it they were worried that I might have run into some issues with my cam. I'd never heard of it, but it wasn't too expensive so I went for it.
Final compression is expected to be between 9.5 an 10:1
Next step is to get the cam and valve train parts together, but that may be waiting until February.
Posted in 2004-present | Family Helpers | Reassembly | engine | link to this page | | Comments (0)
October 30, 2012
Electrical test video
Well, while I wait for the engine to progress further, I have been playing with my wiring harness. After having to fix one wire I had reversed (which caused the passenger front marker lights not to work), everything seems to be going according to plan.
My son and I made a short (2 1/2 minute) video of my Charger's "First light" it was a happy moment!
Here's the link.
70 Charger Electrical system first test
I was using my battery charger to provide the power, but it did the job.
Pardon the mess in the garage. I've had precious little time to work on my Charger, and even less to clean up.
Enjoy!
Posted in 2004-present | Family Helpers | Reassembly | body | link to this page | | Comments (0)
October 01, 2012
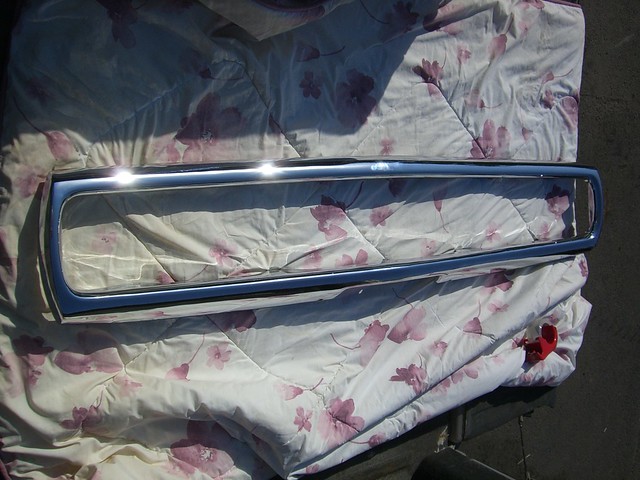
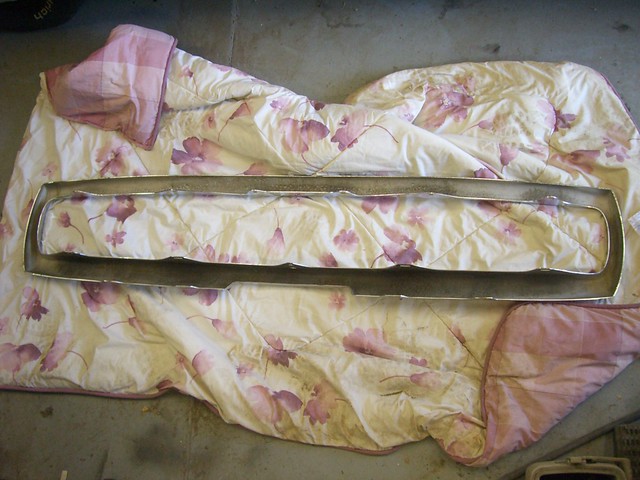
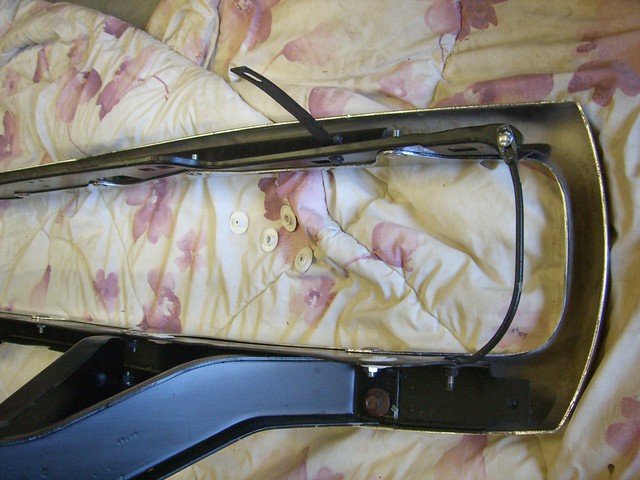
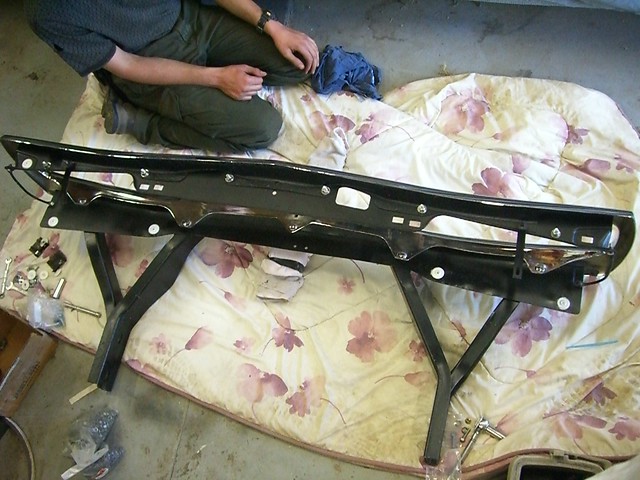
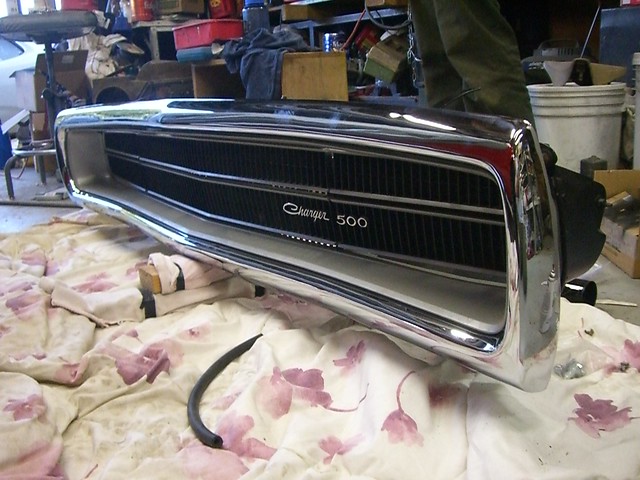
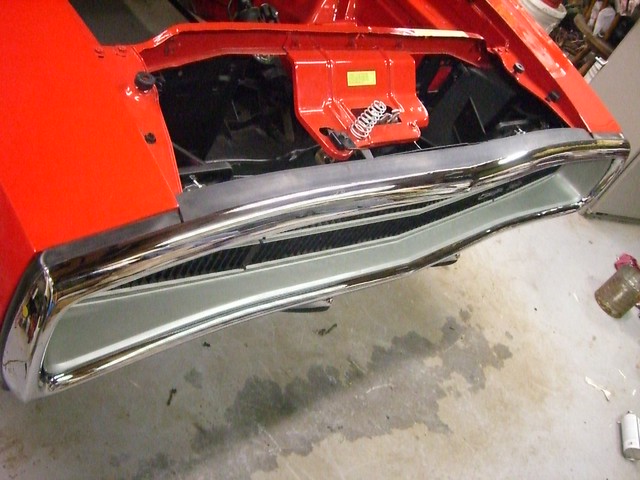
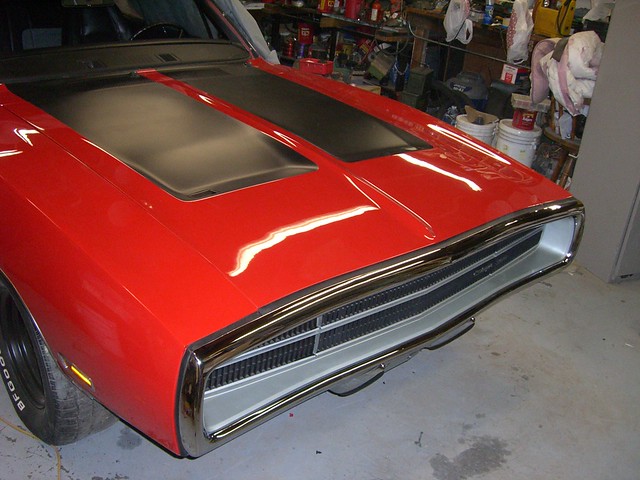
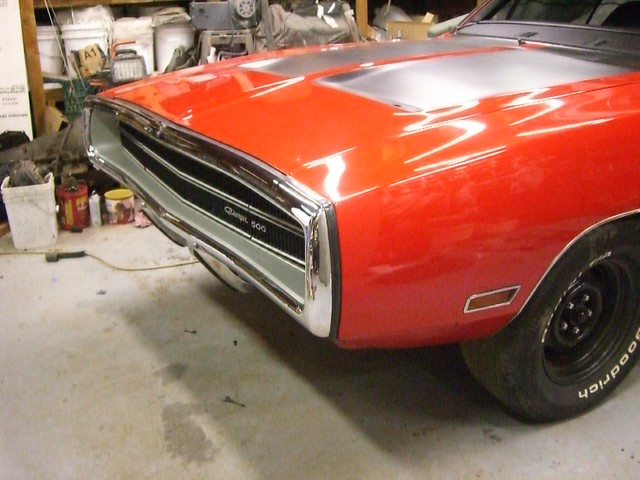
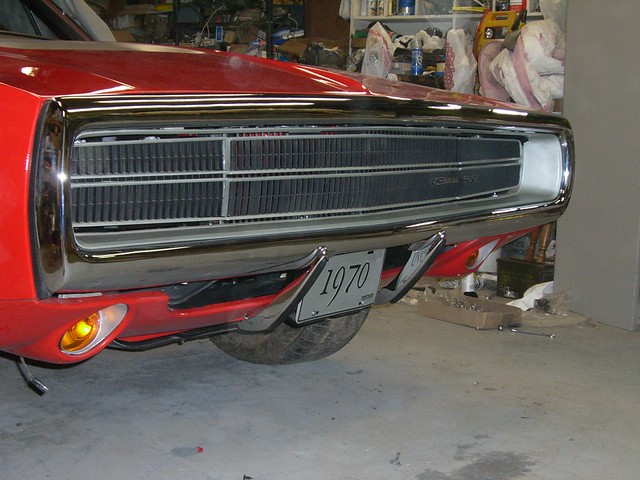
Bumper and Grill where they belong!
At long last, my bumper has returned from the chrome shop, it cost me extra and took 11 months, but I finally got it back, and it does look very good.
Rather than give you carpal tunnel scrolling down through all the pictures, I put together this slide show detailing the assembly and installation sequence.
The grill is a nice original one that I restored some years ago, the bumper and bumpettes are newly re-chromed originals, the rubber strips on the bumperettes are new reproduction ones I bought several years ago.
The images below are generally in order, and clicking on any of them will yield a larger image if you need more detail.


Posted in 2004-present | Family Helpers | Reassembly | body | trim | link to this page | | Comments (0)
July 04, 2012
Meeting a Mentor
While on a family vacation up north this year, I was able to tie-in with some really neat folks. One of them I had wanted to meet for a number of years. My body-work instructor guru, and pal Howard Holland of Howard's Backyard Auto Body. His DVD's are really great at helping a person go from pretty near zero to actually doing a good job, in a fun and informative way.
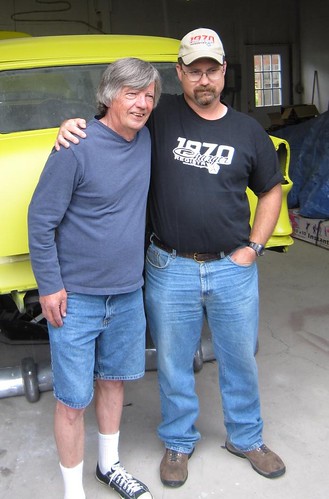
My family and I really enjoyed getting to meet Howard, and take a tour of his shop, his home and band room. Howard is even nicer in person.
We had a lot of fun, thanks Howard!
Posted in 2004-present | Family Helpers | body | primer and paint | sanding | link to this page | | Comments (0)
March 10, 2012
Side glass going in
My vent window glass showed up at my house Wednesday, so this weekend I was able to start putting the side glass in m Charger.
Got the passenger side vent window frame assembled into the re-chromed part. (I did the driver's side some months ago before I knew my glass was badly scratched) Here the pieces are being "peened" together.
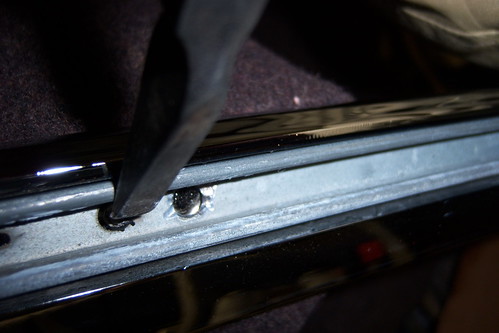
Installed the new vent window glass into the channel pieces using inner tube as the gasket... It trims up very nicely and really holds on the the glass well.
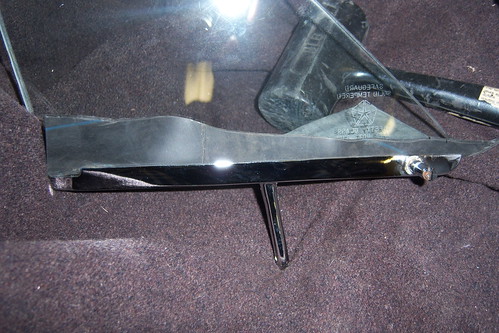
After this the rubber gets trimmed very closely with a new razor blade, and it looks really good. Then the vent windows get installed into the vent window frames. Then it is time to put the rest together.
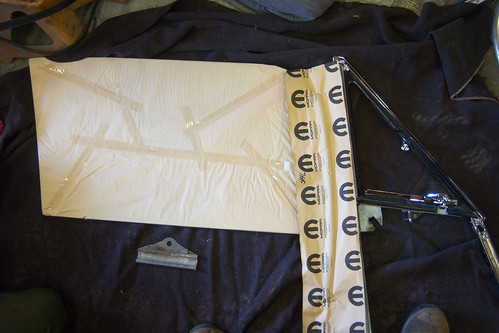
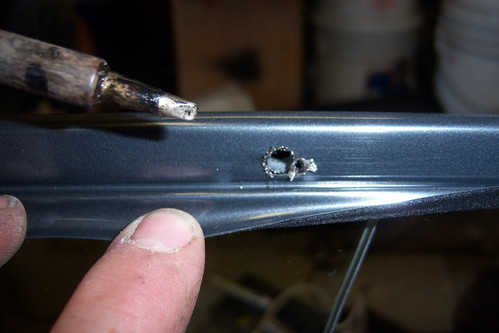
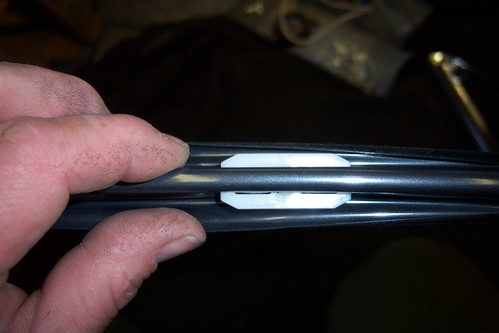
At the front edge of the door glass there is a fairly expensive (like $45 each) piece of molded plastic covered in felt. There are a pair of plastic guides that go at the top and the bottom of the door glass through holes in the door glass. The plastic guides go inside the outer edge of the felt covered plastic. The "problem" is the holes are not in the felt covered plastic. So to make a clean hole that would not "spread" and wreck my new piece, I melted a clean hole in just the right spot with my soldering iron.
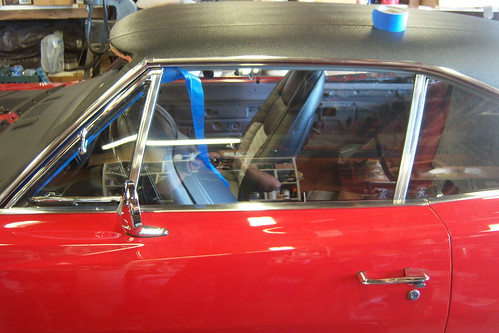
Once these are all together the assembly starts to take shape...
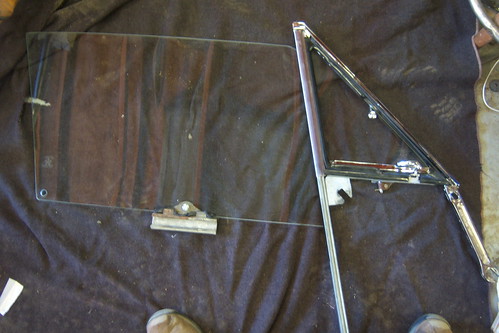
With the help of my son and nephew, we installed the side glass in both doors. After a couple hours of adjustments, I am happy with the results thus far. Once I am totally sure that I do not want to change anything with the adjustments, I will be able to continue the interior re-assembly.

In making the adjustments I found a good summary in the book Project Charger on pages 136-137. If you are restoring a Mopar, especially a Charger, I highly recommend this book.
Posted in 2004-present | Family Helpers | RESTORATION | Reassembly | glass | link to this page | | Comments (0)
March 04, 2012
New glass going in - part 1
Well even though a week ago it was snowing here, today it was in the low 70's and sunny. Great weather for the butyl tape to work, so my son, my nephew and I put the new AMD rear glass in my Charger.
Here I am putting down the 5/16" tape.
Here is the glass in, trim on. The lower passenger side corner really gave me a hard time, had to work the piece over some, but after sufficient frustration leading to prayer, and hard work, I got it on OK. (Thank you Lord!)
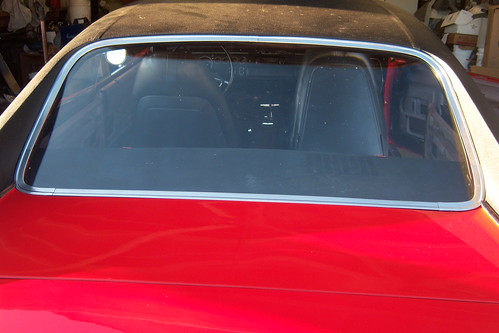
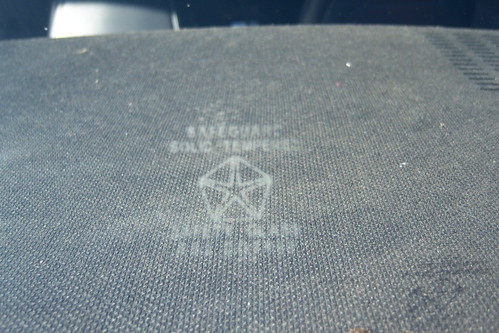
I like that the glass has the Pentastar logo on it, I think that is a nice touch.
I put the new quarter window glass in too. It seems pretty good, but one of the holes (passenger side) seemed to be a little off so I had to modify the bushing that goes around the bolt. The driver's side was fine though. I'll know more about how well it fits when I have the door glass in and try to get everything adjusted. About a week ago Mopar Ed told me that the vent glass (which AMD forgot to put in the box) was on its way. So maybe soon I can get the door glass in.
Keep checking back!
Posted in 2004-present | Family Helpers | RESTORATION | Reassembly | glass | trim | link to this page | | Comments (0)
December 08, 2011
Merry Mopar Christmas 2011
For the last four years, we have put our Mopar wreath on my garage door. Four Christmases ago my son saw how to make one in the Mopar Collector's Guide magazine. He whipped one up in just a few minutes. Now each year we take his picture next to it (and remark at how much taller he has gotten).
Merry Christmas everyone!
Posted in 2004-present | Family Helpers | link to this page | | Comments (0)
November 29, 2010
Merry Mopar Christmas 2010!

Here's my son by the garage door, doing his annual pose next to the Mopar wreath he made after reading the instructions in a 2008 Mopar Collector's Guide. It's been fun watching him get taller and taller in comparison to the wreath each year. This year, he has extra reason to smile, because with my Charger at the paint shop, his 1967 Plymouth Satellite is in the garage, and we are completing some extensive work on it, including changing the driver side door jamb and quarter panel. It is really nice to get to do some of this work with him.
Posted in 2004-present | Family Helpers | link to this page | | Comments (0)
November 29, 2009
A Very Mopar Christmas 2009

Same wreath, same door, same nail, same boy as this picture... just a year later and about five inches taller.
Posted in 2004-present | Family Helpers | link to this page | | Comments (0)
July 29, 2009
Dividing the work, multiplying the fun
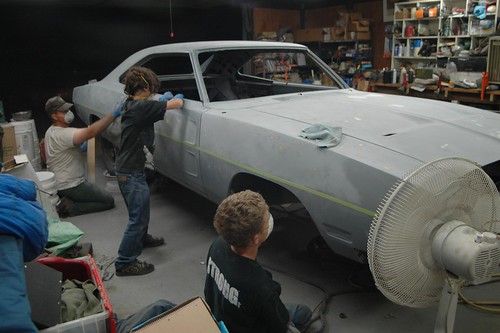
We recently had the treat of having my niece and nephew over at our house for a couple of days. While they were here, my son and I took my nephew out to the garage and showed him how much fun it is to sand on my Charger. The boys both did a really good job, and it was fun to teach them some of the things I've learned the hard way - not to mention it was really great for me to see that side of the car being sanded much more rapidly than when I'm working alone. Thank you, kids!
Posted in 2004-present | Family Helpers | RESTORATION | body | primer and paint | sanding | link to this page | | Comments (0)
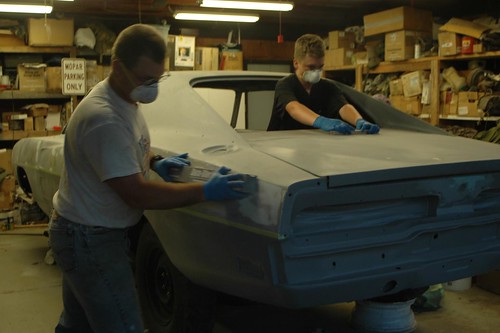
June 03, 2009
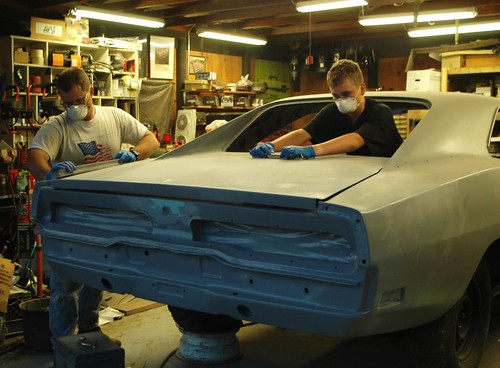
Block Sanding 101
This summer, with our Bible study on vacation until fall, I find myself with some extra time on some evenings. My son and I have embarked on a project to get the block sanding moving at a quicker pace: I am teaching him what I have learned, and he is being a HUGE help. We are having a lot of fun together. We're making rapid progress on completing our first go-round of the car, and I anticipate during August putting on the next layers of 2K primer, and blocking the car out again, but then with 320-grit paper (we are using 150-grit on our first pass).
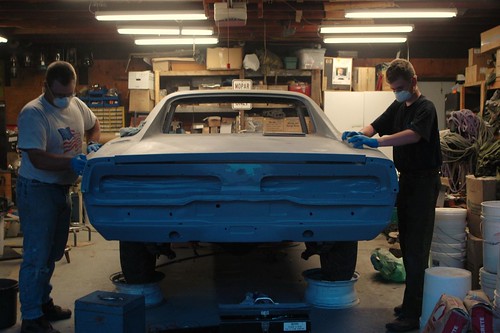
Not only is it wonderful to spend time with my son and get things done, but an added bonus is seeing his growing enthusiasm for about the upcoming restoration of his 1967 Satellite. (You can see a picture of his car here.) Working on my Charger together is excellent training for him, because when we're done with my car, his is next and he will be doing much of the work on that project.
Posted in 2004-present | Family Helpers | RESTORATION | body | primer and paint | sanding | link to this page | | Comments (0)
December 14, 2008
A Very MoPar Christmas!

Mopar Collector's Guide's January 2009 issue had instructions for creating a Mopar-themed wreath. My twelve-year-old son whipped one up for the shop door in about five minutes.
Posted in 2004-present | Family Helpers | link to this page | | Comments (0)