


December 25, 2018
Merry Mopar Christmas 2018
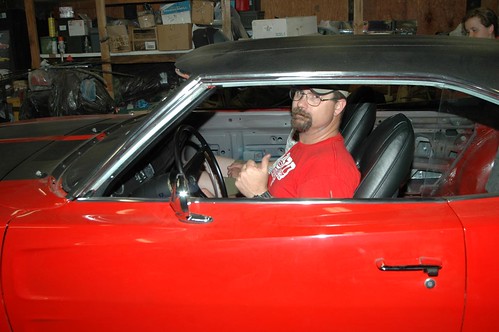
This year for Christmas my wife splurged and bought me a new reproduction replacement Tic-Toc-Tac for my Charger. The original clock never worked since I had owned it, and some time ago the tachometer got erratic and stopped working too. (after almost 50 years who could fault it?)
The new one fit right in, and connected just like the original. While I had the cluster out, I replaced all the instrument panel lights with new LED units I bought online.
The end result was a VAST improvement and it is SO COOL to have both the clock and tachometer working. Merry Christmas everyone!
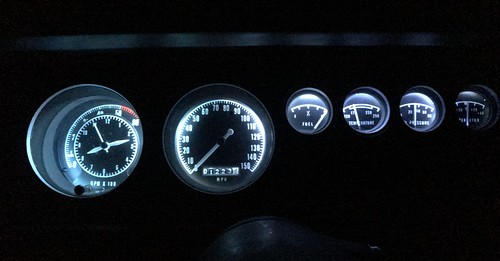
And I must say thanks so much to my lovely wife for such an awesome gift!
Posted in 2004-present | Family Helpers | RESTORATION | interior | wiring | link to this page | | Comments (0)
February 01, 2014
Finally some progress!
Been quite a while since I had any progress to report. I would not be surprised if some of you may have thought I sold my Charger or something!
I had to work out some issues with some items I bought back in December, and then once I did get all that ironed out, it has been hard finding time when I also had the energy to work on my Charger.
But seeing the progress a buddy over at the 1970 Charger Registry has been making on his Charger recently prompted me to get my self out into the garage.
This same buddy from the 1970 Charger Registry very graciously hooked my up with a fan clutch and I got my fan powder coated. I bought a kit from 440 Source to get all the front end engine stuff at once back in December. I have been slowly accumulating things like 11/32 vacuum / PVC line, positive battery cable, reproduction spark plug wires, power steering pressure and return lines and other stuff.
So today I put it all together. I put the power steering together with the cooler, all the lines etc. Put the alternator on and hooked up the wiring, mounted the pulleys, belts and fan. Ran the new plug wires and PVC/ booster lines.
This is where I am for now... (Waiting for a radiator to fall from the heavens!)
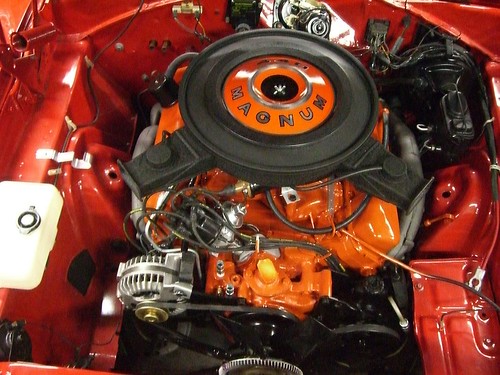
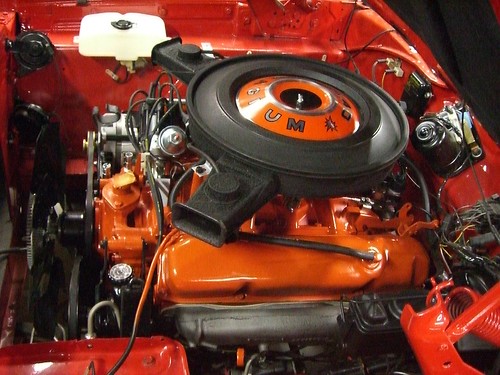
I might have time to poke around under the car tomorrow, Starter, drive line, pinion snubber, and rubber fuel line segments are ready to go in. We'll see....
Posted in 2004-present | Reassembly | engine | wiring | link to this page | | Comments (0)
February 03, 2012
It's all in the details
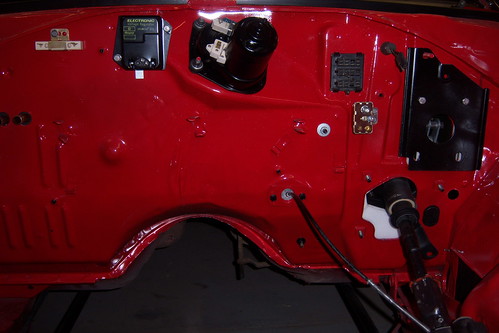
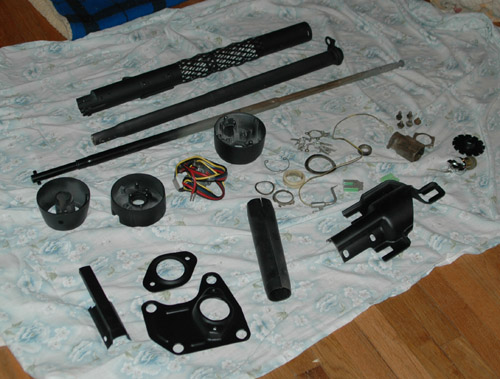
Well, while I am waiting for my glass to arrive (should be not more than a couple of weeks now), I have been keeping busy assembling a collection of fairly "correct" appointments for my Charger's firewall. I got a great deal on a Mopar reproduction voltage regulator, I reconditioned an original type ballast resistor I had, I did the same with the starter solenoid, and restored my windshield washer nozzles and hoses (installed after this picture was taken) I located original type bolts for each and put them on for this picture.
Nothing too exciting, but still, some progress.
Posted in 2004-present | Reassembly | body | wiring | link to this page | | Comments (2)
November 08, 2011
Headlight door motor ready
Now that I am getting closer to installing my grille, I blasted, restored, and rebuilt my headlight door motor. The gear, and internal plastic parts are all new from The Headlight Motor Man (Great stuff by the way). I appears to work very well!
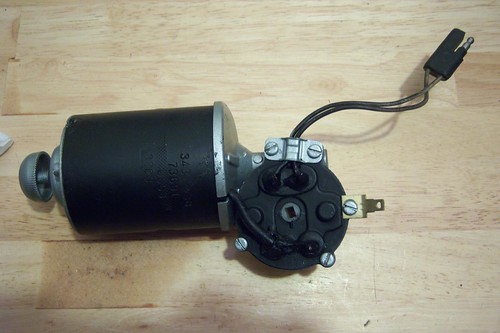
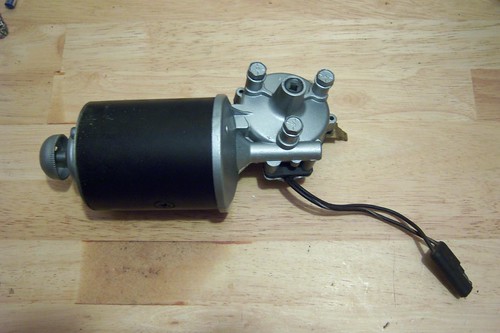
Hopefully soon I'll have my refurbished motor back in its natural environment!
Posted in 2004-present | Reassembly | body | trim | wiring | link to this page | | Comments (1)
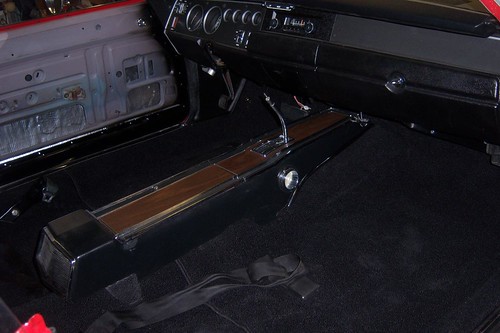
August 23, 2011
Carpet, console, and front seats
Well, Finally getting some time to start putting a few more things together.
I got the tailight and dash wiring all in and connected. Using my little "jump-start" box, I was able to make all the lights tun on, which was fun and gratifying!
With the wiring in I was able to proceed with completing the installation of sound deadener on the floor pan, and move on to the carpet. With help from my buddies at the 70 Charger Registry forum, the carpet install went pretty smoothly.
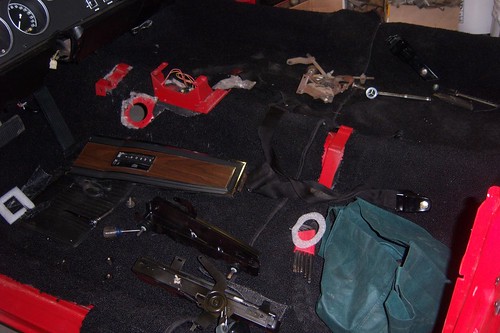
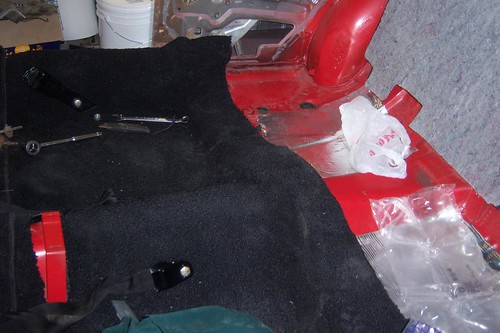
Here's the carpet in, with the console in position.
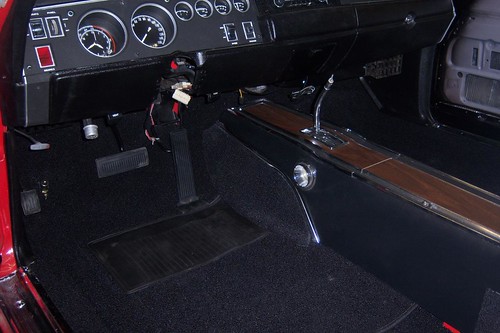
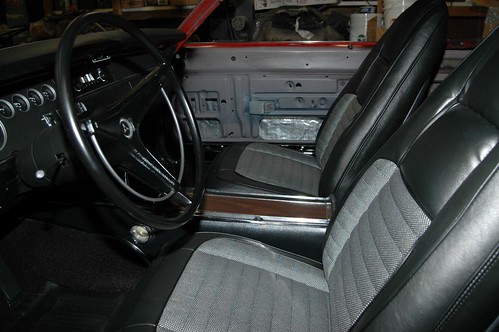
Before installing the driver's side front seat, I installed the steering column and steering wheel, since having the seat out made rolling around on the floor of the Charger much easier.
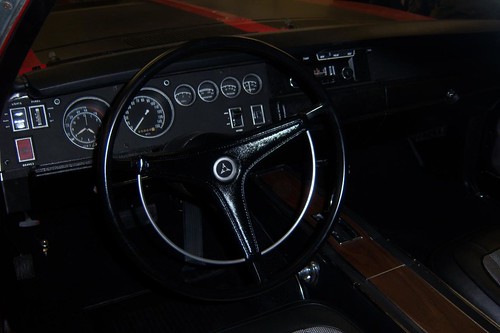
Steering column, and wheel are in and connected. Front seats are in! I have not sat in my Charger since 2004, happy days!
The rear seat is waiting until all my side glass is in, which is waiting on rechroming my vent window frame parts (hopefully in October) Once all the glass is in, and is adjusted correctly, then the door panels will go on, and the rear seat will go in.
Posted in 2004-present | RESTORATION | Reassembly | interior | trim | wiring | link to this page | | Comments (0)
June 10, 2011
Filling in holes
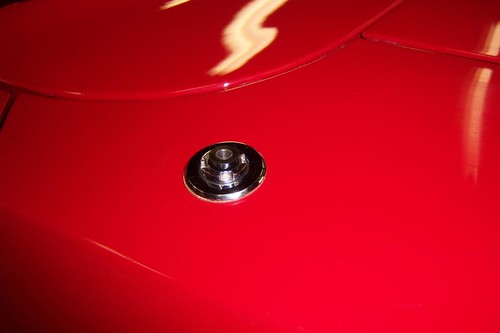
Recently my family and I attended the Fremont Mopar Alley Mopar Rally car show, and I met a really nice guy and his wife who own a beautiful '69 Charger. While talking with them, I found out that they had some leftovers from restoring their car. One of those items was a NOS antenna base, nut, and bezel. He made me an extremely good deal, so I purchased it. My son, my nephew and I installed it in the car and routed the antenna coax. It looks really good, just like it's supposed to, and gives a finished look to the fender.
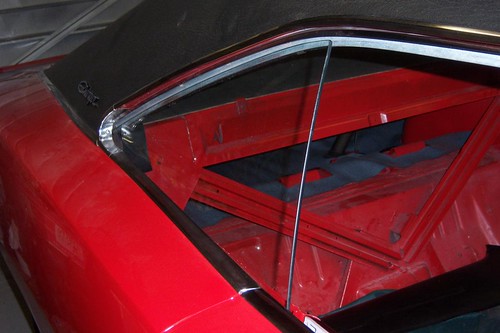
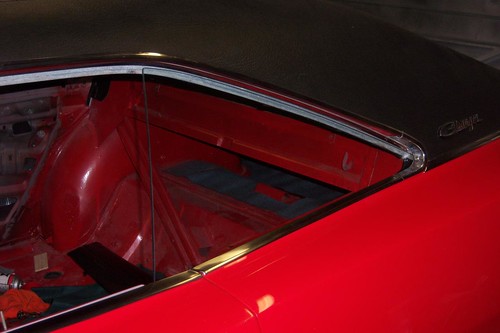
My friend and regular parts supplier, Mopar Ed, gave me an excellent deal on a pair of used quarter windows that were in considerably better shape than my originals. My son and I had previously installed all the hardware, so it was a simple matter for my nephew Jordan and I to install and adjust the windows themselves. It sure is fun, seeing some of the big holes start to be filled on my Charger.
Posted in 2004-present | RESTORATION | Reassembly | body | glass | wiring | link to this page | | Comments (0)
June 23, 2007
Steering column restored
One of the things I've looked forward to for a long time was the disassembly, thorough cleaning, and reassembly of my steering column components. Many of these were sandblasted, as noted in a previous entry. I also used a brand-new ignition switch and a brand-new ignition lock cylinder and keys (keyed to match the new door locks I bought). My turn-signal switch is a used one, but it is not burned, it's in good shape, and it still has the automatic cancelling tabs intact.

Now that it has been restored and each component has been tested, I will package this away, waiting for that wonderful day when my car has been painted and reassembly is underway.
Posted in 2004-present | RESTORATION | interior | wiring | link to this page | | Comments (3)
May 25, 2005
Rebuilding the Wiring Harness
One major source of heartburn when I drove my Charger all those years was my temperamental electrical system. Once the wiring was all removed and I could inspect it properly, it was a mystery that the car had worked at all without burning itself to the ground. All of the bad splices, bad connections, improperly done repairs, and modifications made this wiring harness a real challenge to restore. My future enjoyment would require a fully functional, safe, and reliable electrical system. Armed with over a dozen salvaged Mopar harnesses and a reproduction '70 Charger factory service manual, I replaced every bad wire, connector, bulb, and switch with good originals. Now the entire harness, headlights to tail lights, has been rebuilt to match the diagrams in the manual, and is ready to be stored.
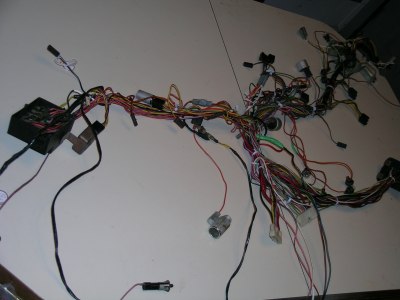
This is the dash harness, the most extensive part of the wiring harness. I have rebuilt it, and it is ready for re-wrapping.
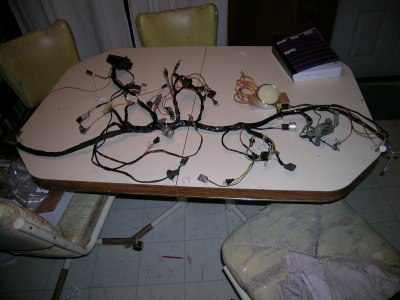
The dash harness, now re-wrapped, replicating factory routing of all wires, is now ready to be stored until reinstallation at a future time.
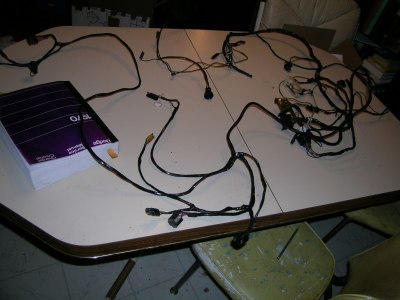
The engine compartment harness, with Mopar electronic ignition conversion seamlessly grafted in for a factory appearance, all re-wrapped and ready for storage. The addition of electronic ignition is the only electrical deviation from stock.
--------
Posted in 2004-present | RESTORATION | wiring | link to this page | | Comments (1)
April 10, 2004
After the glass, the

After the glass, the soft parts of the interior were removed and stored. The wiring harnesses were carefully removed. I will rebuild these carefully in order to insure that there will be no electrical problems when the car is reassembled.
--------
Posted in 2004-present | RESTORATION | disassembly | wiring | link to this page | | Comments (0)