


June 08, 2014
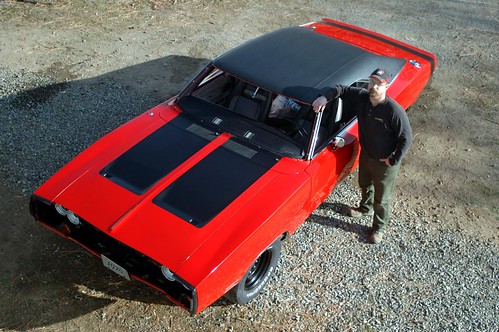
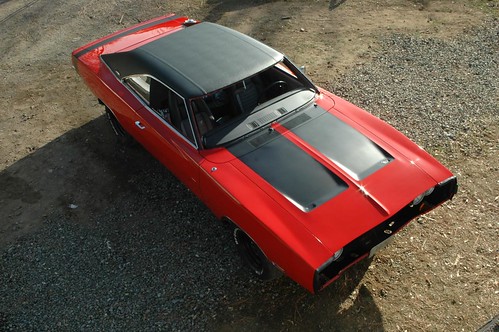
DRIVING my Charger out into the sun!
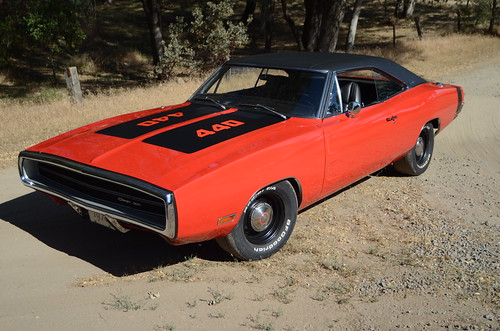
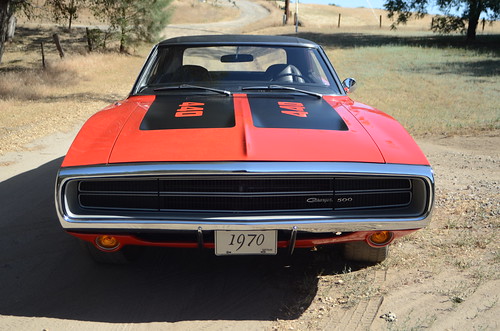
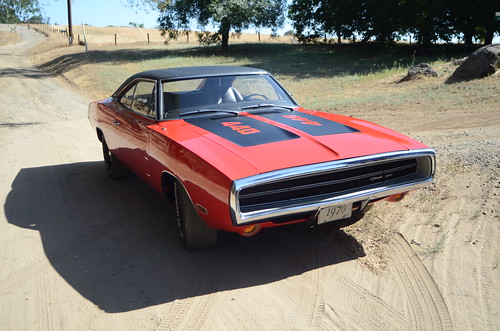
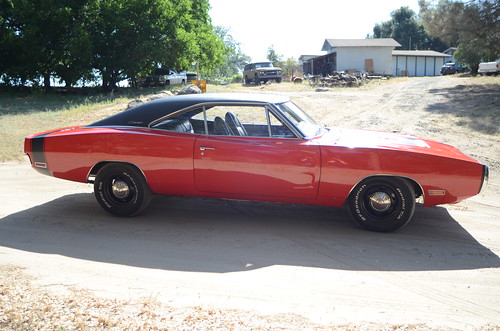
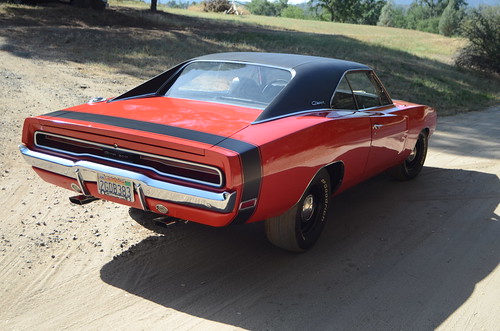
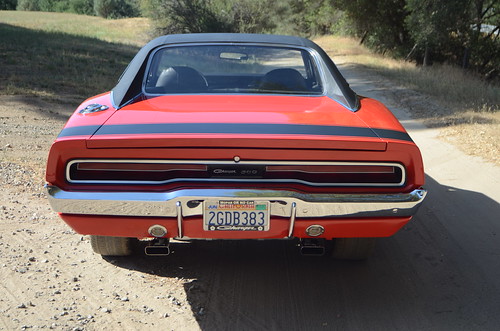
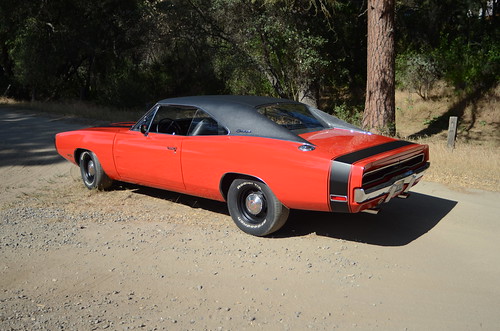
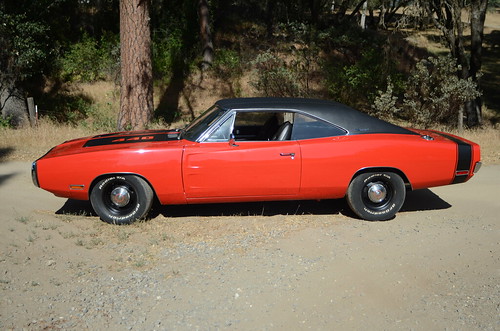
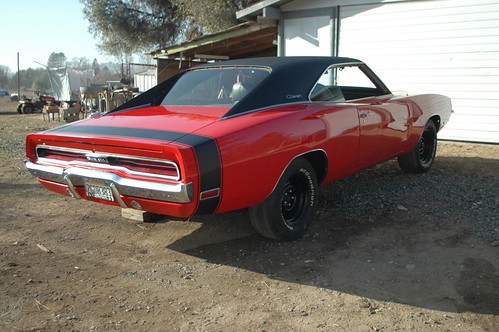
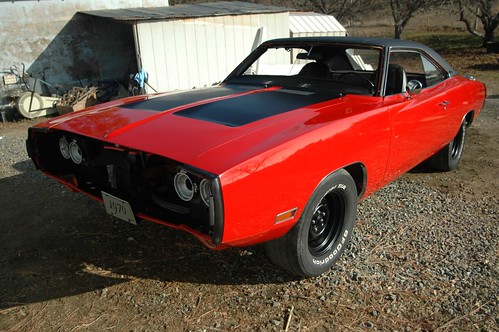
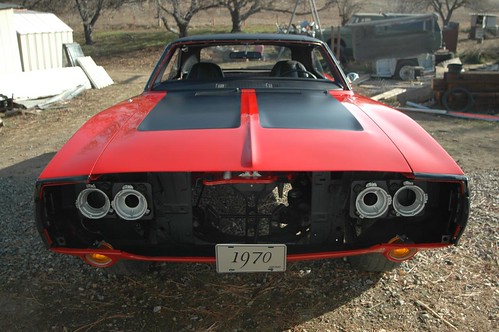
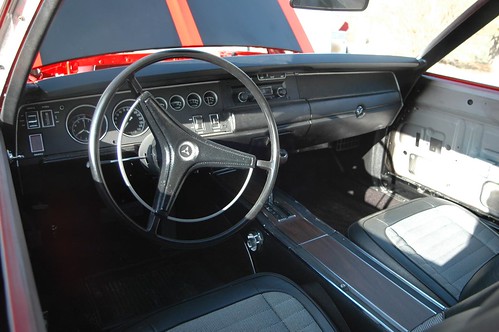
For the first time in more than 10 years I drove my Charger today. It still needs shocks, tires, insurance etc so I did not go far, but far enough to get my Charger out into the sun for a round of nice pictures. Thanks to my wife for taking the video and photos, and my son for spotting for me.
Into the sunshine!
Down the driveway
If you like, join me on a quick walk around my Charger.
The to-do list is getting shorter and shorter, and my Charger is getting closer to being ready to take to it's first car show, probably in October.
Posted in 2004-present | Family Helpers | RESTORATION | Reassembly | body | engine | glass | suspension, brakes, tires, and wheels | link to this page | | Comments (0)
March 10, 2014
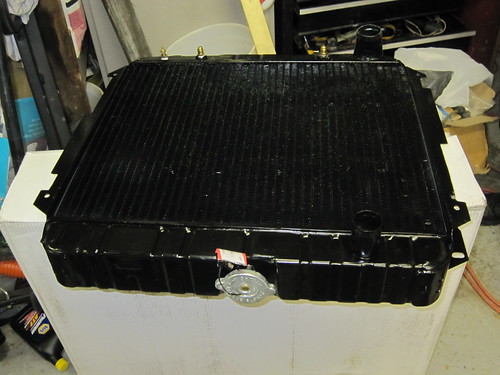
Radiator is in !
Yay! a big piece of the puzzle went into place today!
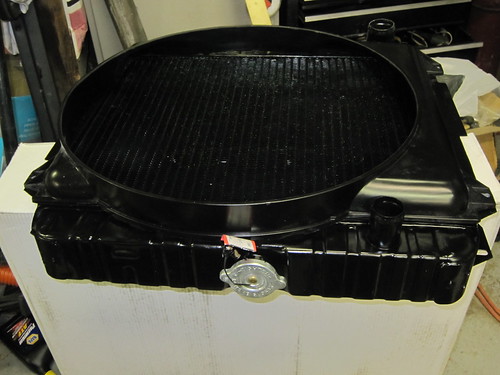
I got my radiator! It looks great, it fit perfectly, including the shroud. I ordered a U.S. Radiators brand 22" 4 core high efficiency copper / brass radiator with OEM style shroud. I bought it from Mopar Ed at themoparshop.com. It dropped right in the shroud fit perfectly and there was plenty of clearance between the fan & shroud, and the fan clutch and radiator face.
With the shroud
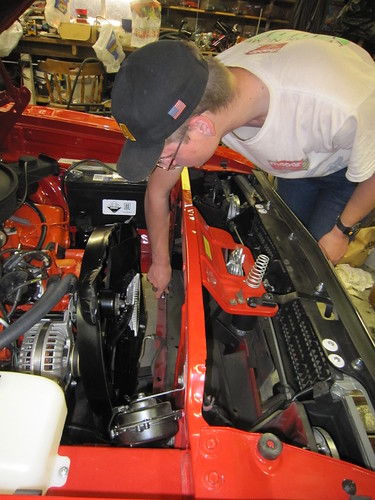
I had my son help me so that nothing went wrong.
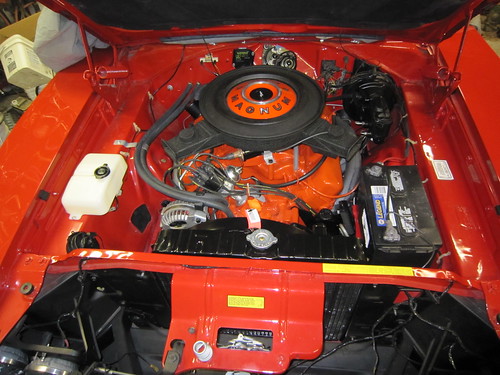
In place and topped off with a reproduction style 16lb radiator cap.

Posted in 2004-present | Family Helpers | Reassembly | engine | link to this page | | Comments (0)
February 19, 2014
IT IS ALIVE!!!!
At long last my Charger has roared to life!
I do not yet have a radiator, and my exhaust is still just the manifolds, so I had to keep it short, but man was it nice!
Hurray!!!
Posted in 2004-present | Family Helpers | Reassembly | engine | link to this page | | Comments (0)
February 01, 2014
Finally some progress!
Been quite a while since I had any progress to report. I would not be surprised if some of you may have thought I sold my Charger or something!
I had to work out some issues with some items I bought back in December, and then once I did get all that ironed out, it has been hard finding time when I also had the energy to work on my Charger.
But seeing the progress a buddy over at the 1970 Charger Registry has been making on his Charger recently prompted me to get my self out into the garage.
This same buddy from the 1970 Charger Registry very graciously hooked my up with a fan clutch and I got my fan powder coated. I bought a kit from 440 Source to get all the front end engine stuff at once back in December. I have been slowly accumulating things like 11/32 vacuum / PVC line, positive battery cable, reproduction spark plug wires, power steering pressure and return lines and other stuff.
So today I put it all together. I put the power steering together with the cooler, all the lines etc. Put the alternator on and hooked up the wiring, mounted the pulleys, belts and fan. Ran the new plug wires and PVC/ booster lines.
This is where I am for now... (Waiting for a radiator to fall from the heavens!)
I might have time to poke around under the car tomorrow, Starter, drive line, pinion snubber, and rubber fuel line segments are ready to go in. We'll see....
Posted in 2004-present | Reassembly | engine | wiring | link to this page | | Comments (0)
October 15, 2013
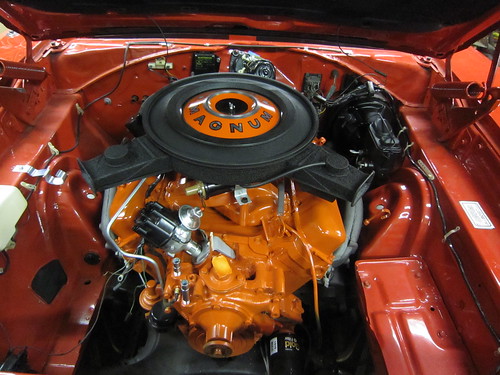
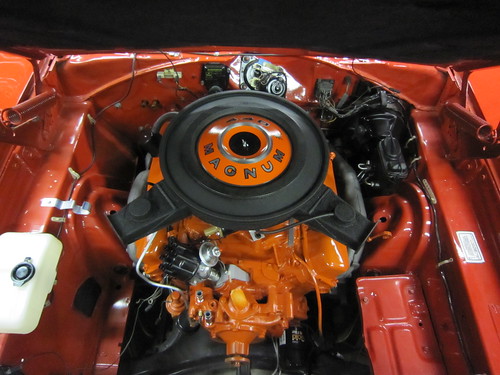
Exhaust manifolds are on!
I had some time this evening and put the manifolds and spark plug wire holders on. Now I can start sorting out the pulleys and brackets for the front, and get the drive line ready to go in.
Everything came out very nicely I think.
Posted in 2004-present | RESTORATION | Reassembly | engine | link to this page | | Comments (0)
October 09, 2013
H.P. manifolds with cermaic coating
So I got these back from the blasting and coating shop today. They did very fast and apparently very good work. I highly recommend these guys Eastwood Sandblasting and Powder Coating.
They used a no glass ceramic coating that appears to very nicely mimic clean cast iron. It is supposed to easily withstand 1,800 degrees.
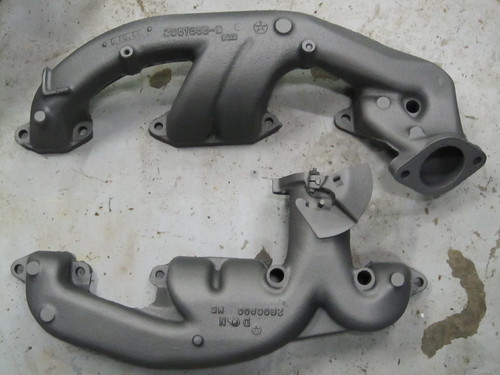
Now want to get them on my Charger's engine.
Check back soon for pictures of them installed.
Posted in 2004-present | Reassembly | engine | sandblasting | link to this page | | Comments (0)
October 03, 2013
Exhaust manifolds
Well, finally a long awaited piece of the puzzle has now been procured. I have been wanting a correct style set of HP exhaust manifolds for a long - long time. Mopar Ed of The Mopar Shop.com (AKA E-Body Parts & Restoration) helped me out big time.
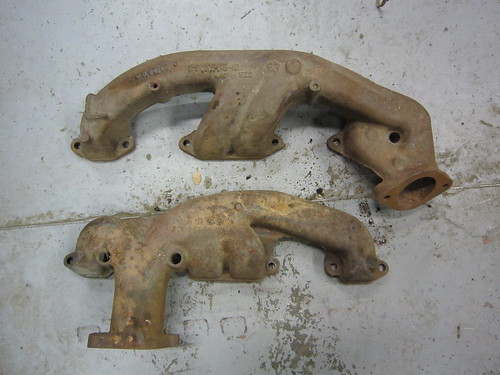
I will be getting these ceramic coated in a cast iron color within the next week, then they will go on. The coating is supposedly guaranteed to not change at all at 1,800 degrees.
Check back soon!
Posted in 2004-present | Reassembly | engine | link to this page | | Comments (0)
September 12, 2013
Problem solved
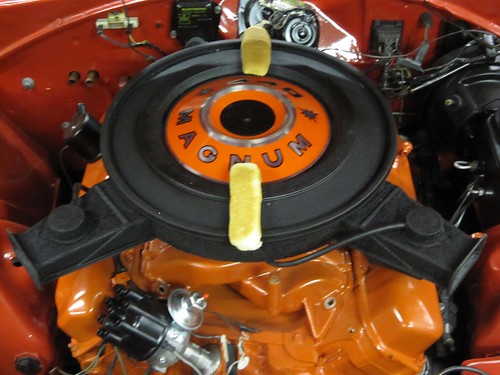
OK, so after some other work my son and I had to do, I decided it was time to pull the CH4B and lay it right next to a stock '69 intake I had.
There was not much difference! (about what I had read online, less than 1/2"). So I tried the stock manifold with my carburetor and air cleaner, the hood was still hitting something, so then out comes the hood insulation pad. Still hitting something.
Then I started searching for something that would indicate to me exactly where the contact was. I looked for some soft clay, but the clay my daughter has is really stiff. My son tries pieces of blue masking tape sticky side up, but no go. Then I get a great idea. Hot-Dog buns! They will leave a record of being smashed cut etc and not make a big mess. So I put hot dog buns on the air cleaner housing, I try to close the hood, still there is contact somewhere, then I try the same thing with the carburetor on, but no air cleaner, going nice and slow, I am still coming in contact with something... My son then spots it looking through the grill, the hood is barely contacting the wiper motor in the back. We make some adjustments to the hood (VERY slight I must say) and then everything is OK. Put the air cleaner back on, the hood closes and no squished buns.
Next, I put the aluminum intake back on, carburetor, air cleaner hot dog buns, the hood closes no squished buns.
So, all along a tiny hood misalignment was causing some very minor contact with the wiper motor. When the air cleaner was off and I knew I had tons of room I'd just shut the hood quickly and never noticed the issue. Then when I was being super cautious I would notice the contact and stop.
It never was the air cleaner! So now I'll change the intake gasket, bolt the CH4B back on, and move forward again. Happy ending to a weird story! Thank you Lord!
I was finally able to add a picture this is what our troubleshooting looked like!
Stay tuned!
Posted in 2004-present | Family Helpers | RESTORATION | Reassembly | engine | link to this page | | Comments (0)
August 17, 2013
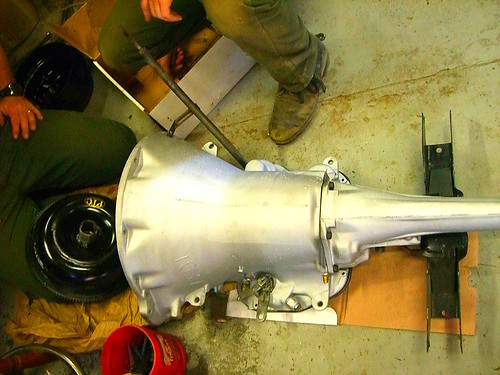
Drive train day!
OK, I just got back in the house (7 PM ) after being in the garage since about 9 AM. My son, one of his friends and I managed to get a few things done on my Charger.
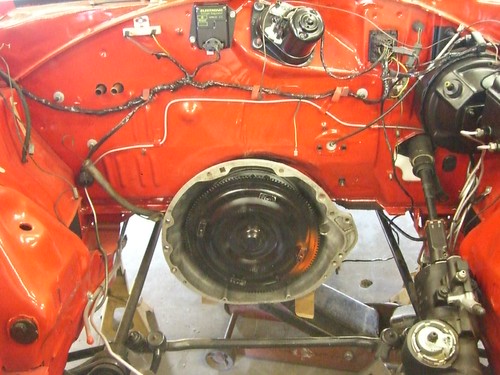
First we rolled the Charger back, removed the hood, jacked it up, and put the transmission in.
Next we filled the engine with 6 qts of oil and some zinc additive, then we primed the oiling system.
Next we grabbed the engine, got it off the stand, and put the flex-plate on.
Then it was time to put the engine in! YAY!

Engine in, and bolted to the transmission, NOTE here, we dropped the transmission back a bit to help get the engine on its mounts.
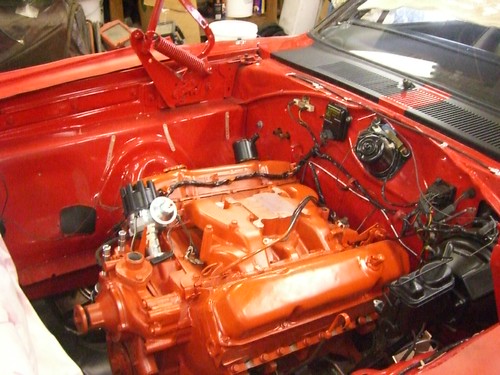
I spent a while hooking things up underneath, installing the transmission cooler lines, flex plate bolts etc.
Then I installed the new distributor, routed some of the wires, and put the new carburetor on. The carburetor is an 800 CFM Edelbrock Thunder AVS series with electric choke option.
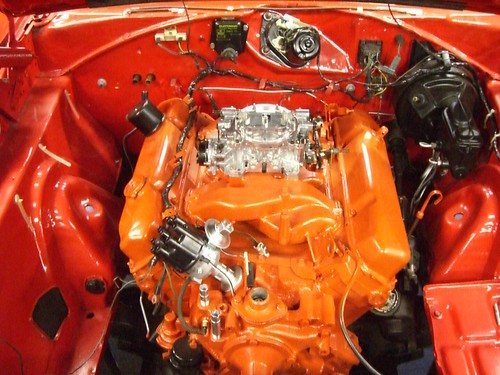
Then the final touch. (- or so I thought)
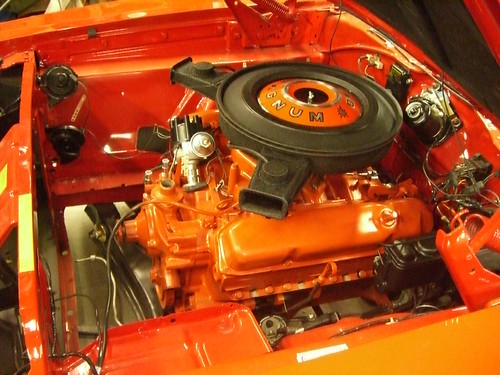
The problem is, it seems the CH4B may be too tall (something is too tall anyhow) I thought it was supposed to be fine (everything I read online said so...) but I can't close the hood because it contacts the air cleaner. At this point, I am thinking I may have to go back to a stock cast iron intake. However I am going to study the problem, and see if I can find an answer first...
Great day, but it ended a bit differently than I expected. I am very thankful that my prayers were answered, and we did the entire job without scratching any part of the Charger, and that we were able to get the hood alignment perfect again when we put it back on. Thank you Jesus!
Stay tuned!
Posted in 2004-present | Family Helpers | RESTORATION | Reassembly | engine | link to this page | | Comments (0)
August 16, 2013
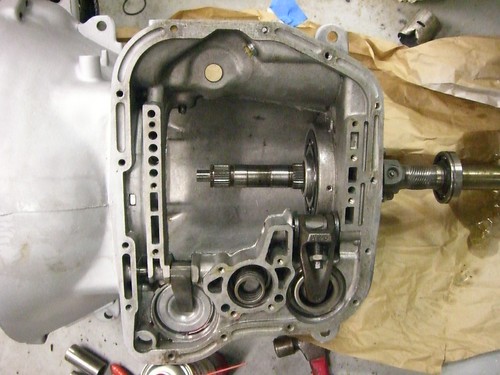
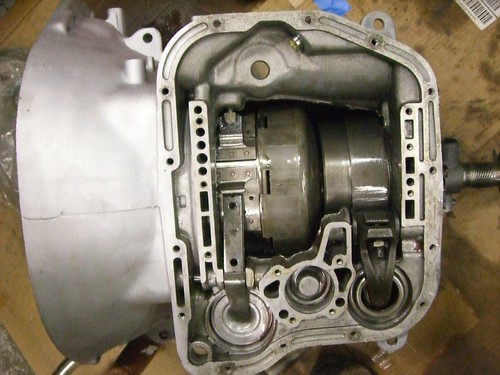
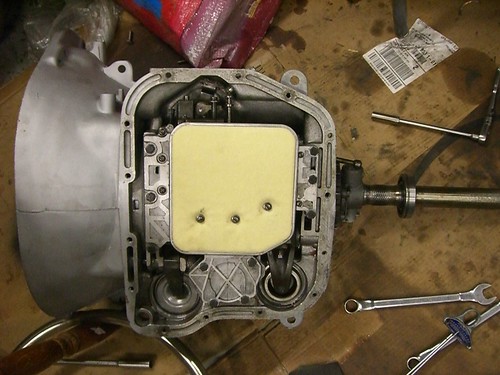
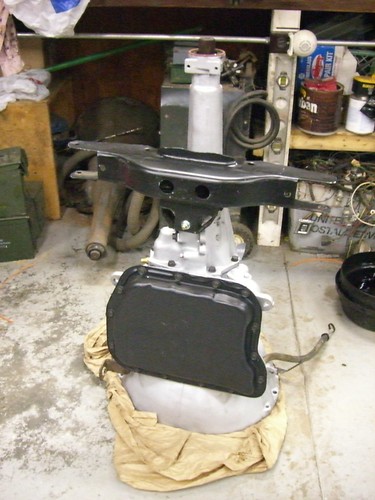
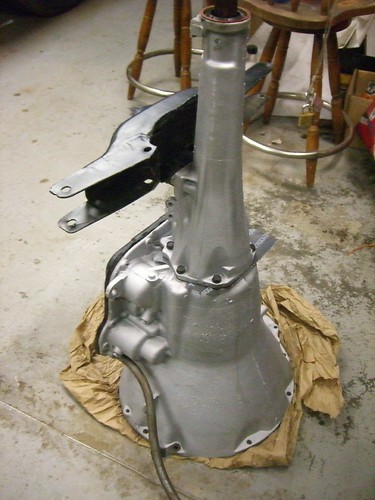
727 Transmission overhaul
Tonight my son and I completed a project we began a week ago (I had to wait for some parts to arrive)
We overhauled the 727 transmission for my Charger. I used red Alto clutches, with Kolene steels, new red Alto front band and a Kevlar rear band, a street Hemi torque converter from PTC (2,800-3,000 stall) and all new seals and bushings etc. And a new poly-loc rear mount.
Tomorrow should be a great day, the drive train should go back in my Charger!
Posted in 2004-present | Family Helpers | RESTORATION | Reassembly | engine | link to this page | | Comments (0)
July 28, 2013
Father's Day present and parts gathering
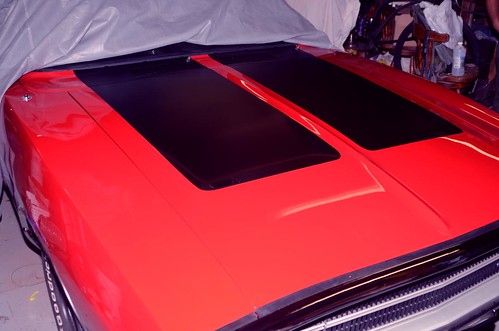
This year for Father's day my family bought me a set of tomato red 440 call outs for the hood of my Charger from Performance Car Graphics- thank you guys!
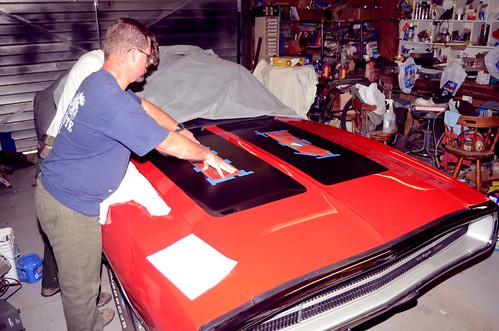
Finally had some time, and my son and I went out to put them on. It actually went really well, we spent a few moments cleaning the hood, and measuring everything. Sometimes you see these numbers (or the HEMI letters) put off to the side of the hood more. The correct placement is centered. The fine folks at Performance Car Graphics included a print of the factory guide for placement. It seems obscure at first, but after carefully studying it, we were confident about the placement of my numbers.
Here was the hood just prior to installation
Here are my son and I completing the layout process, which again was easy once we knew where they were supposed to go.

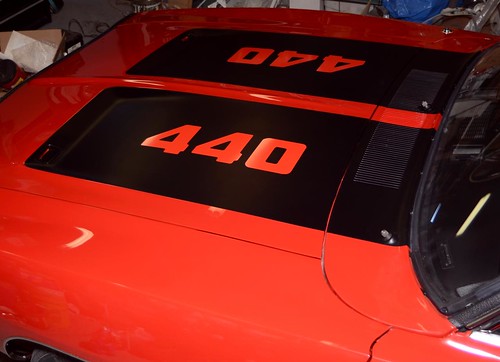
And here is the final product. It took less than an hour start to finish. It was fun, easy, and I think it looks great!

Also, I finally have all the pieces to rebuild my 727 transmission, the torque converter has been ordered from Performance Torque Converters (PTC) It is their copy of the HD 11' street Hemi converter with a stall of about 2,800 - 3,000 RPM., My 800 CFM Edelbrock Thunder AVS carburator should be headed this way tomorrow, I have the sending units for the engine, and a line on a set of original HP exhaust manifolds from Mopar Ed A few other odds and ends are trickling in, so fairly soon, the engine and transmission should be sitting in the car! Stay tuned...
Posted in 2004-present | Family Helpers | Reassembly | body | engine | link to this page | | Comments (0)
March 17, 2013
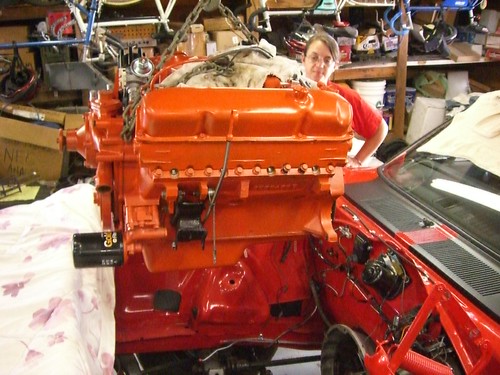
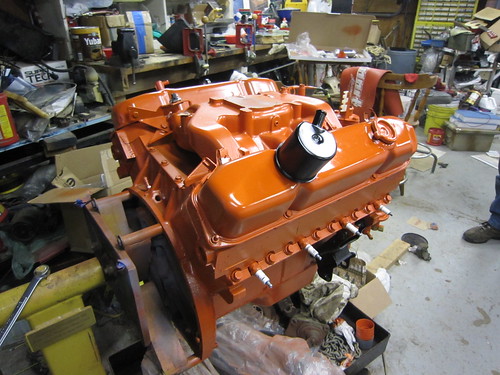
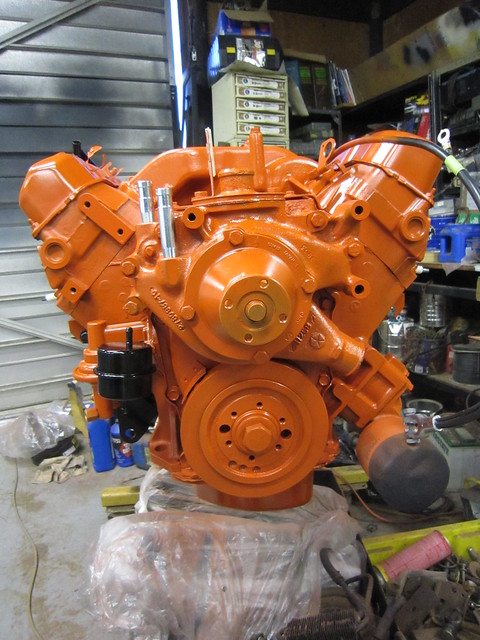
Final engine assembly!
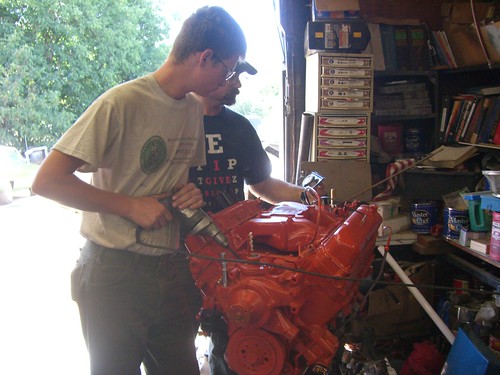
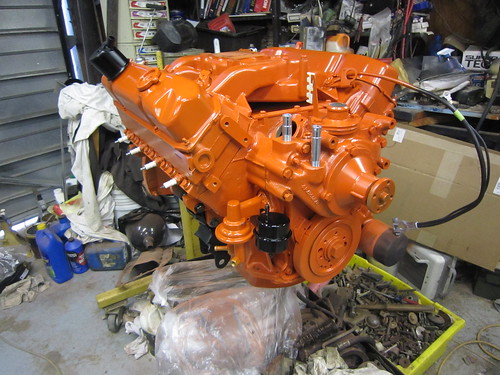
Well, I believe everything is right and torqued and and all the pieces are as correct as my son and I can get them to be, so it was finally time to prime and paint the engine!
I used Duplicolor Chrysler Hemi orange, on top of Duplicolor gray engine primer. then once the orange was done I used Duplicolor clear engine paint on everything to help with durability, and ease of cleaning the engine in the future.
I bought all from a local auto parts store. It took four cans of the orange to get the coverage I was after, but one can of primer, and one can of clear were plenty.
Now I will start cleaning, checking, and painting all my brackets and pulleys Stay tuned!

Posted in 2004-present | Family Helpers | RESTORATION | Reassembly | engine | primer and paint | link to this page | | Comments (0)
March 14, 2013
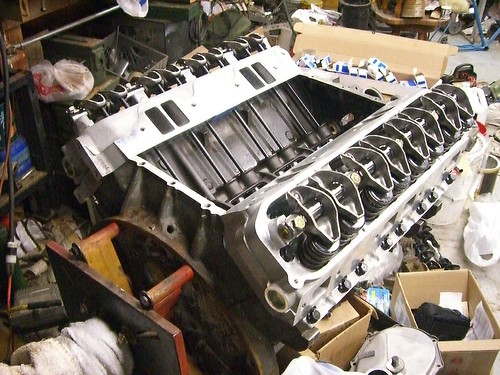
More Engine Assembly
A few more pieces on... Everything is "permanently" attached except the valve covers which are just on for the picture.
Factory windage tray, new 440 source pickup (which I had to heat and bend just a little to clear the windage tray, and have adequate pan clearance still).
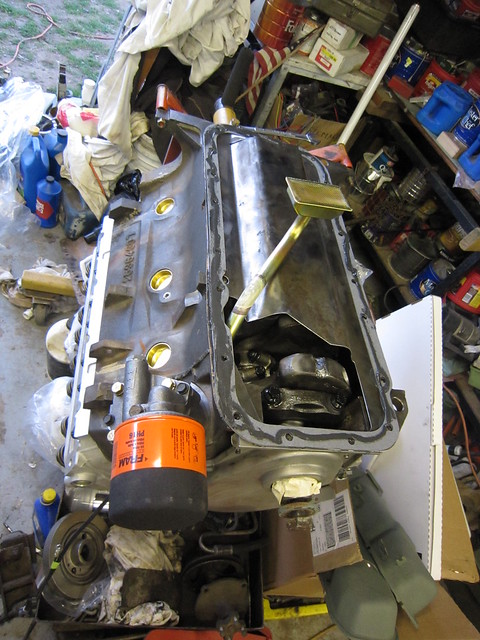
This is the 440 Source 6 Qt. Hemi oil pan for Mopar B/E bodied muscle cars. it has it's own baffles inside too. It looks like a nice pan to me, it fit perfectly and you can't beat the price...
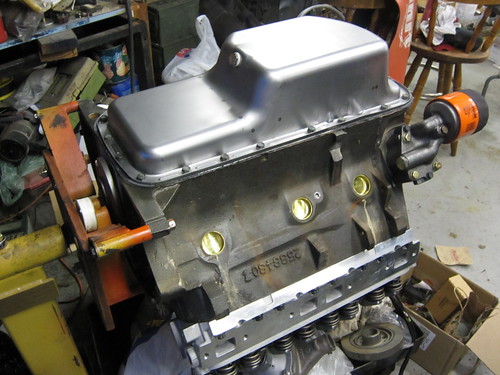
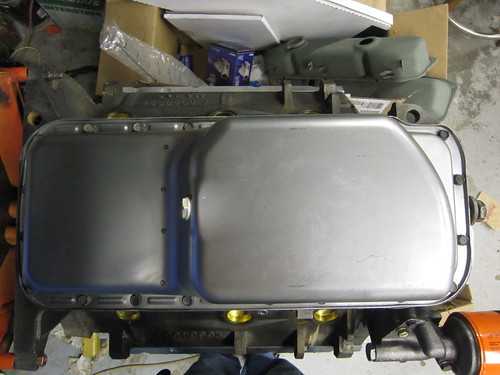
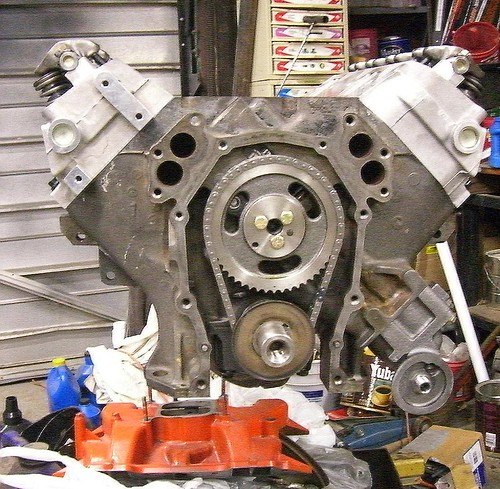
Here it is turned back over, now the intake manifold, and the items that attach to it, as well as the timing chain cover are back home where they belong.
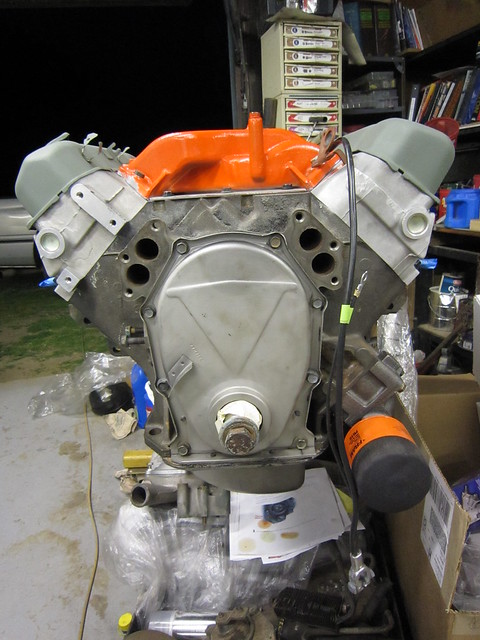
I hope to finish assembly and paint it sometime in the next week... Stay tuned!
Posted in 2004-present | Family Helpers | RESTORATION | Reassembly | engine | link to this page | | Comments (0)
March 06, 2013
Engine Assembly continued
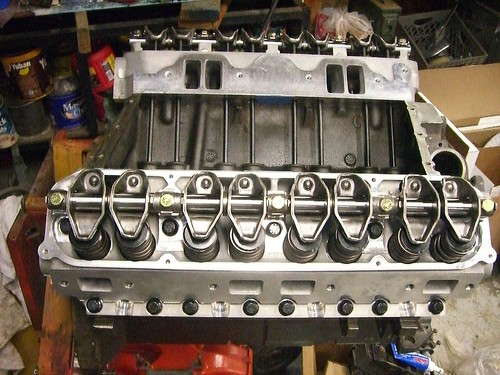
Well, I got my heads back from the shop and I have managed to squeeze a little engine assembly time between all the other things I've had going.
Here are a few pics, not done yet, but it looks good to me!
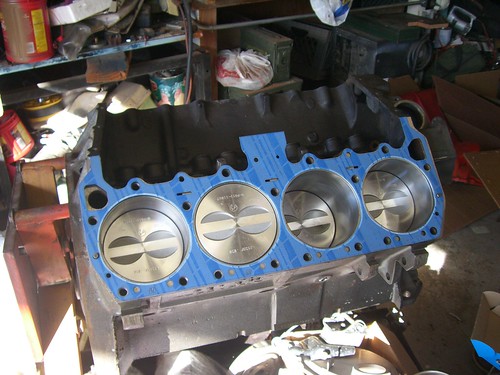
The 440Source Stealth aluminum heads going on...
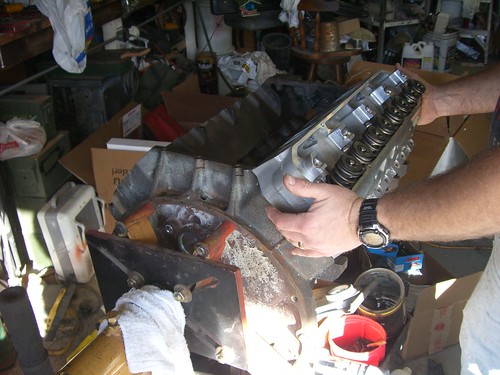
All the valve train parts are new, and lubed with ZDDP zinc laden assembly lube to keep them safe.
Hopefully it will not be too much longer before I am done and the whole thing gets painted Orange!
Posted in 2004-present | RESTORATION | Reassembly | engine | link to this page | | Comments (0)
February 06, 2013
Engine progress ahead!
OK, the stalemate between my budget and my engine has ended for now, so here is the rest of my engine!
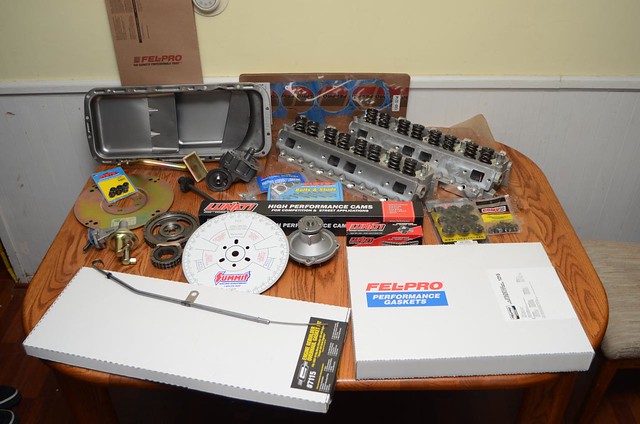
From 440 source
440 Source Stealth aluminum heads
ARP head bolt set
Fel Pro head gaskets
Comp cams 10 deg locks and retainers
6 qt reproduction Hemi style pan
new 3/8 deep pan pick up tube
Melling HV oil pump
New dip stick and tube
New heater hose nipples
New SFI approved flex plate
From Summit
Lunati 60303 cam and lifter set
Summit true roller 3 bolt timing chain set
Carter 4845 fuel pump
Milodon high volume aluminum water pump
ARP flex plate bolts
ARP assembly lube
Mopar performance oil pump priming shaft
Milodon hardened oil pump drive shaft
Summit camshaft degree wheel
Felpro intake gasket set ( FEL-1215 with heat crossover blocked)
Mr. Gasket engine gasket kit
Extra Felpro oil pan gasket
I had some items arrived after I took the picture above, this is the rest.
From Mopar Ed at The Mopar Shop
Reproduction negative battery cable
Correct type PCV valve, and grommet
Correct type breather grommet
Items from other sources
Reproduction vapor separator
New Elgin rocker arms and shafts
Throttle return spring bracket
Mancini racing chromoly HD push rods
A huge thank you to all those who have helped guide my parts selection. I will soon have the heads looked over (the valves) and change out the locks - retainers, then I will start carefully bolting things together!
stay tuned...
Posted in 2004-present | RESTORATION | Reassembly | engine | link to this page | | Comments (0)
December 11, 2012
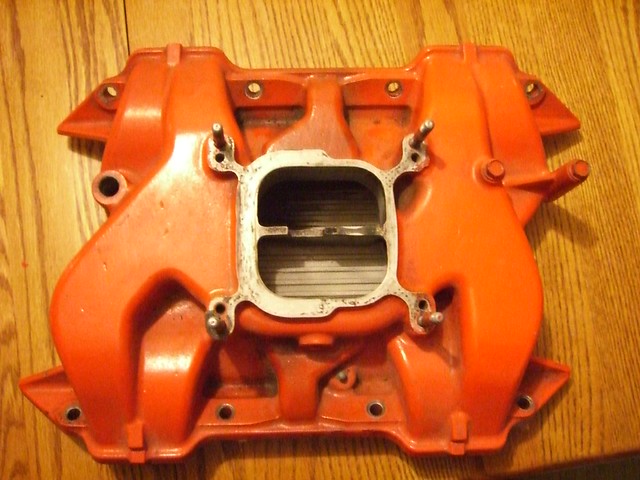
CH4B Intake manifold
One more piece of the puzzle! I have been trying to buy a CH4B manifold for over a year and a half. I have been continually out-bid on Ebay, or too late finding them in the classifieds. But finally I found a nice one with a buy it now / best offer option. They accepted my offer and it arrived today!
This one had already been painted Mopar High Performance orange, which is fine because I was going to do that anyway. As is frequently done by restorers using this manifold, the Edelbrock logo and Mopar part numbers have been removed also which helps with the stock look.
In case you are no familiar with te Edelbrock CH4B it is a very good performing, basically stock profile aluminum intake manifold made back in the 70's by Edelbrock and sold through Mopar dealers. It is still a top performing dual plane intake manifold, (if not the top performing dual plane) and will guarantee my dual snorkel air cleaner will easily clear the hood.
If you'd like to read more about why this is the intake I was looking for you might enjoy this Mopar Muscle article.
Early Christmas for my Charger!
Posted in 2004-present | RESTORATION | Reassembly | engine | link to this page | | Comments (0)
November 08, 2012
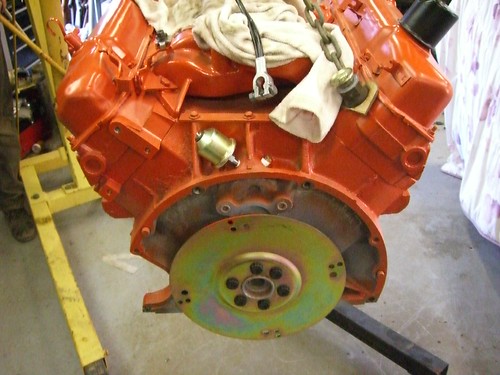
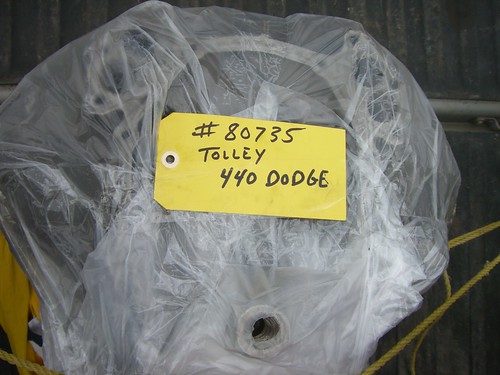
Engine back home!
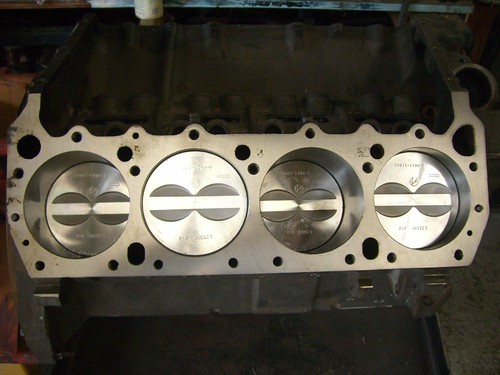
On Sept 7th, my engine looked like this,
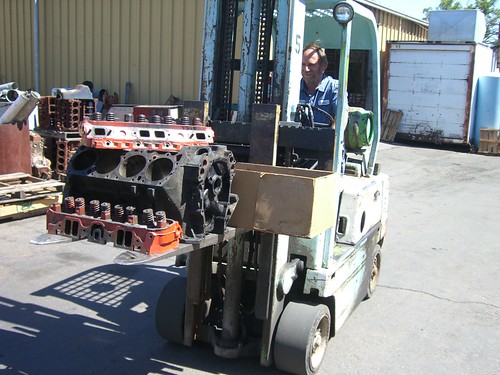
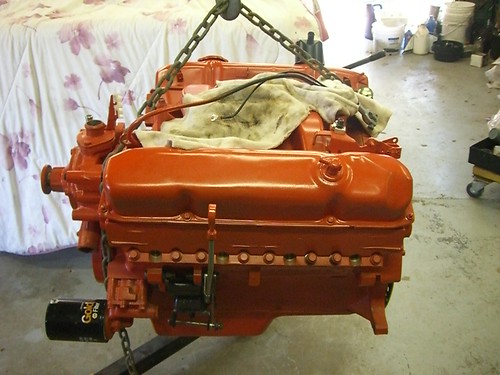
Today it looked like THIS!
The engine shop (Valley Balancing in Ceres, CA) called and told me all that I wanted them to do was done. They did all the machining on the block and heads, balanced everything, assembled the rotating assembly, and wrapped it up for me.
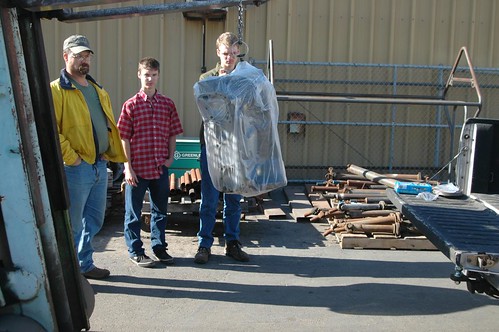
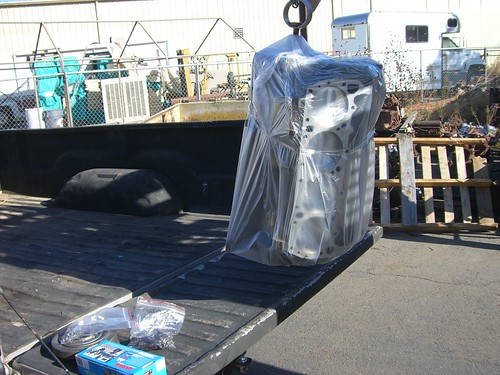
We got it all home safely and put on the engine stand.


Hopefully when I get my tax return I can buy the cam, lifters, push rods, rocker arms, springs etc, the timing chain, oil pump and drive shaft, oil pan, pick-up etc.
Meanwhile it will stay safe, dry, and bagged in my garage.
Since I have not completed my engine entirely, and some people have had questions, I thought I would list what I have had done thus far.
1. Hot tank block
2. Magnuflux block
3. Touch-up Valve Job - both heads (new stainless valves, hardened exhaust seats, and new guides done recently)
4. True the engine block deck surface
5. Grind crank mains and rods .010
6. Re-size rods
7. Bore & hone cylinders .030 with torque plate
8. Balance all internals
9. R&R cam bearings - new Clevite bearings
10. Tap all bolt holes
11. New ARP rod bolts
12. New ARP main bolts
13. New forged TRW/sealed power pistons
14. New Mahle rings
15. New Clevite main and rod bearings
16. Line bore hone all 5 mains
17. Resurface heads
18. Assemble lower end
19. New main seal and housing
20. Machine heads for positive type valve seals
21. New positive type valve stem seals
22. New oil pump drive bushing
23. Install new brass freeze plugs
The valve stem seal mod was recommended by the shop because it they were worried that I might have run into some issues with my cam. I'd never heard of it, but it wasn't too expensive so I went for it.
Final compression is expected to be between 9.5 an 10:1
Next step is to get the cam and valve train parts together, but that may be waiting until February.
Posted in 2004-present | Family Helpers | Reassembly | engine | link to this page | | Comments (0)
December 28, 2011
Christmas goodies
OK, well I have not made much progress on my Charger lately, been busy saving every penny for my set of all new glass which I plan to buy in February. But for Christmas, I got an assortment of Charger care & beautification items I had requested from my wife and kids.
I got a waxing kit with Meguiar's Ultimate Liquid Wax, an applicator and buffing cloth, a "California Car Duster", and an assortment of car washing, and detailing supplies.
So, today since it was nice outside, we pushed my Charger outside and started in. It had gotten fairly dusty since I have never washed it since it was painted about a year ago. It is covered, and indoors, but everything here outside is dirt, or gravel, so over time dust creeps on to everything.
First thing we did, was very carefully give my Charger a proper bath, I dried it off with a large micro-fiber towel I got with my goodies. Then my son and I applied the "Ultimate Wax", and then buffed it off by hand with the Meguiar's micro-fiber buffing cloth from the kit.
It really came out nice. The pictures below are quite good, and taken by my wife, but even she says they really aren't as stunning as the car is in person. As always, you can click on each image to see it larger.
It was a lot of fun bring the shine out, and knowing the finish is now protected somewhat, is nice too.
It has been a very merry Christmas for my Charger indeed. (and me!)


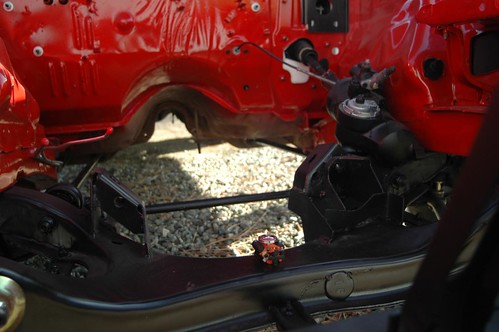
Oh, and since all my buddies, and everyone in my family keep asking me about the engine, I dropped in an engine today too. And YES, It's a HEMI!
I need to finalize the engine mounts, but check it out!
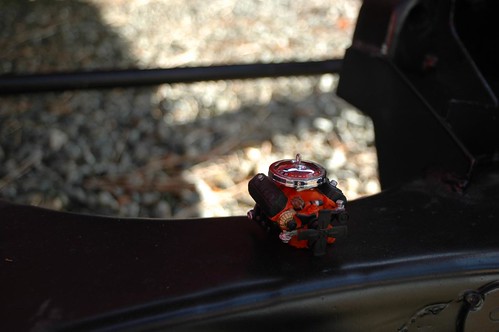
Well, on second thought, I guess I'll have to keep the "Holy Hemi" on our Christmas tree, and wait to overhaul my 440.
Posted in 2004-present | RESTORATION | body | engine | interior | primer and paint | link to this page | | Comments (0)
December 03, 2011
Fuel tank and lines are in!
Today, my son and I also put in the new Fuel tank, a new 3/8" sending unit (with 1/4" vapor return fitting) we will mate this to the new reproduction steel fuel lines and clips he and I installed earlier this week. (again new 3/8 feed with a 1/4 return)
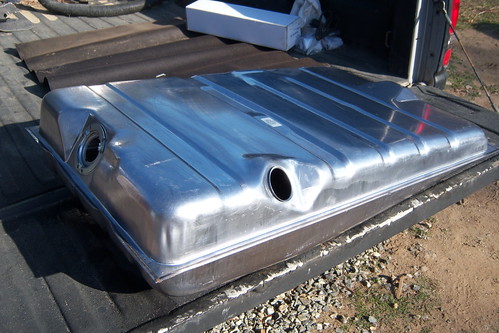
Here's the tank with pads, sending unit, and new fuel fill seal installed.
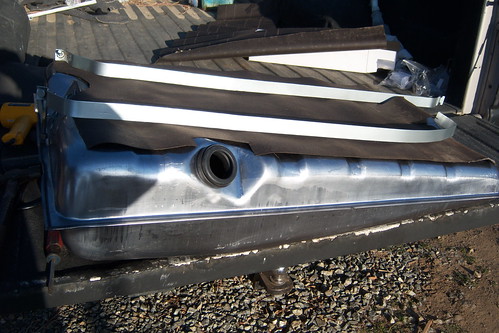
And here it is all tightened down in its permanent home!

More to come.
Posted in 2004-present | RESTORATION | Reassembly | body | engine | link to this page | | Comments (0)
August 20, 2006
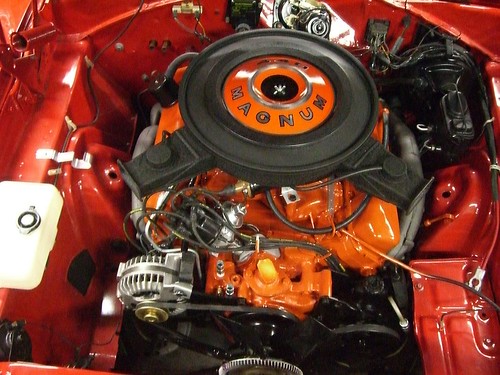
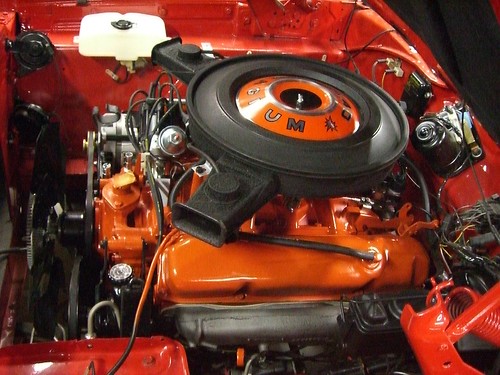
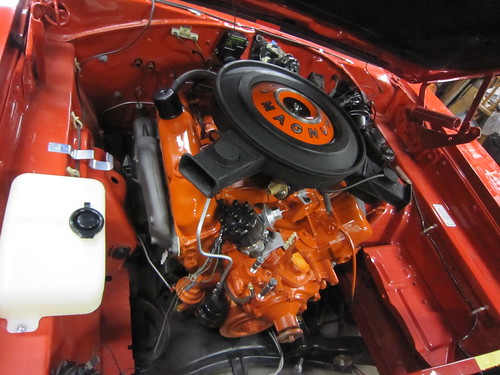
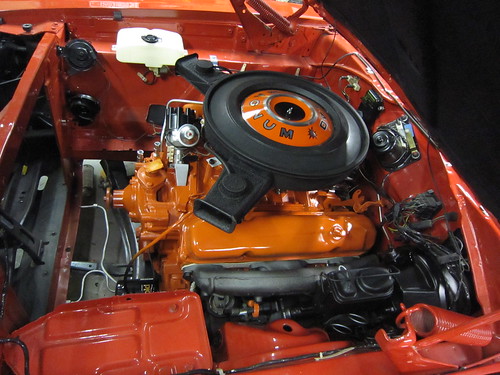
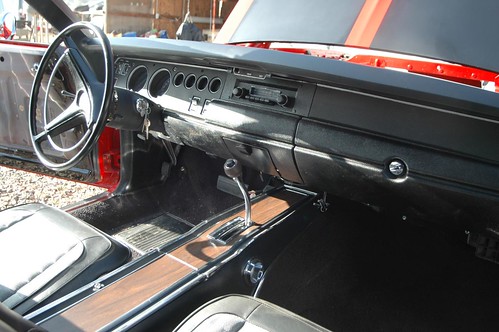
August 2006: Steering wheel, seats, and air cleaner restored
This has been an inspiring and productive month for my Charger project. Through God's grace, some good eBay fortune, and the generosity of several friends, my air cleaner, steering wheel, and seats are all restored and ready to be packed away awaiting their turn going back into my Charger as I reassemble it.
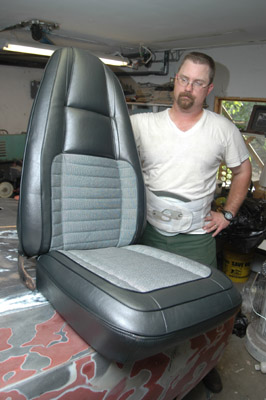
Here I am, posing proudly with one of my newly-restored front seats. The story of how these came out so nicely is really rather amazing and has had me praising the Lord for several days now. Earlier this year, I purchased a nice set of seat covers for my car in charcoal vinyl with salt-and-pepper cloth inserts. Then just a couple of weeks ago I happened to see one day in our very small town a 1969 Roadrunner in primer on a tow-dolly in front of our local greasy spoon burger joint. We parked my wife's 1972 Dart next to it, and I proceeded to look around the car hoping to attract the attention of the owner so I could talk to him. When he came out, I realized I had met him a couple of years before at the DMV, and we had promised to contact each other and never did. He told me the sad news: he was moving away in about three weeks. After a visit to his house and some lengthy Mopar-infused conversation, he told me he was an upholsterer by trade and had specialized in Mopars for 35 years. A short time later this fellow Mopar enthusiast decided to do a tremendous favor for me. For a very small fee, not even enough to cover materials really, he made time in his busy packing schedule to completely redo my seats, stripping them down to the frames, rebuilding the seat foams where needed, and covering them with my seat covers. The final result was stunning to say the least, and these pictures do not do them justice. Thank you Larry!
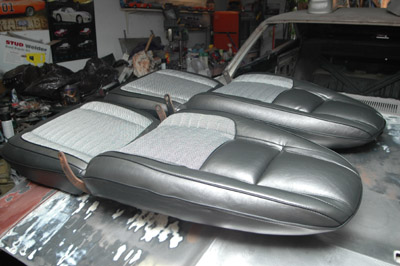
Here are both bucket seats, which will soon be put in storage. Before that, I will refinish the hinge covers and seat tracks and have them ready for eventual installation, the same time as the seats.
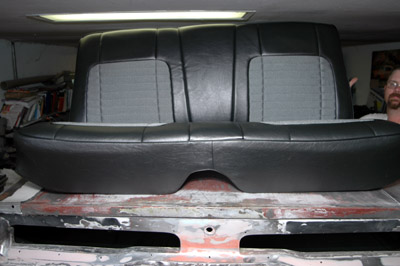
After so many years of seeing my poor, neglected, cracked, mouse-eaten, duct-taped, sometimes-covered-usually-not backseat, I have to pinch myself when I look at this perfect restoration to perhaps better-than-new condition. This really motivates me to get that car painted so I can start putting it together!

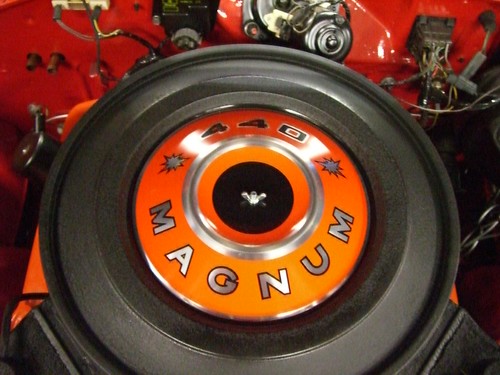
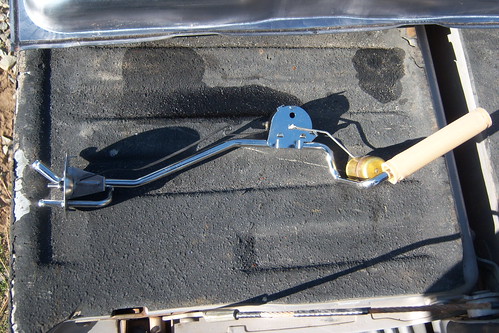
This air cleaner is a piece of the puzzle I have been in search of for a long time. After searching and searching eBay for years, being constantly disappointed by the high prices these air cleaner assemblies go for, I happened upon one that had been described incorrectly as a Chevy air cleaner. I could tell from the photos that indeed it was the exact Mopar housing I needed. Thanks to the error of the person listing the item I was able to get it for about 1/3 the going Mopar-air-cleaner rate. I guess the Chevy folks knew it wasn't theirs and the Mopar guys hadn't found it. The housing was perfectly straight. After cleaning it, I stripped the original remaining wrinkle finish, which was mostly gone anyhow, and then recoated the entire assembly with a proper coat of Krylon wrinkle paint. I purchased the pie-pan also on eBay, and it is an original NOS, which I bought for less than the price of many of the more commonly available reproduction pie-pans. This has been safely packed up in a padded box and will be stored until needed later on in the restoration of my Charger.
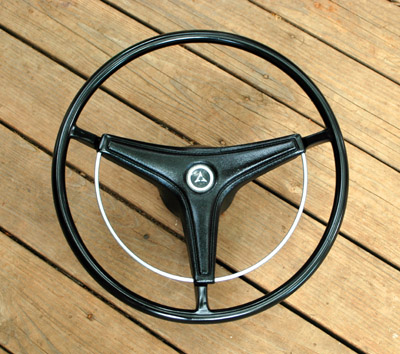
It took the generosity of a couple of friends to bring this steering wheel together for my car. The wheel itself came from my longtime friend James, and the wheel center, a 1970-only item, came from my friend Jude, a fellow Charger enthusiast. So for the cost of a little elbow grease and some vinyl dye for the wheel center, I now have a crack-free very original-looking steering wheel to go with the rest of my new interior stuff.
--------
Posted in 2004-present | RESTORATION | engine | interior | link to this page | | Comments (0)