


October 09, 2013
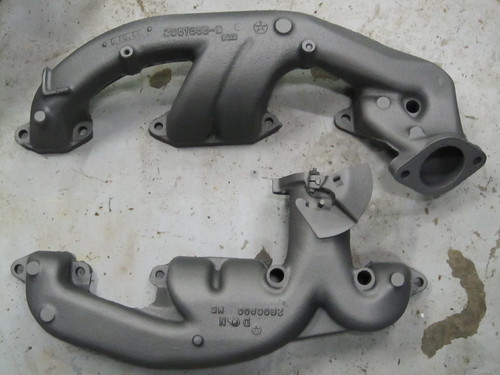
H.P. manifolds with cermaic coating
So I got these back from the blasting and coating shop today. They did very fast and apparently very good work. I highly recommend these guys Eastwood Sandblasting and Powder Coating.
They used a no glass ceramic coating that appears to very nicely mimic clean cast iron. It is supposed to easily withstand 1,800 degrees.
Now want to get them on my Charger's engine.
Check back soon for pictures of them installed.
Posted in 2004-present | Reassembly | engine | sandblasting | link to this page | | Comments (0)
March 26, 2013
A Special Guest!
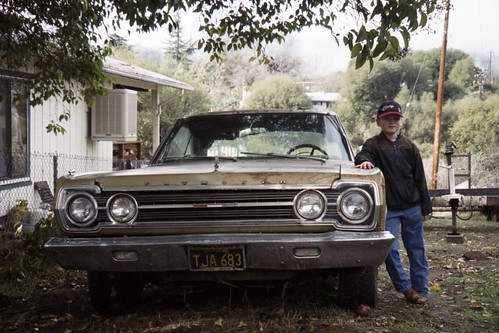
Something I've been encouraging my son to do for a long time is to create a web presence about the ongoing restoration of his 1967 Plymouth Satellite.
Well the last merit badge he needs to finish before he can submit his Eagle Scout package is Communications. One of the ways to meet one of the requirements is to design a web site. The requirements state you do not even have to post it, and it does not have to be more than a few paragraphs of information. However, with a little nudge from his Dad (and Assistant Scoutmaster) he put it on the web.
Here he is at age 7 when I bought him his first Mopar! (he is almost 17 yrs old now and 6'3" tall)
It is basic, and he'll be adding to it as we go, we have many hundreds of photos, but most are references for when we put it back together.
It is a blog, so just like my Charger blog, the newest posts are on top, you scroll down to see older stuff - all the way back to the beginning.
Here is a link to see it... Tolley's Satellite Restoration
Let him know what you think, or if there is anything any of you want to know.
Posted in 2004-present | Family Helpers | RESTORATION | disassembly | glass | interior | primer and paint | rust & rust repair | sandblasting | sanding | sheet-metal replacement | link to this page | | Comments (0)
December 03, 2011
Front Bumper Parts ready
Well, I had a chance to get a few things done today.
Finished sand blasting the metal parts that surround the grille, then got them primed, and painted. Now when I get time, I can reassemble the grill, bumper etc, and install them!
Here they are after being primed, and painted...
Looking forward to finishing the front!
Posted in 2004-present | RESTORATION | Reassembly | body | rust & rust repair | sandblasting | trim | link to this page | | Comments (0)
November 02, 2011
Re-Chromed Rear bumper - On!
Well, my son and I have found time to install the new wheel lip mouldings, and to re-assemble and install the re-chromed rear bumper.
I blasted the bumper brackets and hardware, shot them with self-etching primer, painted all satin black and put it together with new bumper bolts, and my brand new but several years old," Mopar or No Car" Charger script license plate frame I bought from Mopar Collector's Guide.
Here's a preview; my wife took a picture for me this afternoon while I was at work...

Stick around, more on the way!
Posted in 2004-present | RESTORATION | Reassembly | body | sandblasting | trim | link to this page | | Comments (0)
January 14, 2011
Wheels
In preparation for the arrival of the Charger, I sandblasted these "cop wheels". They are a Mopar item from the mid-1980s, usually found on Diplomats and Grand Furys. They are nice, stout, ventilated 15x7.5" wheels with great backspacing, making tire selection a breeze. After sandblasting, I coated them with etching primer and then three coats of satin black. These will be set aside until needed.
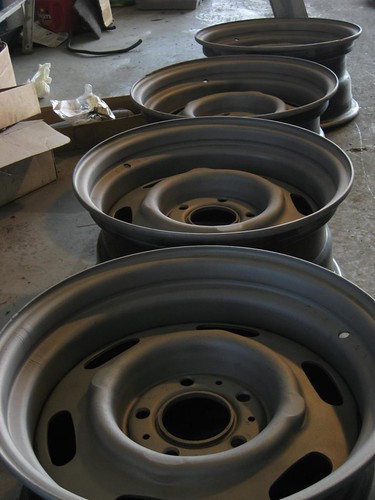
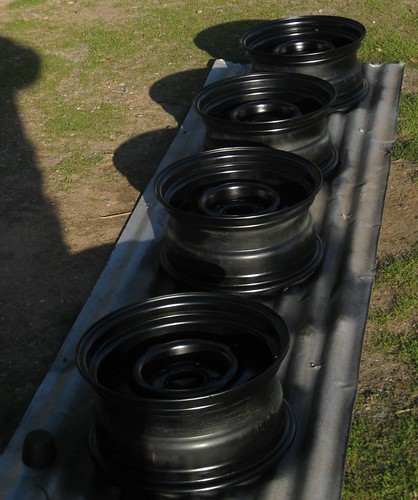
Posted in 2004-present | RESTORATION | primer and paint | sandblasting | suspension, brakes, tires, and wheels | link to this page | | Comments (0)
December 10, 2010
Refinishing suspension
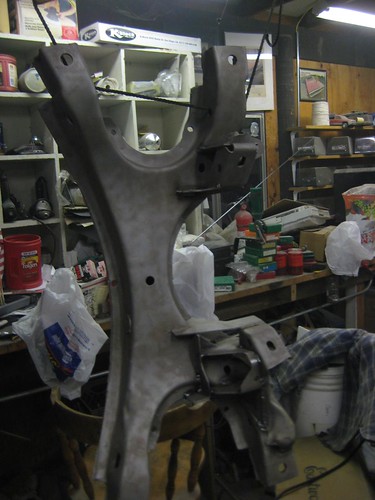
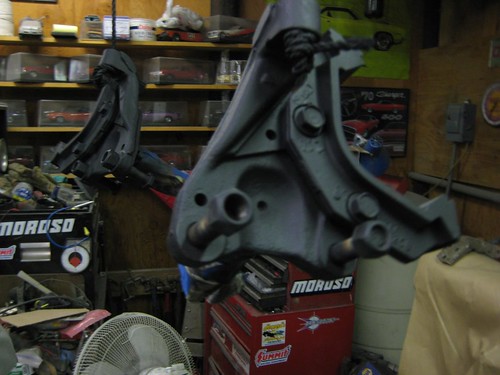
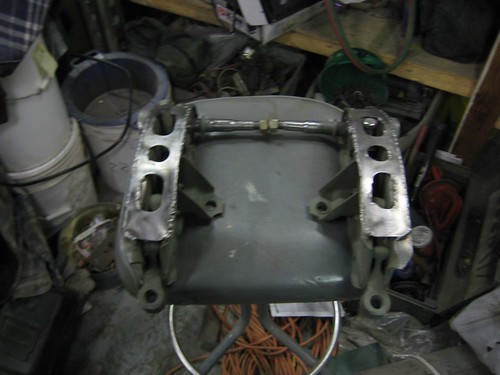
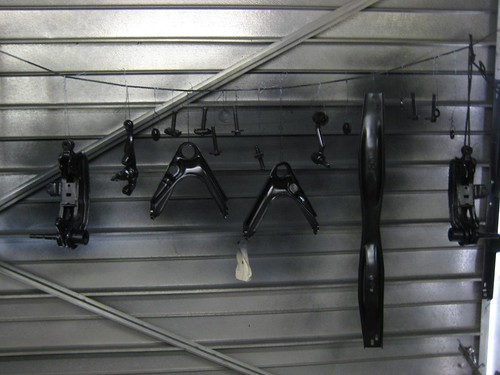
While my Charger is away at the paint shop, in addition to spending some excellent time getting some work done on my son's '67 Plymouth Satellite, I took this time to sandblast, prime, and paint the front-end suspension parts that I will use when my Charger goes back together. Also, while I was at it, I did the same procedure to the bumper brackets and a few other metal parts of the car that usually aren't seen. After sandblasting, all the parts were primed with self-etching primer, then primed again with conventional 2K primer because I learned that you aren't supposed to apply Eastwood's Extreme Chassis Black over self-etching primer. I am not sure why, but I'll take their word for it.
I did take the time to carefully inspect and reinforce some of the components. On the K-member I added new welds and improved some existing welds, and boxed in the steering box mount to eliminate flex that is common in that area. I also installed a set of reinforcement plates on the lower control arms that i ordered from Mancini Racing. Everything I read said that if you're going to increase the size of the front sway bar, which I am, you really need to box in the lower control arms.

Posted in 2004-present | RESTORATION | primer and paint | sandblasting | suspension, brakes, tires, and wheels | link to this page | | Comments (0)
February 17, 2009
Getting my rear-end in gear
The way my entire Charger was sitting on jack-stands made it easy for me to prime. However, I noticed when block-sanding the car that the whole Charger would start to sway. This made me very nervous. I kept having terrible visions of my now-pristine quarter panels and fenders slamming on the ground. I decided I needed to stabilize the car better.
Since I had everything ready to go on the rear end, I decided I would put it under the car and put some junky tires on the car. The photos below chronicle the sequence I went through in this part of the project. One of the neatest things was, this was the first time that I was able to start emptying some boxes that had held new parts.
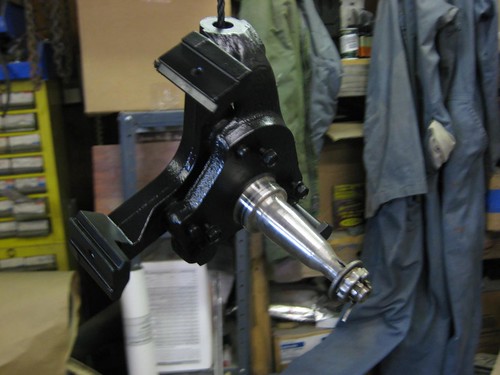
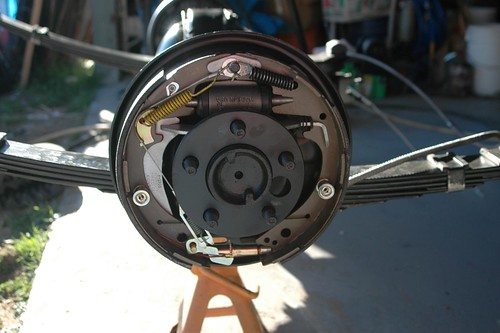
These first two pictures show the rear end stripped of its original 10-inch brake parts, with the axles put back in place. With it hanging from my engine hoist, I had just completed sandblasting the entire rear end.
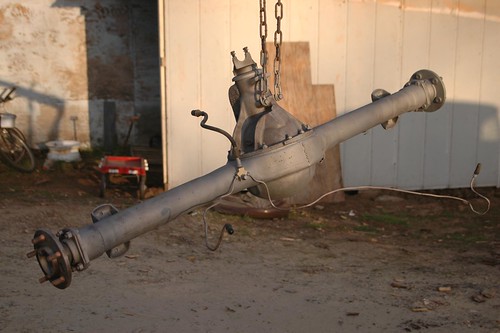
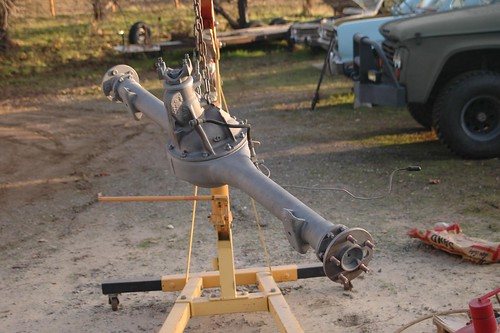
These two photos are of the assembled and painted rear end, with the 11-inch heavy-duty brake hardware, the Mopar Performance OEM-style 440/Hemi leaf springs, all-new bushings, new hard brake lines, and the new rubber brake line. The gears in the 489-cased third member are 3:55's with the large 440 yoke. All that is ready to be rolled under the car.

In this photo, you can see everything in the new 11-inch rear brake system has been replaced: wheel cylinders, all the springs, self-adjuster parts, brake linings, everything new and shiny.
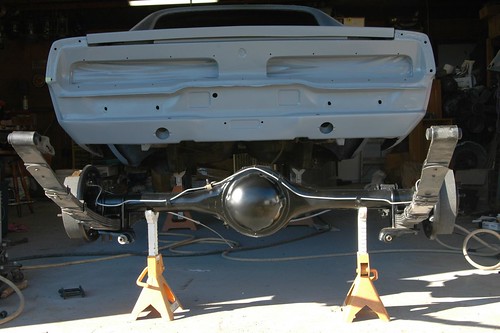
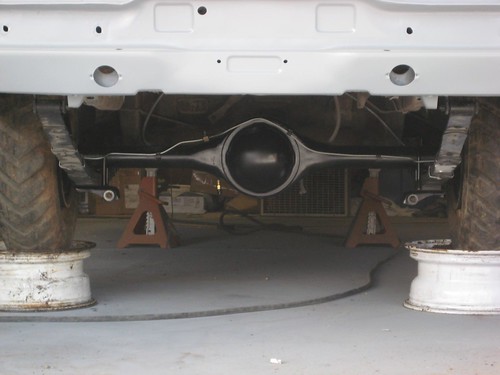
Here the rear end is all bolted in. The tires are tall, skinny 7.00-15 Bobcat tractor tires that I had from past projects. They allow plenty of room for me to work around the wheel wells, and I won't care if they get paint all over them. With the rear end in place and my stoutest jack-stands moved as far forward on the frame as I can get them, my Charger is now rock-solid, and I'll feel a lot better working those panels over as I block things out.
Posted in 2004-present | RESTORATION | sandblasting | suspension, brakes, tires, and wheels | link to this page | | Comments (1)
October 28, 2008
One last sandblasting chore
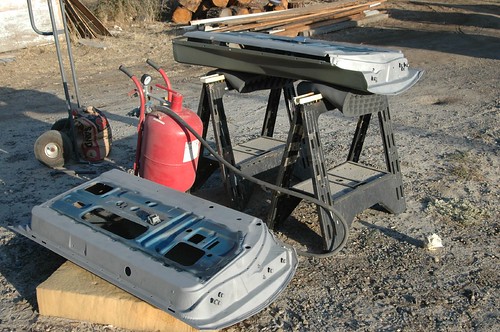
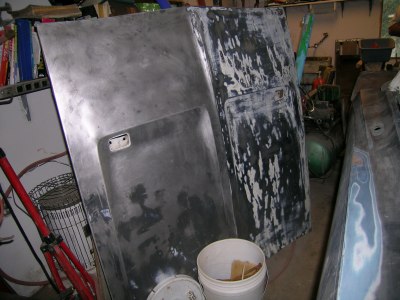
As the day to put primer on my Charger draws near, I realized I had neglected to strip the old paint and minor surface rust, etc., off the inner part of my doors. I had used a wire wheel on my grinder to remove all the paint from the door jamb area of the car body itself, but wanted a good fresh start on the doors. My son and I removed the doors, gutted the latches and window regulators etc., and set them outside for sandblasting. The red tank-looking object between the doors in the first photo is my inexpensive but very serviceable sandblaster.
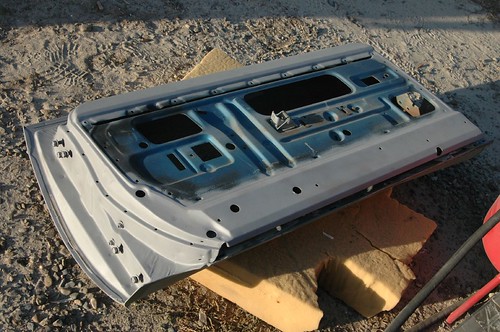
This is a closeup of the areas I sandblasted. I protected the outside edge of the door, which already has primer on it, with a heavy layer of masking tape prior to sandblasting. I was very pleased with the results. All the rust, all the paint, all the years of glue, etc., are gone. After this, the doors were taken inside the garage and etching primer was applied to all the bare metal.
Posted in 2004-present | RESTORATION | body | disassembly | sandblasting | sanding | link to this page | | Comments (0)
February 19, 2007
Sandblasting, take 2
Since most of the hours I've been putting in on my Charger lately have involved trying to smooth out the body panels and move my body work towards "prime-able perfection", posting a monotonous series of pictures of the same areas of the car would not be interesting or helpful to the viewers of this site. Finally some of my work takes on a more visible form: I took over my wife's parking stall for the weekend, turning it into a sort of reincarnation of my sandblasting enclosure from a couple of years ago. This time, a large stack of small parts were the object of the sandblasting. I completely disassembled, cleaned, sandblasted, primed, and painted my steering column components, all the hardware for my new 11" rear brake assemblies, and a host of other brackets and things, as well as the underside of my rear deck lid, which still had some of the previous finish on it, and a set of wheels I'm going to put on my wife's Dart sometime in the near future. By Monday evening, everything was broken back down and the restored components were packed carefully away. My wife was really pleased that the BIG blue tarp was only up for a weekend this time.
After I get a few new components, I will be reassembling the steering column and putting it in storage until needed, as I have already done with the brake components and other sub-assemblies.
Posted in 2004-present | sandblasting | link to this page | | Comments (0)
May 20, 2005
Interesting historical find
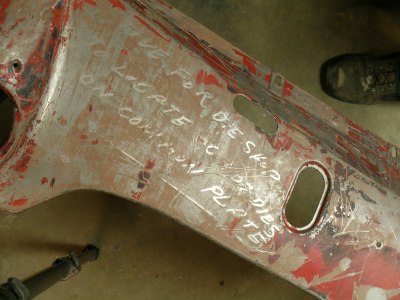
You never know what cool historical things might turn up when you're restoring a car. I found this writing underneath the original primer on my front valance. The writing says, "SAVE FOR DIE SHOP TO LOCATE 06 AND 07 DIES ON COMMON PLATE". It is interesting to think that this part of my car was once used seemingly to help recalibrate equipment that would in turn make parts of other '70 Chargers. You can click this link to view the picture in a larger size.
--------
Posted in 2004-present | RESTORATION | sandblasting | link to this page | | Comments (0)
Sandblasting: results
I only sandblasted the sturdy, mostly-non-exterior parts of the car. My goal was to remove any rust, old paint, grease, oil, etc., and have a nice surface ready for primer and a good coat of Eastwood's rust encapsulator, where needed. More delicate exterior sheet metal is being stripped of its layers of paint, primer, and filler by chemical stripper and/or lots of power- and hand-sanding. The hand-sanding is where my kids "get" to help a lot (they really do enjoy it).
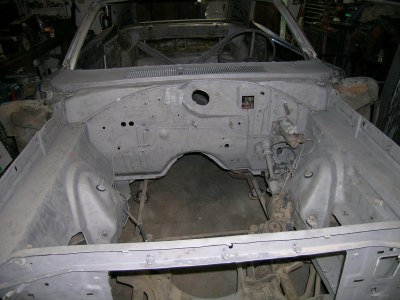
All blasted and clean, the engine compartment now looks so nice, I can just imagine the layers of glossy paint that will one day adorn it.
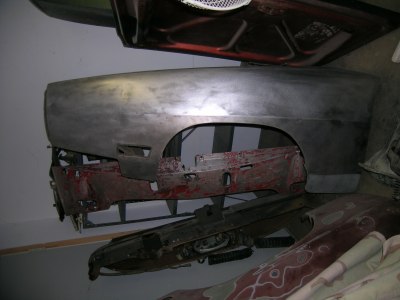
Several treatments with chemical stripper and a few hours of sanding have got my driver's side fender down to its original shiny self. After I smooth a couple of dings and installing a steel rust-repair panel for the area behind the tire, this fender will be primed with etching primer, awaiting the day of final painting.
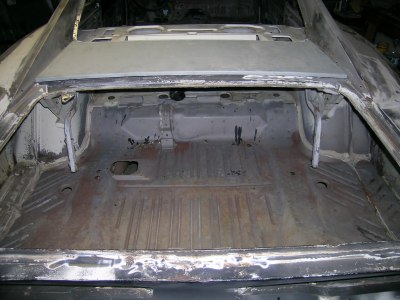
My trunk was remarkably solid, and will not need replacement. A couple of minor pinholes will be welded up before the trunk floor is treated with Eastwood's Rust Encapsulator and preventative treatment.
The hood had an amazing number of layers of finish on it, but after many rounds with the stripper, and much sanding, the bare metal is finally showing itself.
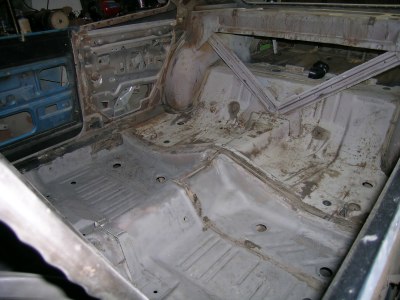
The floorpan
--------
Posted in 2004-present | RESTORATION | sandblasting | link to this page | | Comments (1)
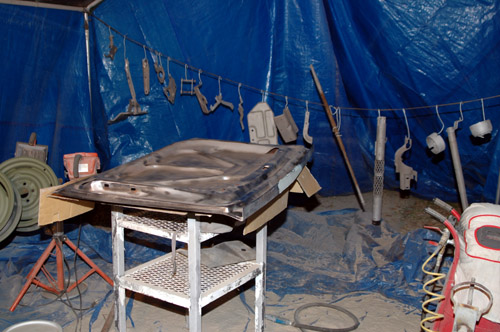
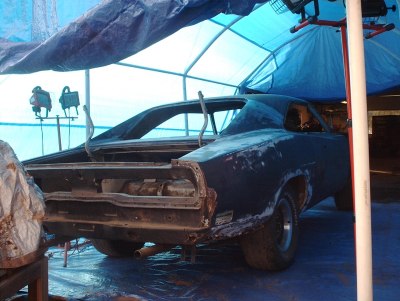
Sandblasting: setup
For the sandblasting phase of my Charger's restoration, I constructed a 20x20 enclosure, with a huge tarp over a steel frame, and another tarp on the floor to aid in sand recovery. Using up to 3 air compressors simultaneously gave me enough air to keep the blasting going strong.
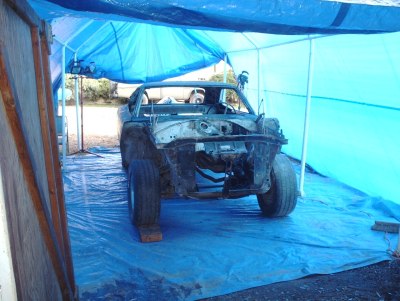
A front view of the stripped Charger, ready for sandblasting
Rear view
--------
Posted in 2004-present | RESTORATION | sandblasting | link to this page | | Comments (1)