


March 26, 2013
A Special Guest!
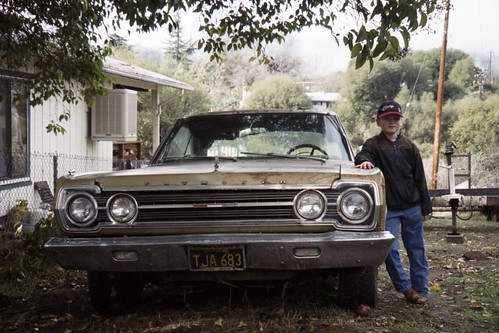
Something I've been encouraging my son to do for a long time is to create a web presence about the ongoing restoration of his 1967 Plymouth Satellite.
Well the last merit badge he needs to finish before he can submit his Eagle Scout package is Communications. One of the ways to meet one of the requirements is to design a web site. The requirements state you do not even have to post it, and it does not have to be more than a few paragraphs of information. However, with a little nudge from his Dad (and Assistant Scoutmaster) he put it on the web.
Here he is at age 7 when I bought him his first Mopar! (he is almost 17 yrs old now and 6'3" tall)
It is basic, and he'll be adding to it as we go, we have many hundreds of photos, but most are references for when we put it back together.
It is a blog, so just like my Charger blog, the newest posts are on top, you scroll down to see older stuff - all the way back to the beginning.
Here is a link to see it... Tolley's Satellite Restoration
Let him know what you think, or if there is anything any of you want to know.
Posted in 2004-present | Family Helpers | RESTORATION | disassembly | glass | interior | primer and paint | rust & rust repair | sandblasting | sanding | sheet-metal replacement | link to this page | | Comments (0)
December 03, 2011
Front Bumper Parts ready
Well, I had a chance to get a few things done today.
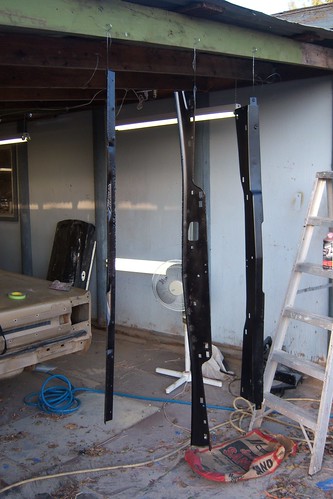
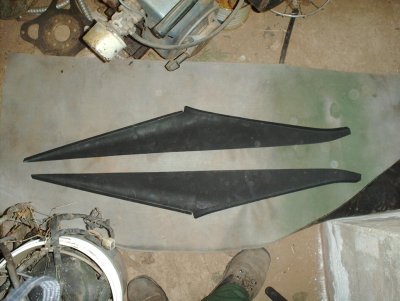
Finished sand blasting the metal parts that surround the grille, then got them primed, and painted. Now when I get time, I can reassemble the grill, bumper etc, and install them!
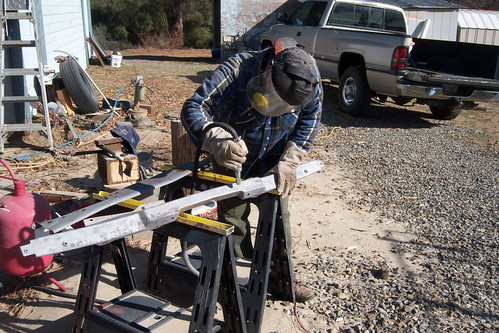
Here they are after being primed, and painted...
Looking forward to finishing the front!
Posted in 2004-present | RESTORATION | Reassembly | body | rust & rust repair | sandblasting | trim | link to this page | | Comments (0)
November 12, 2010
Special Thanks to Howard!
I am LONG overdue in giving proper thanks to a mentor, teacher, guide and friend who I have seen countless times, spoken to on the phone, spent hours and hours listening to, but never actually met.
When my good friend the "metal wizard" Frank moved away I was just beginning some very serious work on my Charger. I was feeling lost, and unsure how I would be able to proceed. I went online in search of some more books, or preferably some videos to help me along as I continued to learn body work.
Well, praise the Lord that I found Howard Holland's "Backyard Autobody" instructional DVD's. Right away in a very personable, and down to earth way, Howard's teaching reenforced what my friend Frank had been showing me, and being able to go over and over the DVD's helped immensely. Getting one of Howard's DVD's (there are currently three volumes) is more than just buying some good practical instruction, Howard himself is available via telephone or email to help you through any questions you may have. The only warning I have to offer though is, when you start talking to Howard on the phone, sit down and get comfortable because your not talking to some generic "tech help line" you are about to make a friend with someone who is as interested in your success as you are!
Howard teaches more than "just" hammer and dolly work, but goes into panel replacement, patch fabrication, filler uses (pro's and con's), priming and painting too! In fact it was my having watched Howard talking about, and demonstrating the use and benefits of single stage Urethane paints that allowed me to so easily accept Mopar Ed's suggestion that we go that route on my Charger's upcoming paint job.
I simply can't recommend highly enough that anyone wanting to learn the ropes in the auto-body universe consider giving Howard's videos a try. You may be amazed by what you can learn to do yourself.... and don't be surprised if the phone rings and it is Howard asking you how your project is going!
I get nothing from Howard for recommending him; he does not even know I am posting this, but I do so in hopes that some of you might get your projects a little further down the road (or back on the road!) through the unique kind of help he has to offer.If you want to you can click on his logo below to go to his website.

Posted in 2004-present | RESTORATION | body | primer and paint | rust & rust repair | sanding | link to this page | | Comments (0)
March 11, 2006
Spring 2006: Seeing Results
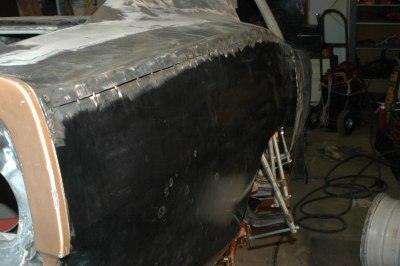
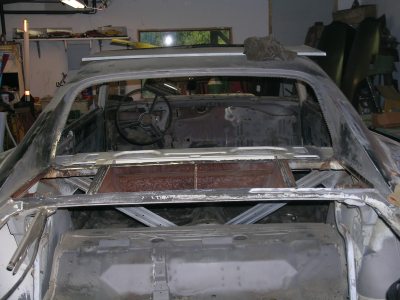
The driver's side sail panel area was one of the first areas on the car that I realized had extensive rust. Now all the metal in that area is brand new and is awaiting only some very fine filler work to smooth over where the welds have been ground down smoothly. The welding process was done slowly to minimize warping, and a bit tedious, but the results should be well worth it.
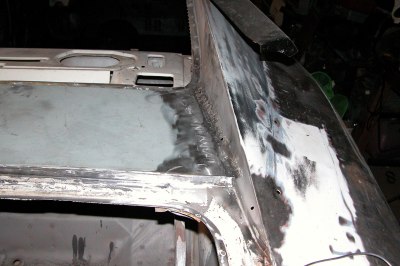
The passenger side had significant rust, though not as serious as the driver's side. However, it too now gleams with new shiny metal. The rear-window opening has been rebuilt and will do a much better job sealing out the rain than it used to.
The tack-welding process is nearly complete! Hopefully my metal wizard buddy will be able to help me do the final smoothing on this quarter panel, as we have recently learned that due to a new job he'll be moving away. BUMMER! (for more reasons than that).
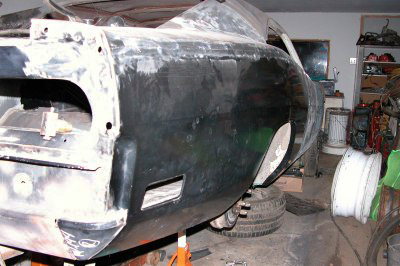
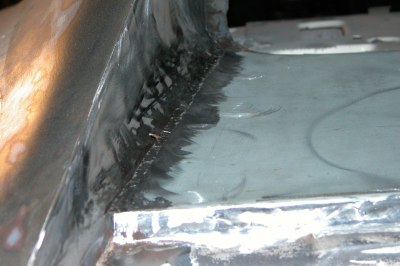
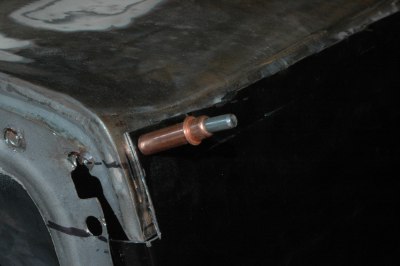
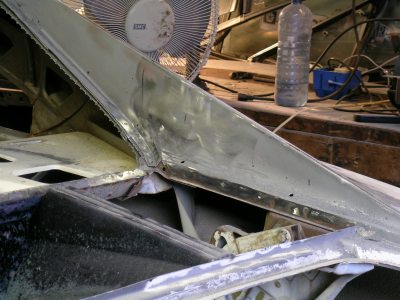
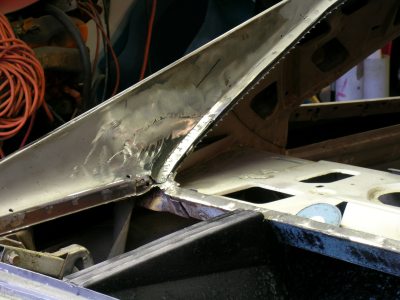
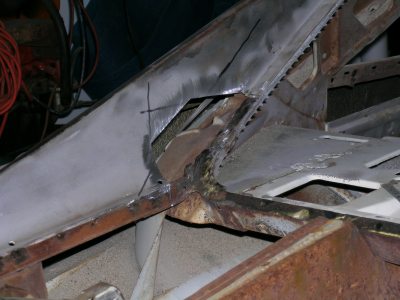
There was quite a bit of hand-forming that had to be done in the area of the recess for the bumper. This was handled extremely well by my very helpful metal wizard. Using the quarter panel extension piece as a guide, he obtained the correct alignment, and as this picture shows, the welding over most of the panel is finished, awaiting only final smoothing. I am very happy to have this worst part of my car become one of the nicest.

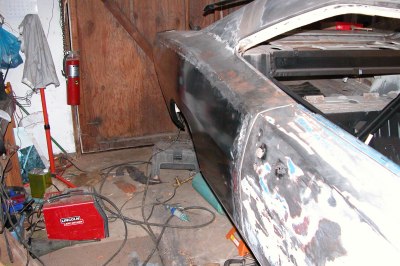
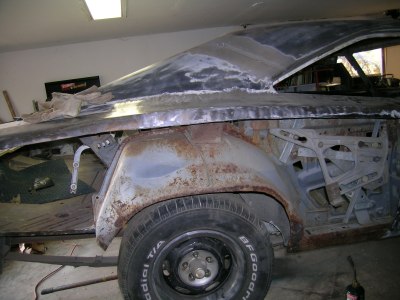
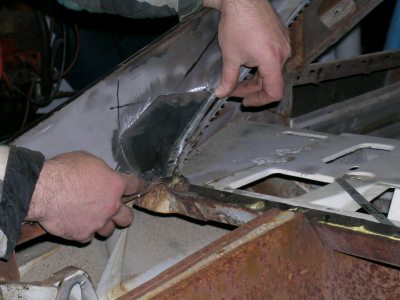
With my metal work coach leaving, I am moving aggressively to attack the driver's side quarter next. This picture is the quarter before I started drilling spot welds and separating the panels, which I now have completed. When my buddy shows me where to cut, I'll have another picture, with another gaping hole in the side of my car. Stay tuned.
--------
Posted in 2004-present | RESTORATION | body | rust & rust repair | sanding | sheet-metal replacement | link to this page | | Comments (0)
January 10, 2006
Rear quarter panel installation
It was finally time to cover up the gaping hole in the side of my car. While paying very close attention to the alignment of the main body lines, and also focusing on the wheel opening and bottom flanged edge alignment, we carefully figured out how much of the reproduction quarter panel would have to be cut off and discarded. A friend of mine, James, who has worked in the automotive restoration field for a number of years, gave us a suggestion which saved us a lot of grief. We were puzzling over how to get the new piece and the opening it would fill trimmed as precisely as they would need to be. His suggestion was to overlap the pieces by as much as possible, and then using a 4" grinder with the thinnest available cut-off wheel, cut both the new panel and the car at the same time. To maintain our alignment, we used a number of cleco temporary clamping devices, which I purchased from Eastwood's.
For those who are wondering, this is a Cleco, purchased in a kit with special pliers to install and remove them, these are a reusable temporary clamping device. First you drill a small hole through both items to be held. Then squeeze the Cleco with the pliers, slide it into the hole, and release. When you're ready to remove it, simply grab it with the special pliers, squeeze, and slide it out of the hole. If you're going to be doing a lot of metal replacement and welding or fabrication work, a set of these is really handy. I bought these at Eastwood's, although I understand they are available elsewhere.
Using Eastwood's intergrip panel clamps, the new panel was held in place for tacking, which we did very carefully, putting a tack only every twelve inches or so initially, in order to avoid overheating the material. Once the edges were well-tacked after several passes, we glued all the lower flanged edges with panel-bonding adhesive, also purchased from Eastwood's. The rear quarter was now in its final resting position. The body lines lined up very nicely, and it would just be up to me to patiently continue the tack-welding and smoothing process until we had a seamless welded bond.
EDIT, OCTOBER 2010
While trimming the wheel lips to the proper dimensions (the after-market quarter panels had an excessively wide wheel lip), I discovered that the panel bonding adhesive, for whatever reason, had not bonded the quarter panel to the wheel house in many places. I removed the panel bonding adhesive, which wasn't that difficult, and drilled holes, then spot-welded the two pieces together just like we did on the driver's side from the beginning. Not sure what the failure was, but I'm glad to have discovered it before getting everything painted.
Posted in 2004-present | RESTORATION | body | rust & rust repair | sheet-metal replacement | link to this page | | Comments (0)
October 01, 2005
October 2005: sheet-metal work resumes
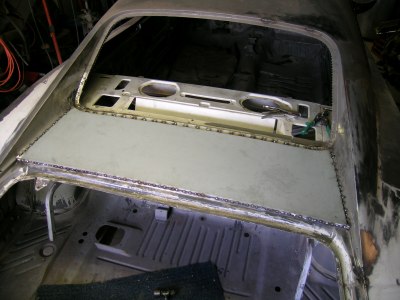
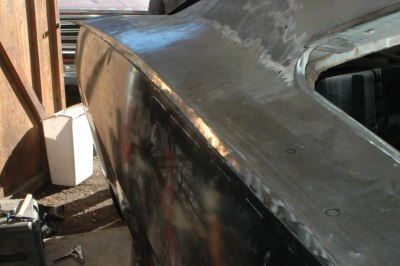
With all the metal prep work done, and the new piece formed and fitted, it was finally time to weld in the piece that would complete the rear-window opening and cover the expanse between the window and the trunk. To get this right, we temporarily reinstalled the deck lid, in order to match the slight crown the original piece had. Carefully tacked in place so as to avoid warping, the piece looked great when it was finally pinned down.
Even though I've been looking forward to this moment for years, I had to swallow hard, grit my teeth, and just go with it when my buddy put his cutoff wheel into the quarter panel. The passenger side had more extensive rust and much more previous body damage (hidden by up to half an inch of filler), so it was decided that full replacement was best.
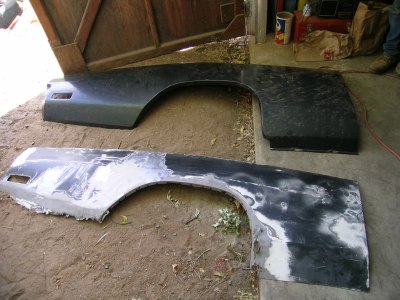
Out with the old, in with the new, so they say. Here's the veteran quarter panel lying next to its replacement.
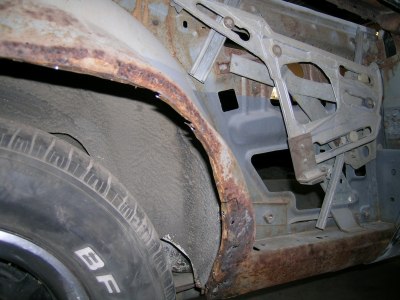
One more reason we totally removed the passenger-side quarter panel was to get at the inner fender rust on the forward edge of this piece. Only total replacement of all defective material will be good enough to achieve the results we are hoping for.
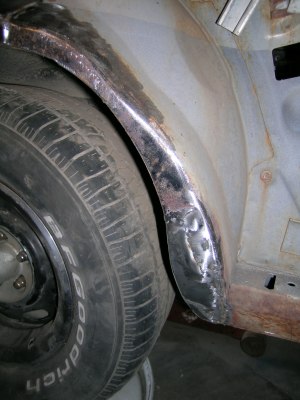
My buddy, the metal wizard, never ceases to amaze me. This was a case in point. He used some of the complex compound curvature left over from the sail panel repair pieces to fabricate an identical steel replacement section for the rusted area in the previous picture. Once welded in and ground off smooth, it was truly amazing how well he had matched the original shape.
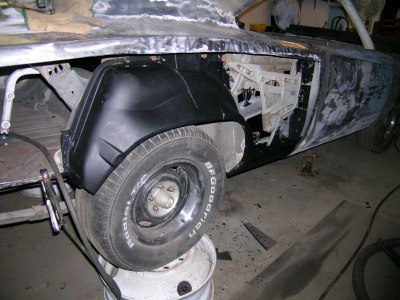
To help prevent any future problems, the inner fender, inner rocker panel, and several other areas which are impossible to access under ordinary circumstances, were given a generous coating of the same rust encapsulator used on the floor.
--------
Posted in 2004-present | RESTORATION | body | rust & rust repair | sheet-metal replacement | link to this page | | Comments (0)
March 10, 2005
Sail panels
The next time my friend and I work on the Charger, we will start out by replacing the flat panel that lives between the sail panels. Test fitting the Charger Specialties piece indicates that once our surface preparation is complete, it should be a perfect fit. I highly recommend this company if you happen to need the sheet metal pieces they offer.
--------
Posted in RESTORATION | body | rust & rust repair | sheet-metal replacement | link to this page | | Comments (0)
Passenger-side sail panel, repaired
The passenger side has much less rust and only a tiny 3" x 1.5" piece of the repair section was needed. The welding, grinding, and sanding went so well on this side that absolutely no filler will be needed at all.
--------
Posted in 2004-present | RESTORATION | body | rust & rust repair | sheet-metal replacement | link to this page | | Comments (1)
Sail-panel and window tray repair: complete
The final product: welded, ground, and high-speed sanded, looks stunning. Little or no filler will be required on the weld seam area. You will never know how great a job my friend did once this is covered up with a vinyl top again, so I'm glad I have pictures.
--------
Posted in 2004-present | RESTORATION | body | rust & rust repair | sheet-metal replacement | link to this page | | Comments (0)
Sail panel repair: ready to weld
After the rusted material was removed, only a relatively small section of each of the repair panels I'd purchased from Charger Specialties was needed. The fit and form of the pieces was quite good, and required no exceptional massaging for a nice fit. Here, the trimmed and fitted repair piece is shown in place, ready for welding.
--------
Posted in 2004-present | RESTORATION | body | rust & rust repair | sheet-metal replacement | link to this page | | Comments (0)
Sail-panel and window tray repair
(just as a reminder, a few entries before this one in the 'sheet-metal replacement' category, you'll find a shot of the rust in this area as we initially uncovered it.)
At long last, the exciting day arrived and my metal-wizard friend brought all his welding and fabricating equipment over to my garage. First step was to remove the large flat panel covering the area between the rear window and the trunk lid. Next the rusted-out areas of the sail panels had to be removed. The driver's side was much worse than the passenger side, so we started there.
--------
Posted in 2004-present | RESTORATION | body | rust & rust repair | sheet-metal replacement | link to this page | | Comments (0)
September 10, 2004
Rear valance quarters
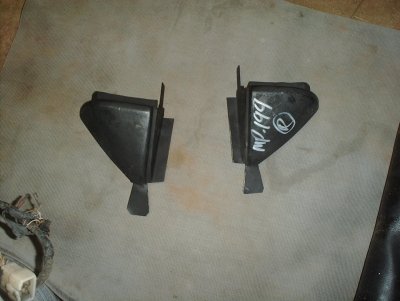
Finishing off my current inventory of rust repair parts is this pair of rear valance corners. The passenger side rear valance corner is badly rusted, and once fitted, these will nicely tie in the new quarter panels with the rear valance, which had been replaced previously.
--------
Posted in 2004-present | RESTORATION | body | disassembly | rust & rust repair | sheet-metal replacement | link to this page | | Comments (0)
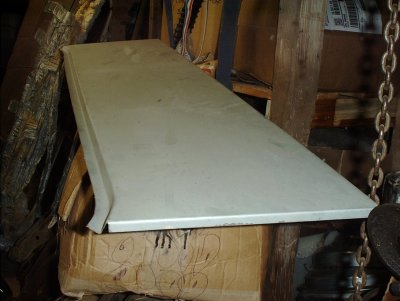
Trunk floor extension
On the passenger side where the rear quarter panel was more severely rusted, the trunk floor extension was rusted out as well, where it met the quarter panel. This piece purchased from Auto Body Specialties will give a solid backing for the new quarter panel on that side.
--------
Posted in 2004-present | RESTORATION | body | disassembly | rust & rust repair | sheet-metal replacement | link to this page | | Comments (0)
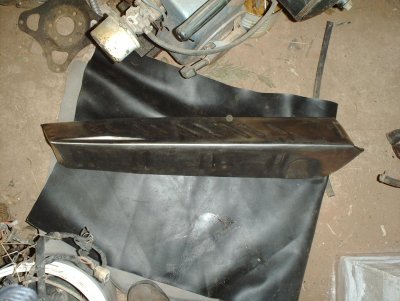
Rear window channel replacement piece
This other piece of metal required to complete the replacement of the rusted portions of the rear window channel was also purchased from Charger Specialties. This too seems to be of excellent workmanship. I will be very happy to have these pieces finally part of my car.
--------
Posted in 2004-present | RESTORATION | body | disassembly | rust & rust repair | sheet-metal replacement | link to this page | | Comments (0)
Window channel replacement pieces
Next I purchased this seemingly very well-made pair of sail panel/rear window channel pieces, made by Charger Specialties in Montana. Not only was I impressed with the parts themselves, but the packing and shipping were very well-thought-out, with my order arriving in a handmade wooden box to keep it safe.
--------
Posted in 2004-present | RESTORATION | body | disassembly | rust & rust repair | sheet-metal replacement | link to this page | | Comments (0)
Replacement quarter panels
These quarter panels were my first major sheet metal acquisition. They were made by Goodmark Industries. I got a great deal on them on Ebay, which allowed my son and me to have a fun trip together to go get them in the truck. I was impressed with the quality of work on these. The real test will be fitting them to the car later, though. We are considering using an Eastwood Company weldless panel repair process to help make this easier. If anyone reading this has experience with this process, good or bad, I would be interested to hear what you have to say; please feel free to email me about it.
--------
Posted in 2004-present | RESTORATION | body | disassembly | rust & rust repair | sheet-metal replacement | link to this page | | Comments (0)
rust in the window channel
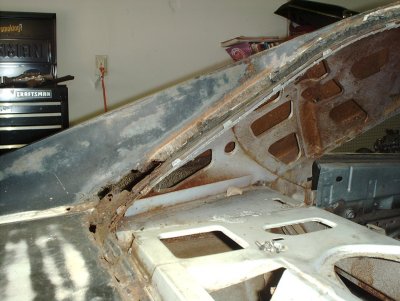
In removing the vinyl top some years ago, I discovered I had a seemingly small patch of rust on the driver's side rear window area. Years later, after removing the rear window and trim, I discovered a fairly large rust hole on the driver's side, with some significant but less extensive rust on the passenger's side corner. The window channel across the bottom was in very poor condition also. I was discouraged upon discovering so much rust on my car, but after looking at various websites and eBay, I have realized that this amount of rust is not only fairly common, but less extensive than a lot of cars that are being restored.
--------
Posted in 2004-present | RESTORATION | body | disassembly | rust & rust repair | link to this page | | Comments (0)
rust in the lower quarter
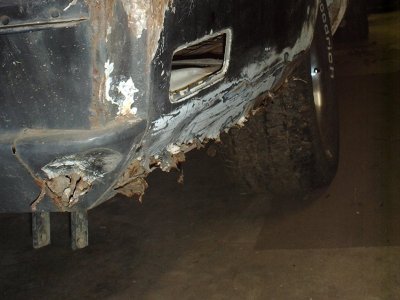
It was astounding to me to discover how much actual decay had taken place in my lower quarter panels. The passenger side was especially bad. I sanded off much of the paint and then used hand tools to pull the metal away to reveal the full extent of the damage. As is visible in this photo, the rear valance corner is rusted through, as is the vertical part of the trunk floor extension behind the lower quarter panel. With the plethora of dents, large and small, this rust helped me to decide that the rear quarters would be replaced rather than reworked.
--------
Posted in 2004-present | RESTORATION | body | disassembly | rust & rust repair | link to this page | | Comments (0)