


« October 2005: sheet-metal work resumes | Main | Instrument bezel »
January 10, 2006
Rear quarter panel installation
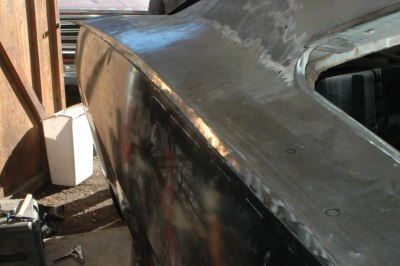
It was finally time to cover up the gaping hole in the side of my car. While paying very close attention to the alignment of the main body lines, and also focusing on the wheel opening and bottom flanged edge alignment, we carefully figured out how much of the reproduction quarter panel would have to be cut off and discarded. A friend of mine, James, who has worked in the automotive restoration field for a number of years, gave us a suggestion which saved us a lot of grief. We were puzzling over how to get the new piece and the opening it would fill trimmed as precisely as they would need to be. His suggestion was to overlap the pieces by as much as possible, and then using a 4" grinder with the thinnest available cut-off wheel, cut both the new panel and the car at the same time. To maintain our alignment, we used a number of cleco temporary clamping devices, which I purchased from Eastwood's.
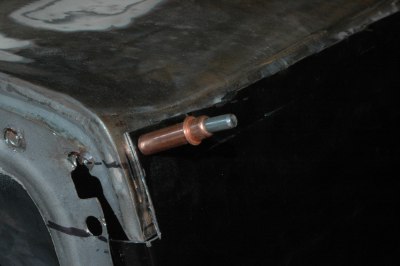
For those who are wondering, this is a Cleco, purchased in a kit with special pliers to install and remove them, these are a reusable temporary clamping device. First you drill a small hole through both items to be held. Then squeeze the Cleco with the pliers, slide it into the hole, and release. When you're ready to remove it, simply grab it with the special pliers, squeeze, and slide it out of the hole. If you're going to be doing a lot of metal replacement and welding or fabrication work, a set of these is really handy. I bought these at Eastwood's, although I understand they are available elsewhere.
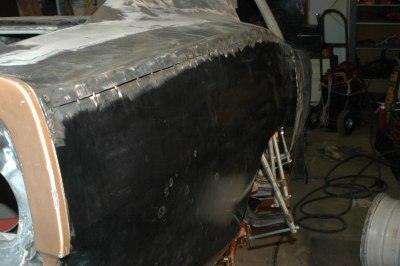
Using Eastwood's intergrip panel clamps, the new panel was held in place for tacking, which we did very carefully, putting a tack only every twelve inches or so initially, in order to avoid overheating the material. Once the edges were well-tacked after several passes, we glued all the lower flanged edges with panel-bonding adhesive, also purchased from Eastwood's. The rear quarter was now in its final resting position. The body lines lined up very nicely, and it would just be up to me to patiently continue the tack-welding and smoothing process until we had a seamless welded bond.
EDIT, OCTOBER 2010
While trimming the wheel lips to the proper dimensions (the after-market quarter panels had an excessively wide wheel lip), I discovered that the panel bonding adhesive, for whatever reason, had not bonded the quarter panel to the wheel house in many places. I removed the panel bonding adhesive, which wasn't that difficult, and drilled holes, then spot-welded the two pieces together just like we did on the driver's side from the beginning. Not sure what the failure was, but I'm glad to have discovered it before getting everything painted.
Posted in 2004-present | RESTORATION | body | rust & rust repair | sheet-metal replacement