


March 26, 2013
A Special Guest!
Something I've been encouraging my son to do for a long time is to create a web presence about the ongoing restoration of his 1967 Plymouth Satellite.
Well the last merit badge he needs to finish before he can submit his Eagle Scout package is Communications. One of the ways to meet one of the requirements is to design a web site. The requirements state you do not even have to post it, and it does not have to be more than a few paragraphs of information. However, with a little nudge from his Dad (and Assistant Scoutmaster) he put it on the web.
Here he is at age 7 when I bought him his first Mopar! (he is almost 17 yrs old now and 6'3" tall)
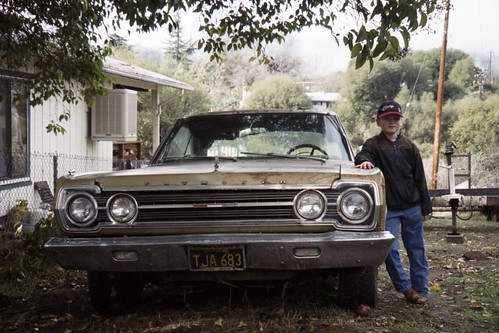
It is basic, and he'll be adding to it as we go, we have many hundreds of photos, but most are references for when we put it back together.
It is a blog, so just like my Charger blog, the newest posts are on top, you scroll down to see older stuff - all the way back to the beginning.
Here is a link to see it... Tolley's Satellite Restoration
Let him know what you think, or if there is anything any of you want to know.
Posted in 2004-present | Family Helpers | RESTORATION | disassembly | glass | interior | primer and paint | rust & rust repair | sandblasting | sanding | sheet-metal replacement | link to this page | | Comments (0)
October 28, 2008
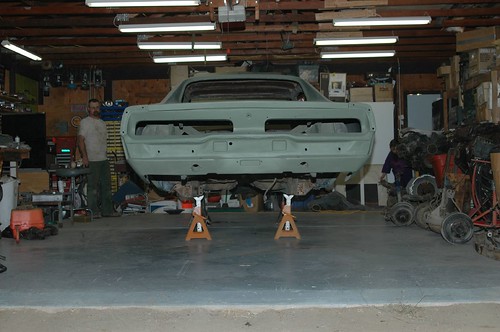
Removing the suspension
The following series of pictures shows my Charger starting out on jackstands with the tires and wheels removed, displaying, hopefully for the last time, its sad stock ten-inch drum brakes. I wanted to remove as many of these parts as possible prior to priming and painting.
Upgrading the brakes is not the only thing I have in mind for this phase of my project. When this goes back together, I will install Hemi .960 front torsion bars and stock XHD 440/Hemi leaf springs. I have all new polygraphite bushings to install throughout, a firm-feel steering box, 12-inch front rotors from a Chrysler Cordoba riding on disc-brake spindles from a '73 Valiant, and 11" HD drums out back. I will also upgrade to a 1 1/8" diameter front sway bar.
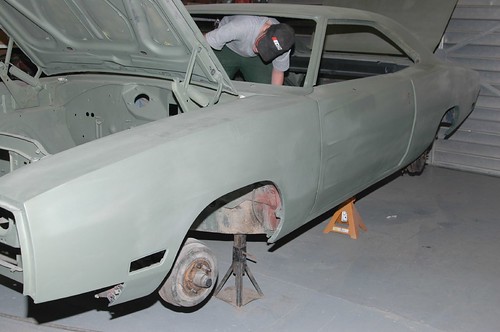
My son, just completing the removal of the steering column.
This picture, in addition to showing the absence of the suspension, shows fairly well what I have been doing these last months on my car. I have been working very hard to get my body lines straight and appropriately crisp. I think they show fairly well in this photo.
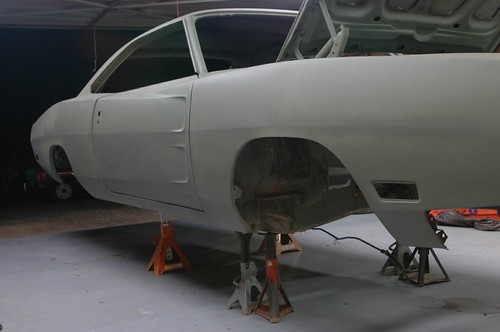
Rear view of the car; rear-end, springs and shackles all had to go as well.
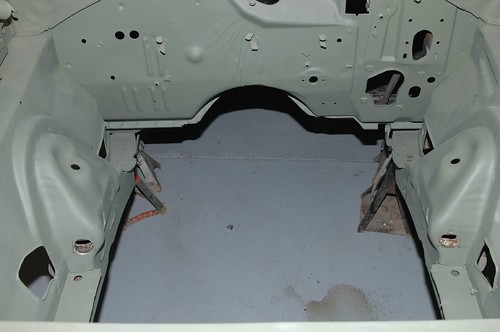
Having the engine bay this clear should make it extremely easy to get the primer and paint everywhere I need them to be, prior to reinstalling the restored and upgraded front suspension and K-member.
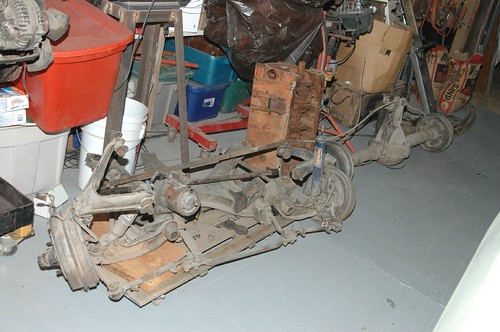

It is really something I thought I would never see, looking at this pile of parts in the side of my garage. It will be a lot of fun this winter to disassemble, clean, restore, and upgrade all of these assemblies prior to installation, after the paint goes on.
Posted in 2004-present | RESTORATION | body | disassembly | suspension, brakes, tires, and wheels | link to this page | | Comments (1)
One last sandblasting chore
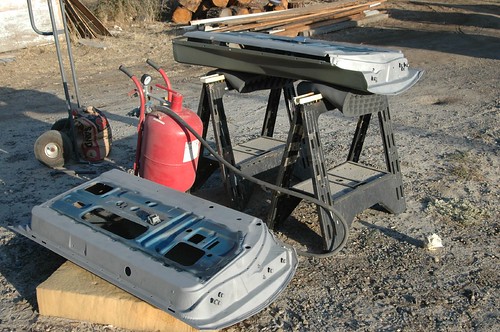
As the day to put primer on my Charger draws near, I realized I had neglected to strip the old paint and minor surface rust, etc., off the inner part of my doors. I had used a wire wheel on my grinder to remove all the paint from the door jamb area of the car body itself, but wanted a good fresh start on the doors. My son and I removed the doors, gutted the latches and window regulators etc., and set them outside for sandblasting. The red tank-looking object between the doors in the first photo is my inexpensive but very serviceable sandblaster.
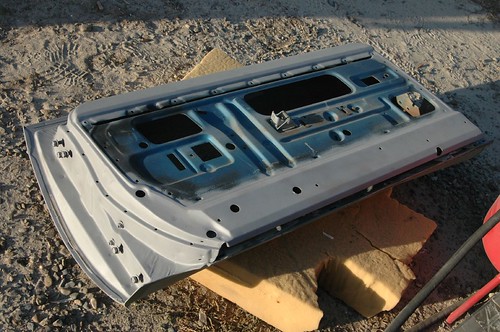
This is a closeup of the areas I sandblasted. I protected the outside edge of the door, which already has primer on it, with a heavy layer of masking tape prior to sandblasting. I was very pleased with the results. All the rust, all the paint, all the years of glue, etc., are gone. After this, the doors were taken inside the garage and etching primer was applied to all the bare metal.
Posted in 2004-present | RESTORATION | body | disassembly | sandblasting | sanding | link to this page | | Comments (0)
September 10, 2004
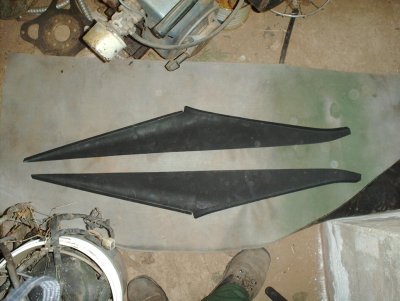
Rear valance quarters
Finishing off my current inventory of rust repair parts is this pair of rear valance corners. The passenger side rear valance corner is badly rusted, and once fitted, these will nicely tie in the new quarter panels with the rear valance, which had been replaced previously.
--------
Posted in 2004-present | RESTORATION | body | disassembly | rust & rust repair | sheet-metal replacement | link to this page | | Comments (0)
Trunk floor extension
On the passenger side where the rear quarter panel was more severely rusted, the trunk floor extension was rusted out as well, where it met the quarter panel. This piece purchased from Auto Body Specialties will give a solid backing for the new quarter panel on that side.
--------
Posted in 2004-present | RESTORATION | body | disassembly | rust & rust repair | sheet-metal replacement | link to this page | | Comments (0)
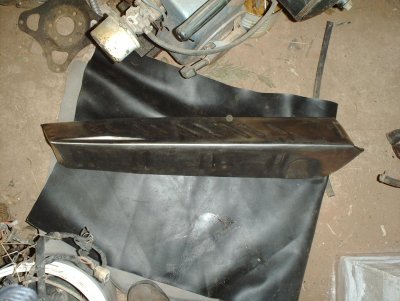
Rear window channel replacement piece
This other piece of metal required to complete the replacement of the rusted portions of the rear window channel was also purchased from Charger Specialties. This too seems to be of excellent workmanship. I will be very happy to have these pieces finally part of my car.
--------
Posted in 2004-present | RESTORATION | body | disassembly | rust & rust repair | sheet-metal replacement | link to this page | | Comments (0)
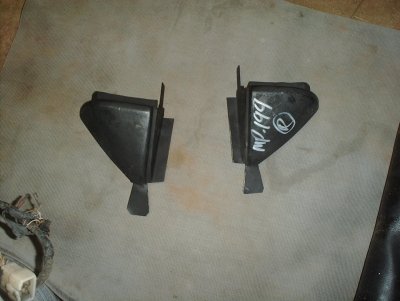
Window channel replacement pieces
Next I purchased this seemingly very well-made pair of sail panel/rear window channel pieces, made by Charger Specialties in Montana. Not only was I impressed with the parts themselves, but the packing and shipping were very well-thought-out, with my order arriving in a handmade wooden box to keep it safe.
--------
Posted in 2004-present | RESTORATION | body | disassembly | rust & rust repair | sheet-metal replacement | link to this page | | Comments (0)
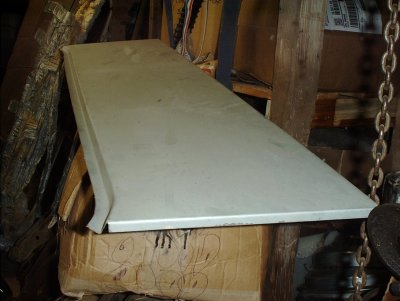
Replacement quarter panels
These quarter panels were my first major sheet metal acquisition. They were made by Goodmark Industries. I got a great deal on them on Ebay, which allowed my son and me to have a fun trip together to go get them in the truck. I was impressed with the quality of work on these. The real test will be fitting them to the car later, though. We are considering using an Eastwood Company weldless panel repair process to help make this easier. If anyone reading this has experience with this process, good or bad, I would be interested to hear what you have to say; please feel free to email me about it.
--------
Posted in 2004-present | RESTORATION | body | disassembly | rust & rust repair | sheet-metal replacement | link to this page | | Comments (0)
rust in the window channel
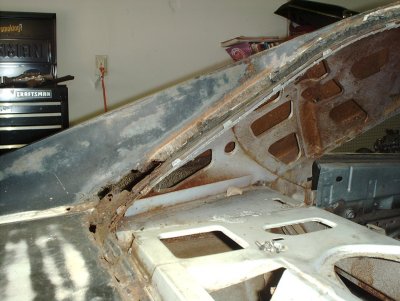
In removing the vinyl top some years ago, I discovered I had a seemingly small patch of rust on the driver's side rear window area. Years later, after removing the rear window and trim, I discovered a fairly large rust hole on the driver's side, with some significant but less extensive rust on the passenger's side corner. The window channel across the bottom was in very poor condition also. I was discouraged upon discovering so much rust on my car, but after looking at various websites and eBay, I have realized that this amount of rust is not only fairly common, but less extensive than a lot of cars that are being restored.
--------
Posted in 2004-present | RESTORATION | body | disassembly | rust & rust repair | link to this page | | Comments (0)
rust in the lower quarter
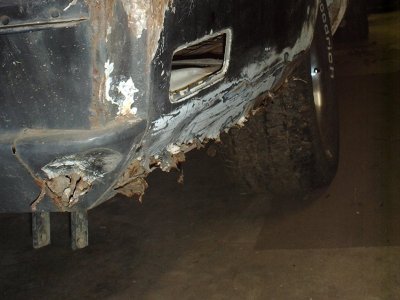
It was astounding to me to discover how much actual decay had taken place in my lower quarter panels. The passenger side was especially bad. I sanded off much of the paint and then used hand tools to pull the metal away to reveal the full extent of the damage. As is visible in this photo, the rear valance corner is rusted through, as is the vertical part of the trunk floor extension behind the lower quarter panel. With the plethora of dents, large and small, this rust helped me to decide that the rear quarters would be replaced rather than reworked.
--------
Posted in 2004-present | RESTORATION | body | disassembly | rust & rust repair | link to this page | | Comments (0)
April 10, 2004
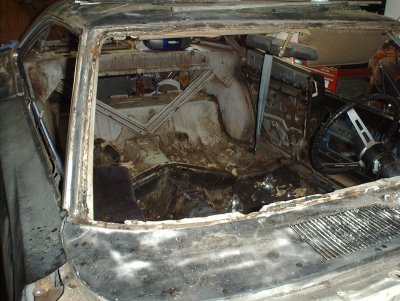
After the glass, the

After the glass, the soft parts of the interior were removed and stored. The wiring harnesses were carefully removed. I will rebuild these carefully in order to insure that there will be no electrical problems when the car is reassembled.
--------
Posted in 2004-present | RESTORATION | disassembly | wiring | link to this page | | Comments (0)
Windows out
Carefully removing all of the glass from the car was a critical step; with the glass out, I will be able to start doing serious work to the rest of the car without worrying about damaging the fragile 35-year-old glass.
--------
Posted in 2004-present | RESTORATION | disassembly | glass | link to this page | | Comments (0)
Body disassembly
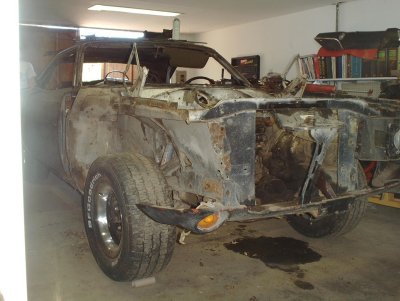
Next, the major body panels were removed, giving me better access to the inner parts of the car, as well as helping me determine what repairs, if any, were needed on the panels themselves.
--------
Posted in 2004-present | RESTORATION | body | disassembly | link to this page | | Comments (0)
Engine compartment, stripped
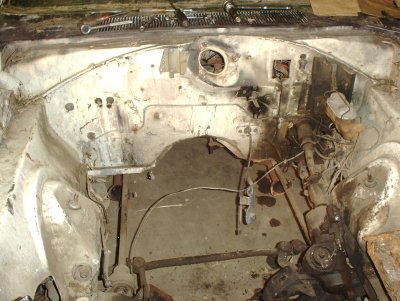
After carefully removing everything that needed to come out immediately, I then labeled and stored all the components. The engine compartment will now wait for the rest of the car to be stripped of paint, grease, and rust.
--------
Posted in 2004-present | RESTORATION | disassembly | link to this page | | Comments (0)
emptying the engine compartment
![]()
With the engine out of the way, next it was time to carefully gut the engine compartment.
--------
Posted in 2004-present | RESTORATION | disassembly | link to this page | | Comments (0)
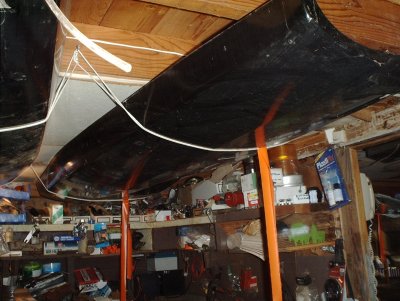
view from the front in the shop
The view from the other end in the garage. There is plenty of room to walk around the car and work. At this point I couldn't wait to get started with further disassembly.
--------
Posted in 2004-present | RESTORATION | disassembly | link to this page | | Comments (0)
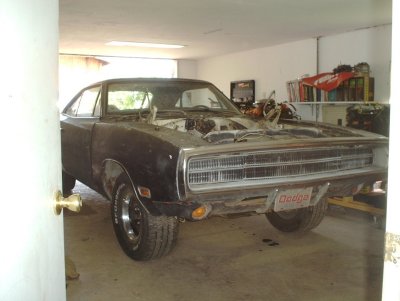
in its new home

My Charger arrives in its new home (for the next few seasons anyway). Many spare moments will be invested between these walls over the next several years.
--------
Posted in 2004-present | RESTORATION | disassembly | link to this page | | Comments (0)
Engine coming out
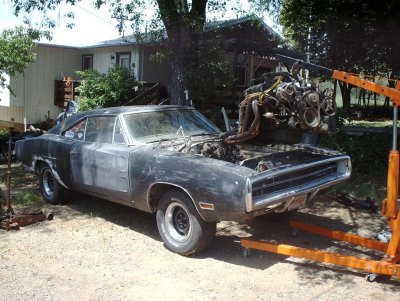
Here's the 440 on the engine hoist, on its way out of the car. It was an odd sight: the engine that had propelled me at nearly 140 mph, dangling in the air.
--------
Posted in 2004-present | RESTORATION | disassembly | link to this page | | Comments (0)
THE BEGINNING
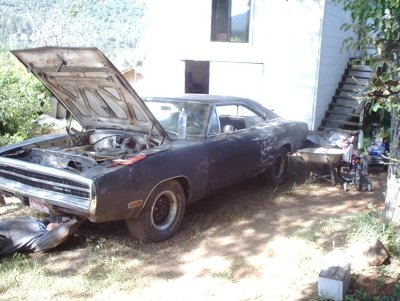
They say the journey of a thousand miles begins with a single step. And so the restoration of my car began with the disconnection of the transmission cooler lines. Within a couple of hours, as the upcoming pictures will show, the 440 engine and 727 transmission were safely out of the car. This was in April of 2004.
--------
Posted in 2004-present | RESTORATION | disassembly | link to this page | | Comments (2)