


June 08, 2014
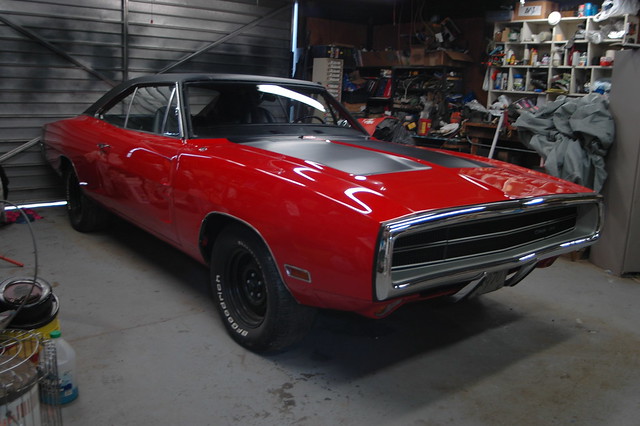
DRIVING my Charger out into the sun!
For the first time in more than 10 years I drove my Charger today. It still needs shocks, tires, insurance etc so I did not go far, but far enough to get my Charger out into the sun for a round of nice pictures. Thanks to my wife for taking the video and photos, and my son for spotting for me.
Into the sunshine!
Down the driveway
If you like, join me on a quick walk around my Charger.
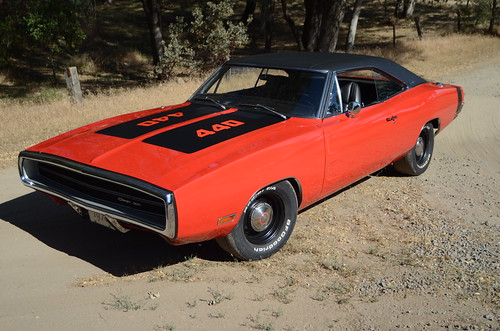
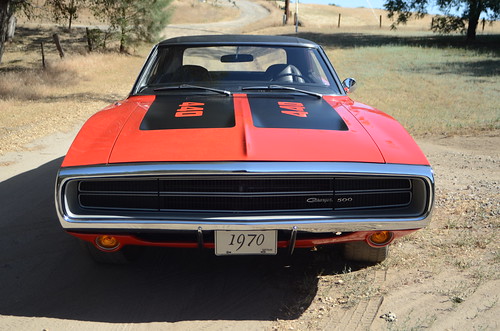
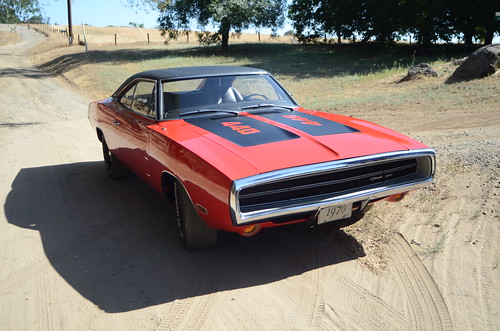
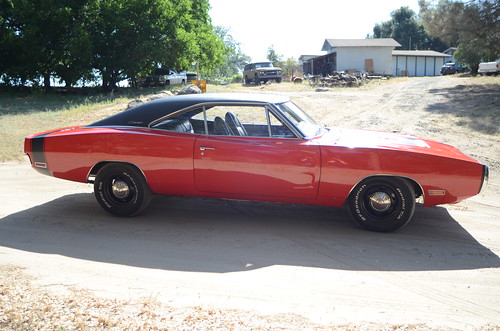
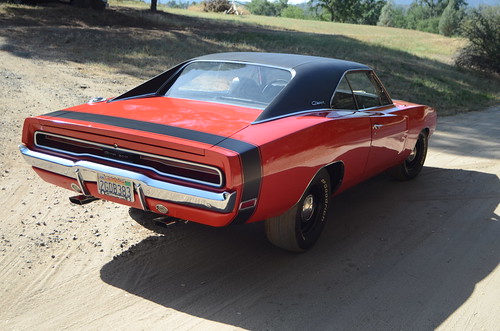
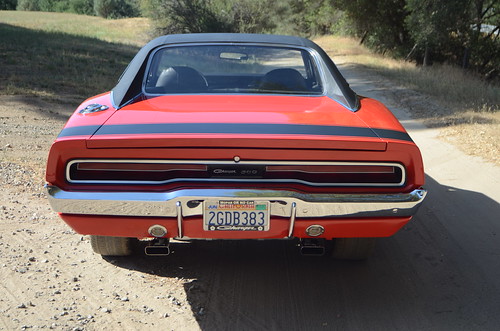
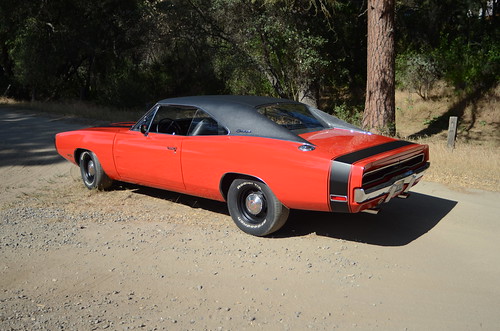
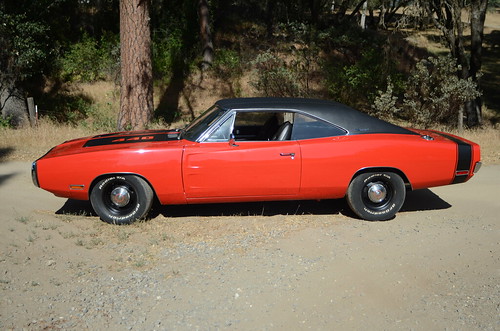
The to-do list is getting shorter and shorter, and my Charger is getting closer to being ready to take to it's first car show, probably in October.
Posted in 2004-present | Family Helpers | RESTORATION | Reassembly | body | engine | glass | suspension, brakes, tires, and wheels | link to this page | | Comments (0)
March 26, 2013
A Special Guest!
Something I've been encouraging my son to do for a long time is to create a web presence about the ongoing restoration of his 1967 Plymouth Satellite.
Well the last merit badge he needs to finish before he can submit his Eagle Scout package is Communications. One of the ways to meet one of the requirements is to design a web site. The requirements state you do not even have to post it, and it does not have to be more than a few paragraphs of information. However, with a little nudge from his Dad (and Assistant Scoutmaster) he put it on the web.
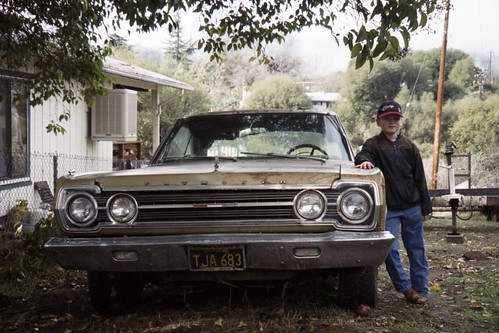
Here he is at age 7 when I bought him his first Mopar! (he is almost 17 yrs old now and 6'3" tall)
It is basic, and he'll be adding to it as we go, we have many hundreds of photos, but most are references for when we put it back together.
It is a blog, so just like my Charger blog, the newest posts are on top, you scroll down to see older stuff - all the way back to the beginning.
Here is a link to see it... Tolley's Satellite Restoration
Let him know what you think, or if there is anything any of you want to know.
Posted in 2004-present | Family Helpers | RESTORATION | disassembly | glass | interior | primer and paint | rust & rust repair | sandblasting | sanding | sheet-metal replacement | link to this page | | Comments (0)
December 14, 2012
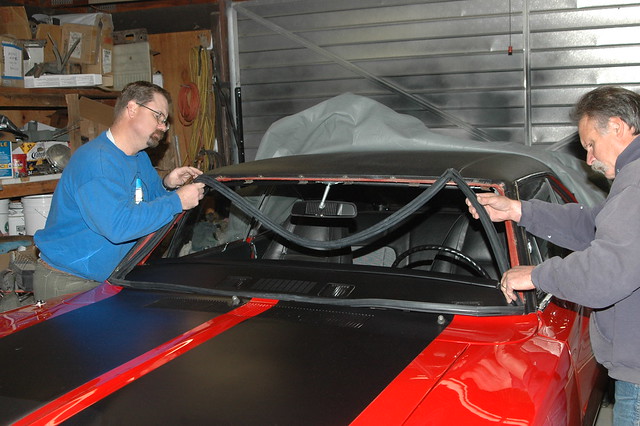
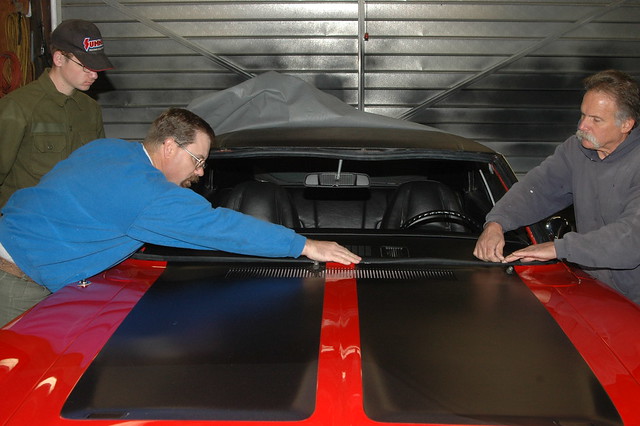
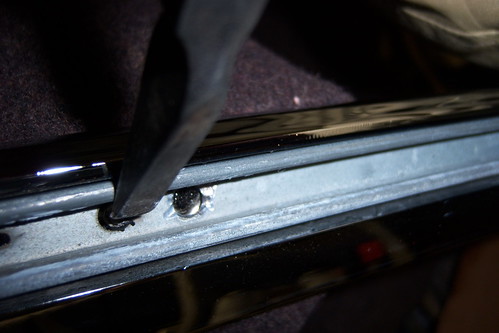
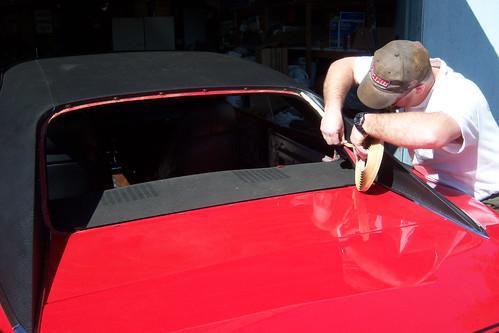
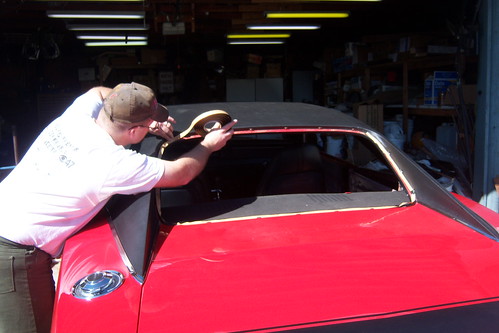
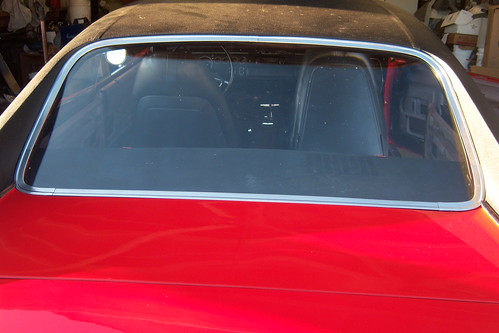
The last glass - Windshield installation
Well, once my electrical systems check was completed successfully I started planning to get my windshield installed.
I arranged to once again have a local businessman, George Sgambellone, owner and operator of Mariposa Auto Trim, about installing my windshield (he came to my house and installed my vinyl top and let me help and learn). He was willing to come to my house and put the windshield in, showing me step-by-step how he was doing everything. The job went very smoothly, took an hour, maybe less, and once again, his rates were EXTREMELY reasonable. I have again decided to place an image of his business card here at the end of this post in case any people in my area need this sort of work done. I highly recommend George.
Here are a progression of pictures from the windshield installation. The first image shows George and myself working together putting the gasket in , then the progress forward.
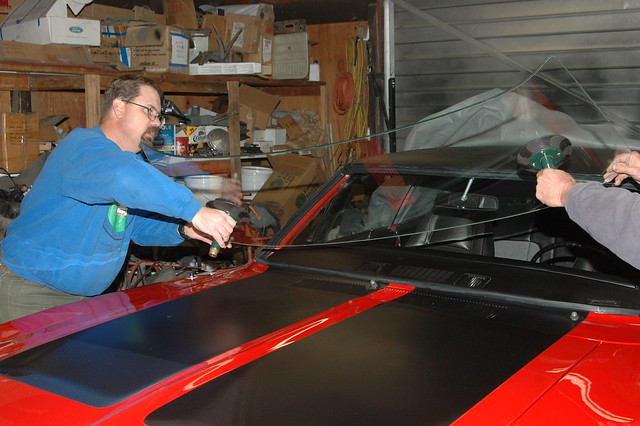
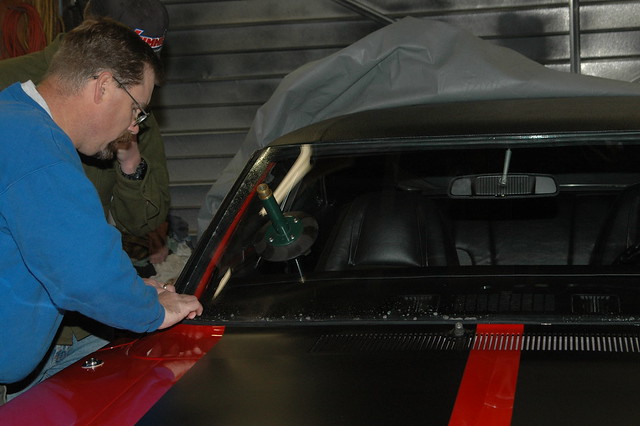
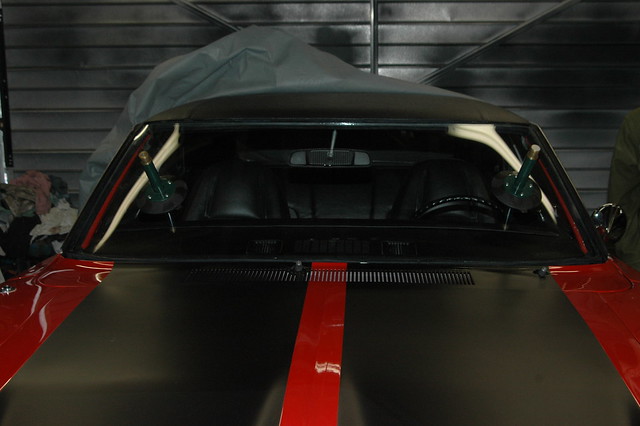
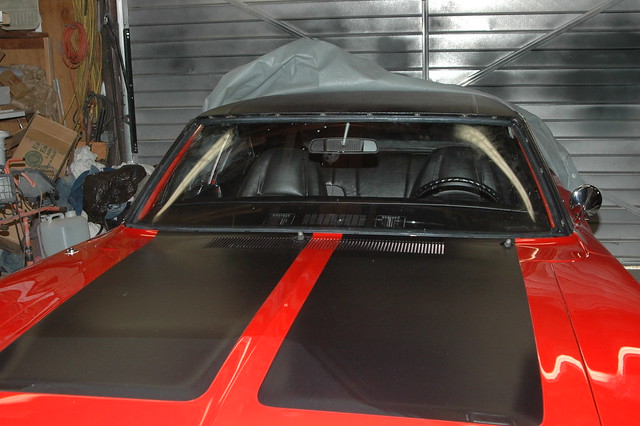
Yay! The glass is complete -The car wlll be much easier to keep clean inside now!
I have begun the process of cleaning and straightening the stainless steel windshield moldings and hope to finish polishing them and get them installed over the next week.
Here is a well deserved plug for George and Mariposa Auto Trim

Posted in 2004-present | Family Helpers | RESTORATION | Reassembly | body | glass | trim | link to this page | | Comments (0)
April 19, 2012
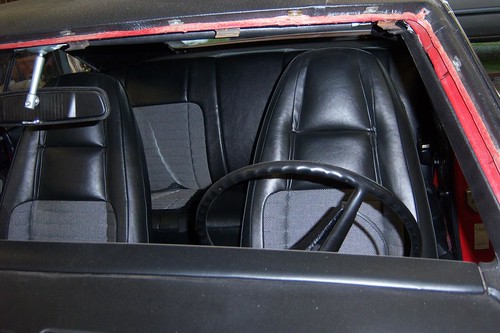
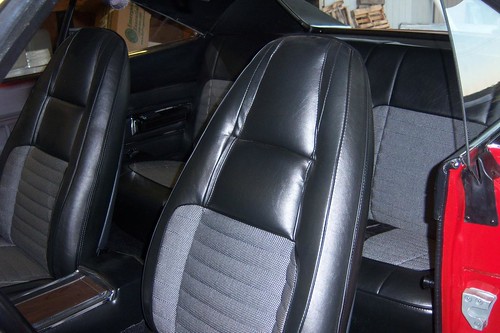
Interior progress
It has been a while since I was able to spend much time on my Charger but finally I have something to report.
Once I was finally happy with the adjustments of the side glass, I was able to begin installing the interior items that have been boxed up for many years now.
The following pictures reveal the fun as it happened!
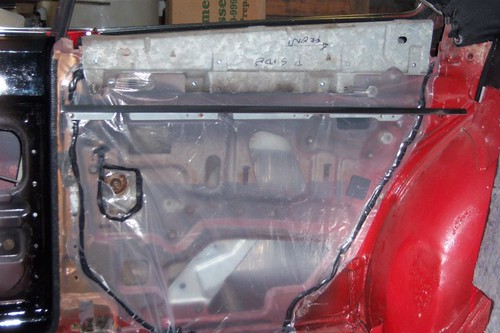
First the insides had to be sealed with a plastic barrier material.

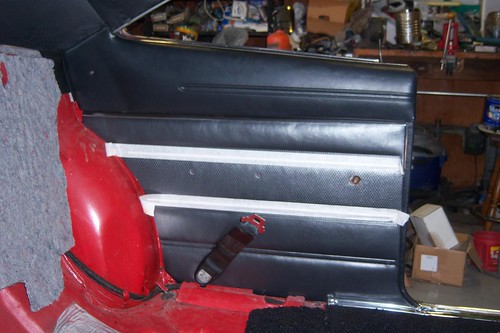
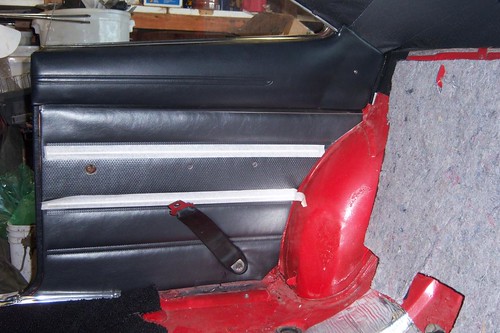
Then the restored upper door pads, and the new Legendary lower door panels could go on.
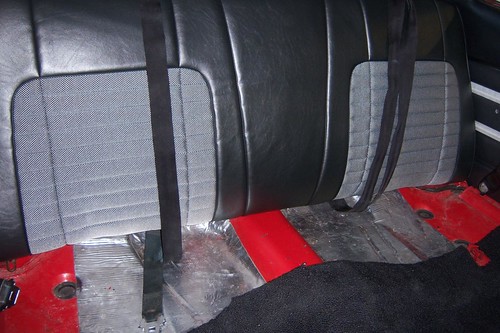
Then at long last the seat!
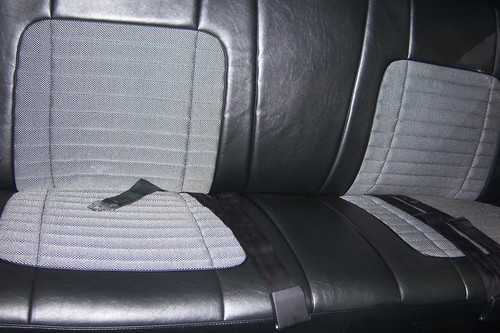
And all the rest too.
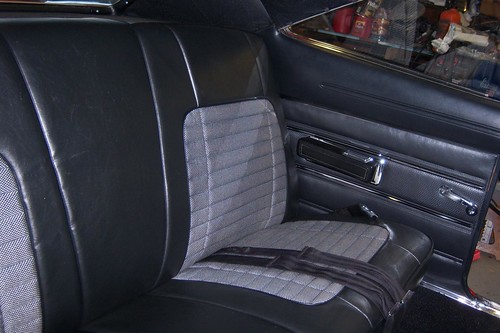
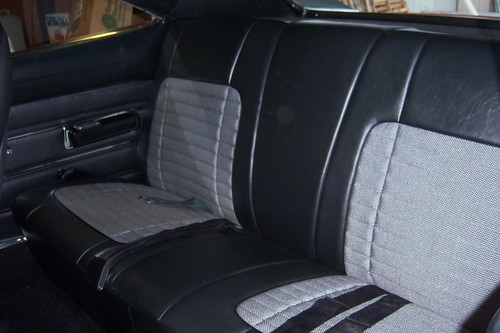
And a couple of over all views...
Next I will install a couple more small items, and the door panels themselves. Check back soon!
Posted in 2004-present | RESTORATION | Reassembly | glass | interior | trim | link to this page | | Comments (0)
March 10, 2012
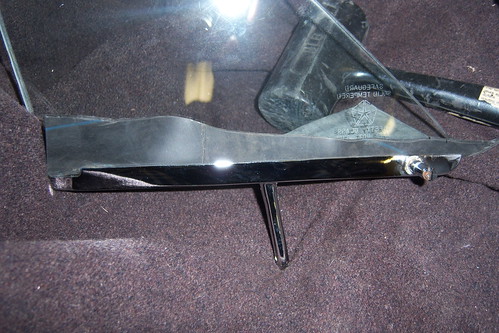
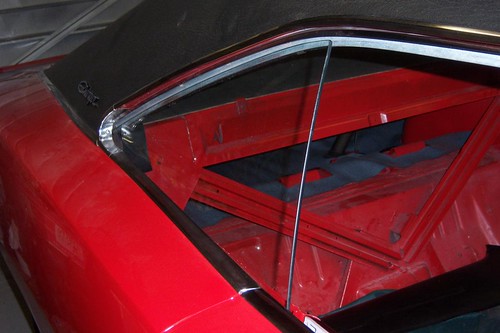
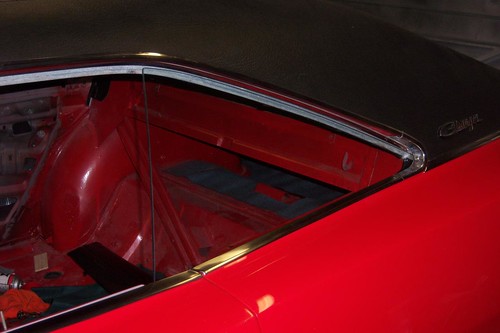
Side glass going in
My vent window glass showed up at my house Wednesday, so this weekend I was able to start putting the side glass in m Charger.
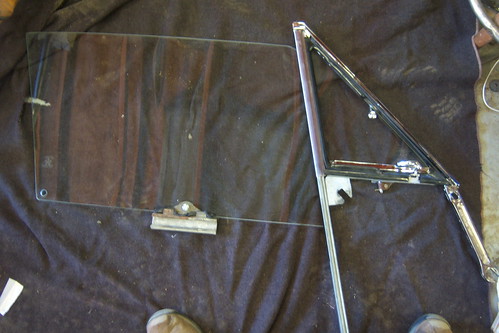
Got the passenger side vent window frame assembled into the re-chromed part. (I did the driver's side some months ago before I knew my glass was badly scratched) Here the pieces are being "peened" together.
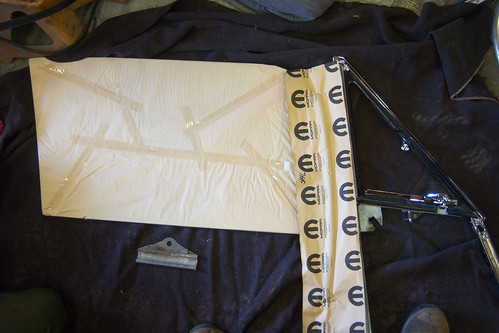
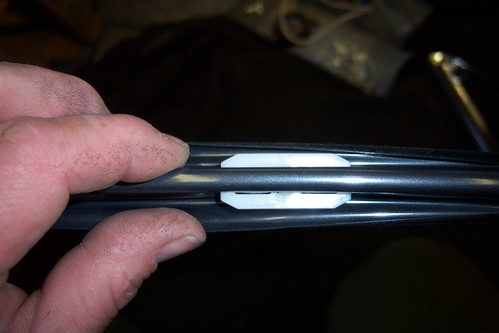
Installed the new vent window glass into the channel pieces using inner tube as the gasket... It trims up very nicely and really holds on the the glass well.
After this the rubber gets trimmed very closely with a new razor blade, and it looks really good. Then the vent windows get installed into the vent window frames. Then it is time to put the rest together.
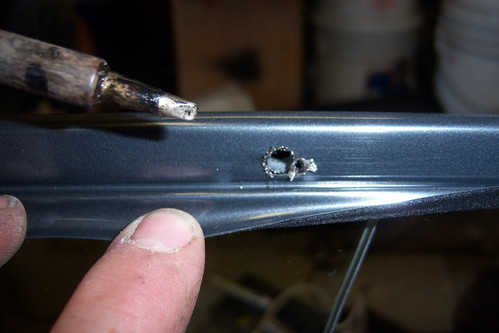
At the front edge of the door glass there is a fairly expensive (like $45 each) piece of molded plastic covered in felt. There are a pair of plastic guides that go at the top and the bottom of the door glass through holes in the door glass. The plastic guides go inside the outer edge of the felt covered plastic. The "problem" is the holes are not in the felt covered plastic. So to make a clean hole that would not "spread" and wreck my new piece, I melted a clean hole in just the right spot with my soldering iron.
Once these are all together the assembly starts to take shape...
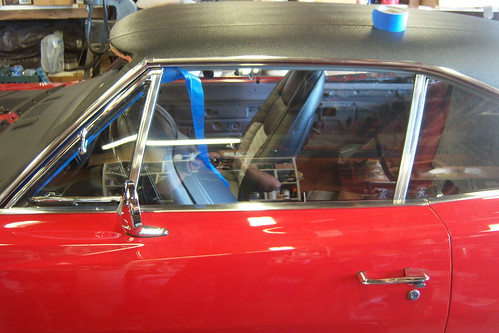
With the help of my son and nephew, we installed the side glass in both doors. After a couple hours of adjustments, I am happy with the results thus far. Once I am totally sure that I do not want to change anything with the adjustments, I will be able to continue the interior re-assembly.

In making the adjustments I found a good summary in the book Project Charger on pages 136-137. If you are restoring a Mopar, especially a Charger, I highly recommend this book.
Posted in 2004-present | Family Helpers | RESTORATION | Reassembly | glass | link to this page | | Comments (0)
March 04, 2012
New glass going in - part 1
Well even though a week ago it was snowing here, today it was in the low 70's and sunny. Great weather for the butyl tape to work, so my son, my nephew and I put the new AMD rear glass in my Charger.
Here I am putting down the 5/16" tape.
Here is the glass in, trim on. The lower passenger side corner really gave me a hard time, had to work the piece over some, but after sufficient frustration leading to prayer, and hard work, I got it on OK. (Thank you Lord!)
I like that the glass has the Pentastar logo on it, I think that is a nice touch.
I put the new quarter window glass in too. It seems pretty good, but one of the holes (passenger side) seemed to be a little off so I had to modify the bushing that goes around the bolt. The driver's side was fine though. I'll know more about how well it fits when I have the door glass in and try to get everything adjusted. About a week ago Mopar Ed told me that the vent glass (which AMD forgot to put in the box) was on its way. So maybe soon I can get the door glass in.
Keep checking back!
Posted in 2004-present | Family Helpers | RESTORATION | Reassembly | glass | trim | link to this page | | Comments (0)
February 25, 2012
Box-O-Glass!
Well after being on back ordered for a while due to the windshield being out of stock. Today I was able to go pick-up my new Charger glass!
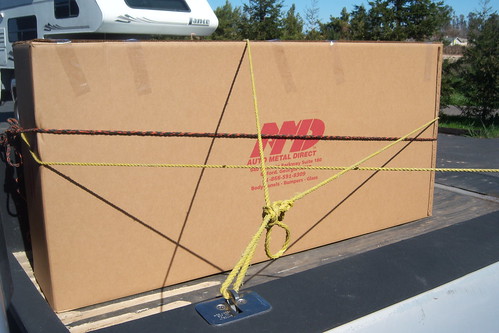
A very large, very well packed box full of reproduction goodness was waiting for me a Mopar Ed's when I got there.

The glass looks great, soon I'll see how it fits. One unfortunate thing though, it appears AMD forgot to put the vent windows in the box, so they will have to come separately.
I hope to be installing the rear glass and quarter windows very soon.
Stay tuned...
Posted in 2004-present | RESTORATION | Reassembly | glass | link to this page | | Comments (0)
November 26, 2011
Hit a snag!
Well, it happens to everyone from time to time, now it is my turn (again)...
After cleaning my various windows really well this weekend, I realized that I am in dire need of replacement glass. My door glass, and rear window especially are scratched beyond belief! I guess all those years driving it, I never noticed (or cared)? Heck back then if my car had glass I thought I was "good to go!"
What that means is the glass installation will not happen right away, the newly chromed vent window frames and such will have to stay packed away, and the re-assembly of my interior will be on hold too. This is because I need to have the side glass all in and adjusted prior to putting the door panels on, and the rear door panels have to be on prior to the installation of the rear seat.
... Oh well, something else to save up for. I'll have to find other things to do on my Charger for a while. That should not be too hard!
Posted in 2004-present | RESTORATION | Reassembly | glass | interior | link to this page | | Comments (0)
October 28, 2011
Some progress
OK, things have been pretty quiet on my restoration for over a month, maybe closer to two. However, as my overtime pay has arrived and has now been put to work for me parts are starting to roll in.
Some folks have been asking, so I thought I's share the current status.
I will have pictures soon, especially when things start to go together, but, here is a list of what I have been able to acquire for my Charger...
Re-Chromed front bumper - got it!
Re-Chromed front bumperettes - got them!.
Re-Chromed rear bumper - got it!
Re-chromed rear bumperettes - got them!
Re-chromed vent window frames and smaller vent window parts (latches etc) - got them!
New bumper bolt kit - got it!
New shifter knob - got it!
New Wheel lip mouldings - got them!
New fuel tank - got it!
New 3/8 fuel line - got it!
New 1/4 fuel return line - got it!
New sending unit - got it!
New fuel line clip kit - got it!
Can't wait to get everything put on. That means I get to finish putting in the side glass, them complete the interior, I get to install bumpers and that means un-boxing my grille! I am getting excited!
Pictures coming "soon" (probably a bit at a time over the next 60 days or so) Please stay tuned!
Posted in 2004-present | Reassembly | body | glass | interior | trim | link to this page | | Comments (0)
June 10, 2011
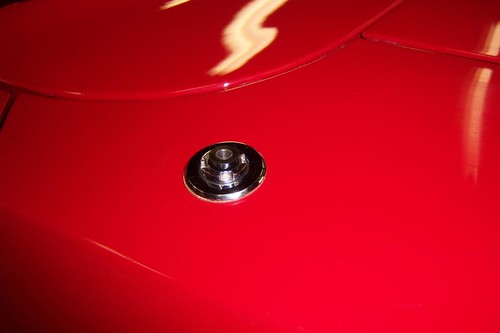
Filling in holes
Recently my family and I attended the Fremont Mopar Alley Mopar Rally car show, and I met a really nice guy and his wife who own a beautiful '69 Charger. While talking with them, I found out that they had some leftovers from restoring their car. One of those items was a NOS antenna base, nut, and bezel. He made me an extremely good deal, so I purchased it. My son, my nephew and I installed it in the car and routed the antenna coax. It looks really good, just like it's supposed to, and gives a finished look to the fender.
My friend and regular parts supplier, Mopar Ed, gave me an excellent deal on a pair of used quarter windows that were in considerably better shape than my originals. My son and I had previously installed all the hardware, so it was a simple matter for my nephew Jordan and I to install and adjust the windows themselves. It sure is fun, seeing some of the big holes start to be filled on my Charger.
Posted in 2004-present | RESTORATION | Reassembly | body | glass | wiring | link to this page | | Comments (0)
April 10, 2004
Windows out
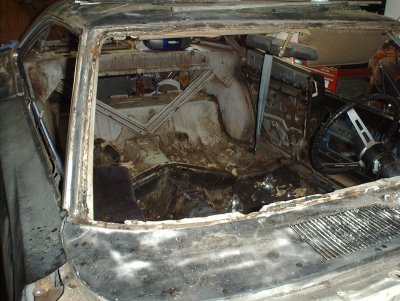
Carefully removing all of the glass from the car was a critical step; with the glass out, I will be able to start doing serious work to the rest of the car without worrying about damaging the fragile 35-year-old glass.
--------
Posted in 2004-present | RESTORATION | disassembly | glass | link to this page | | Comments (0)