


« March 2005 | Main | October 2005 »
May 25, 2005
Rebuilding the Wiring Harness
One major source of heartburn when I drove my Charger all those years was my temperamental electrical system. Once the wiring was all removed and I could inspect it properly, it was a mystery that the car had worked at all without burning itself to the ground. All of the bad splices, bad connections, improperly done repairs, and modifications made this wiring harness a real challenge to restore. My future enjoyment would require a fully functional, safe, and reliable electrical system. Armed with over a dozen salvaged Mopar harnesses and a reproduction '70 Charger factory service manual, I replaced every bad wire, connector, bulb, and switch with good originals. Now the entire harness, headlights to tail lights, has been rebuilt to match the diagrams in the manual, and is ready to be stored.
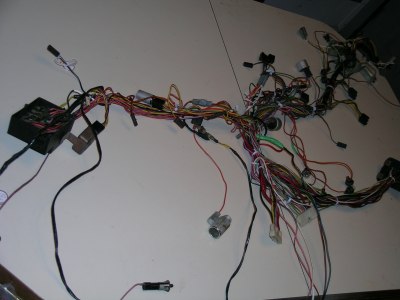
This is the dash harness, the most extensive part of the wiring harness. I have rebuilt it, and it is ready for re-wrapping.
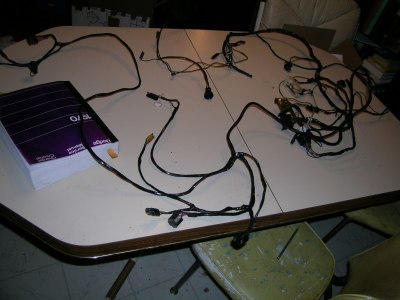
The dash harness, now re-wrapped, replicating factory routing of all wires, is now ready to be stored until reinstallation at a future time.
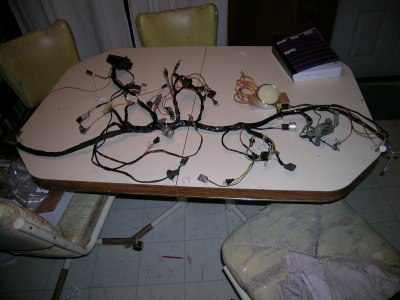
The engine compartment harness, with Mopar electronic ignition conversion seamlessly grafted in for a factory appearance, all re-wrapped and ready for storage. The addition of electronic ignition is the only electrical deviation from stock.
--------
Posted in 2004-present | RESTORATION | wiring | link to this page | | Comments (1)
May 20, 2005
Interesting historical find
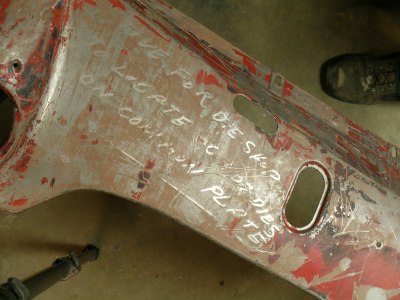
You never know what cool historical things might turn up when you're restoring a car. I found this writing underneath the original primer on my front valance. The writing says, "SAVE FOR DIE SHOP TO LOCATE 06 AND 07 DIES ON COMMON PLATE". It is interesting to think that this part of my car was once used seemingly to help recalibrate equipment that would in turn make parts of other '70 Chargers. You can click this link to view the picture in a larger size.
--------
Posted in 2004-present | RESTORATION | sandblasting | link to this page | | Comments (0)
Sandblasting: results
I only sandblasted the sturdy, mostly-non-exterior parts of the car. My goal was to remove any rust, old paint, grease, oil, etc., and have a nice surface ready for primer and a good coat of Eastwood's rust encapsulator, where needed. More delicate exterior sheet metal is being stripped of its layers of paint, primer, and filler by chemical stripper and/or lots of power- and hand-sanding. The hand-sanding is where my kids "get" to help a lot (they really do enjoy it).
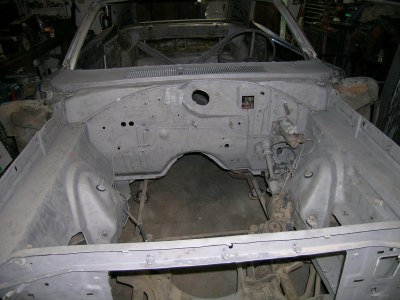
All blasted and clean, the engine compartment now looks so nice, I can just imagine the layers of glossy paint that will one day adorn it.
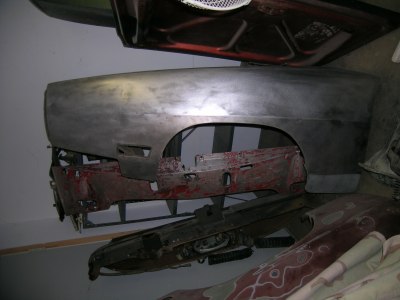
Several treatments with chemical stripper and a few hours of sanding have got my driver's side fender down to its original shiny self. After I smooth a couple of dings and installing a steel rust-repair panel for the area behind the tire, this fender will be primed with etching primer, awaiting the day of final painting.
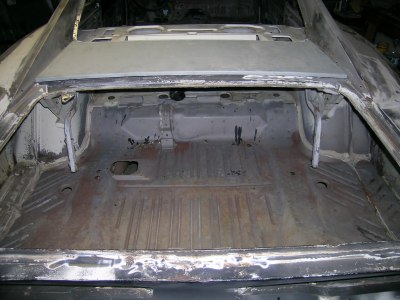
My trunk was remarkably solid, and will not need replacement. A couple of minor pinholes will be welded up before the trunk floor is treated with Eastwood's Rust Encapsulator and preventative treatment.
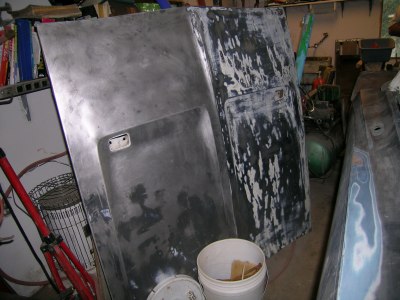
The hood had an amazing number of layers of finish on it, but after many rounds with the stripper, and much sanding, the bare metal is finally showing itself.
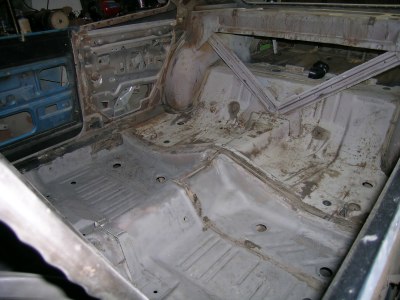
The floorpan
--------
Posted in 2004-present | RESTORATION | sandblasting | link to this page | | Comments (1)
Sandblasting: setup
For the sandblasting phase of my Charger's restoration, I constructed a 20x20 enclosure, with a huge tarp over a steel frame, and another tarp on the floor to aid in sand recovery. Using up to 3 air compressors simultaneously gave me enough air to keep the blasting going strong.
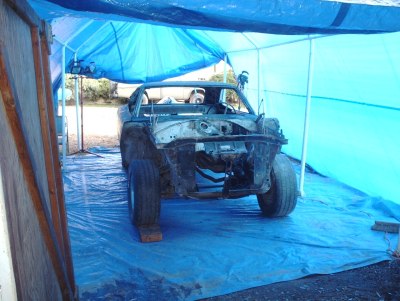
A front view of the stripped Charger, ready for sandblasting
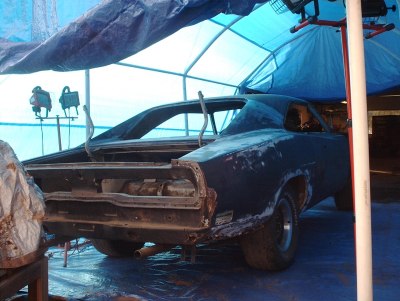
Rear view
--------
Posted in 2004-present | RESTORATION | sandblasting | link to this page | | Comments (1)