


« August 2006 | Main | November 2006 »
October 20, 2006
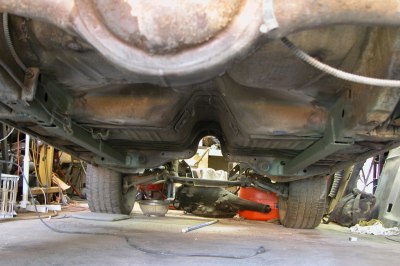
Sub-frame connectors
One of the things it seems virtually all Mopar people agree with is that there are many huge benefits to stiffening up our old Mopar muscle cars. One of the best ways to do this has proven to be attaching what are called sub-frame connectors, which tie in the front and rear frames of the car. This relieves stress from the sheet metal during hard launches and extreme handling situations. There are numerous brands of these available, ready-made to go into a wide assortment of cars. However, I found a number of people who had fabricated their own quite successfully. I decided to take that approach and save some money. The material I used was 2x2 square tubing with a 1/8"-thick wall. The plates that attach to the forward frame were 1/4" thick 2"x4 1/2". The gussets for the rear were 1/16" mild steel.
The first thing I did was weld the 4 1/2"-wide pads onto the front edge of each tube. The front subframe was cleaned with a wire wheel prior to welding, and the whole piece was fitted approximately in place in order to mark the angle at which the rear would have to be cut to meet the rear subframe.
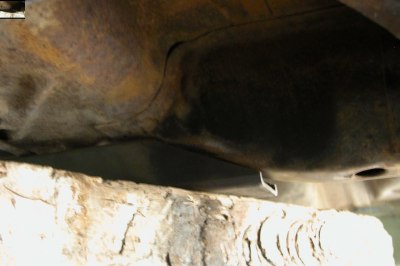
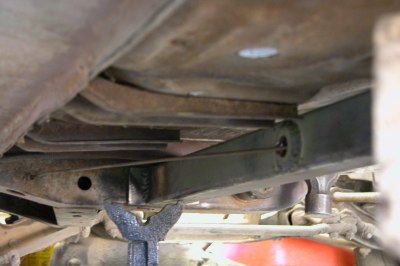
I cut the rear of the tubes so that the bottom of the frame would be flush with the tube. This resulted in the tube being brought up exactly to the bottom of the rear floorpan. I did not want to cut into the floorpan, as I have seen some do on A- and E-body cars. This junction was completely welded off on both sides prior to being plated.
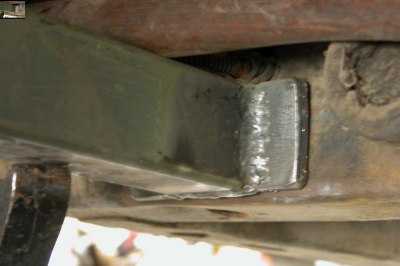
This is the finished view of the rear, with the plates welded over the top of the joint of frame and subframe connector, which was also welded. Each side of the subframe connector had one of these plates, and each plate was welded on all four sides.
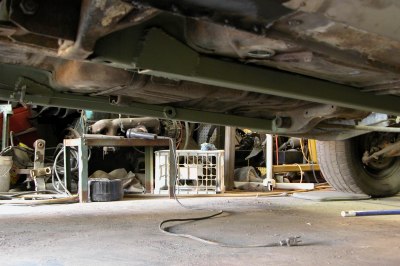
Here are both bars in place, painted with etching primer, as seen from the passenger side.
Both bars viewed from the rear.
The only thing that prevented this from being a super-easy job was the fact that on the driver's side, the parking brake cable passed directly through the space where the subframe connector needed to be. After marking the location on the tubing where the cable would need to go through, I drilled large 3/4" holes on either side. Realizing that this could possibly weaken the subframe connector on that side, I chose to weld heavy washers on the outside of the hole on each side. I took a drill with a 5/16" bit at the same angle the cable would pass through the tubing and made a smooth, angled channel for the cable. I was very pleased with how well it turned out, and can't wait for the day when I can realize the benefit that these bars will provide.
Posted in 2004-present | RESTORATION | body | suspension, brakes, tires, and wheels | link to this page | | Comments (0)
October 19, 2006
Restoration of hood hinges and springs
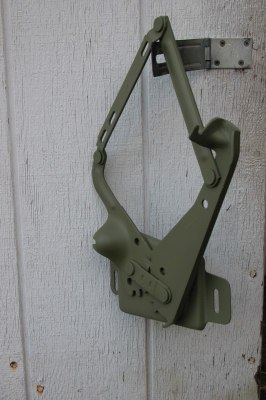
Using my 4 1/2" grinder with a cup-style wire wheel, I removed all the original finish from my hood hinge. Since these had functioned fine on the car before it was disassembled, no real refurbishing was needed. However, I wanted them to be ready for new paint, and after they were totally stripped they were given multiple coats of self-etching primer.
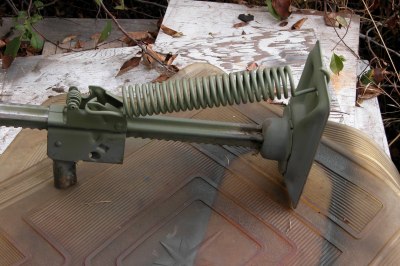
Some people recommend using a coil-spring compressor, reversed, to stretch hood springs for paint removal and repainting. I found that this surplus Mopar bumper jack did a great job and was easier to use.
Posted in 2004-present | RESTORATION | body | link to this page | | Comments (0)
October 18, 2006
Hubcaps
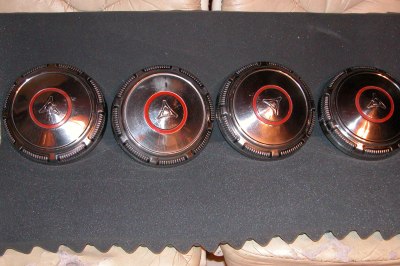
Some friends whom I have helped with some Charger items and issues over the last couple of years graciously gave me this set of four period-correct dog-dish-style hubcaps. These will look really great in the center of my police wheels. I have not yet decided if I will paint the wheels black, to complement but contrast with the car body color, or paint them body color. I have seen it done both ways, and like both.
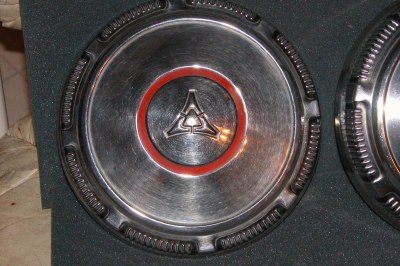
a closer view of one of the hubcaps.
Posted in 2004-present | RESTORATION | suspension, brakes, tires, and wheels | link to this page | | Comments (0)
October 15, 2006
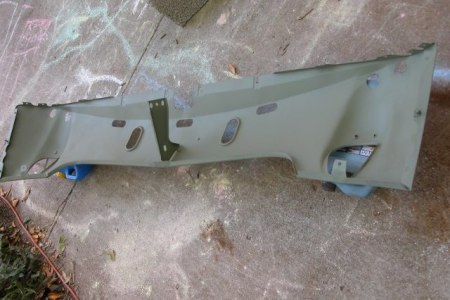
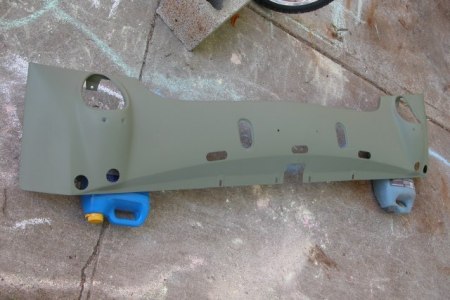
Front valance ready to go
One of the many things accomplished by my family members for me during one of our several "sanding parties" was getting the majority of the original finish sanded off of this front valance. The front valance was in really good shape, and needed very little hammer-and-dolly work after removing the rest of the finish, prior to being primed with self-etching primer. This piece will now be set aside, awaiting further reassembly of the car.
Posted in 2004-present | RESTORATION | body | link to this page | | Comments (0)
October 05, 2006
Restoring the grille
I was really happy when I was able to get this grille some time ago, as documented earlier. It was in vastly better condition than my original grille, but it had one flaw: one of the vertical fins was missing a section. I used Plastifix to repair it. The major steps in the process are shown below. Warning to people planning to use this product: It smells really strong, and may have your family really disgruntled if you use it in the dining room. Trust me on this, I know.
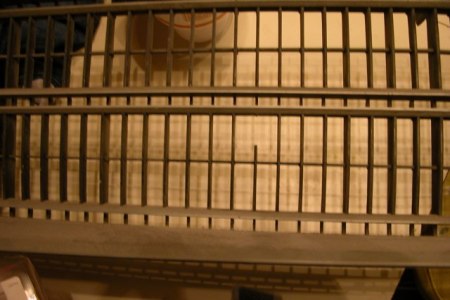
This was the trouble spot I was going to try to fix.
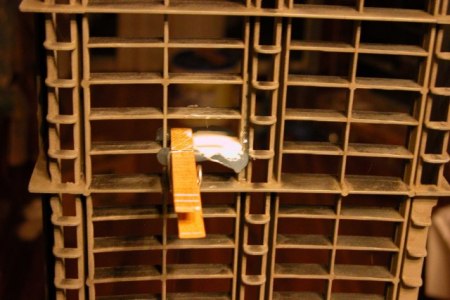
After using the soft molding block provided to make a mold off of a neighboring good fin, I clothespinned the mold into position and filled the mold with the liquid plastic repair material. This took six or so hours before it was really hard enough to take the mold off.
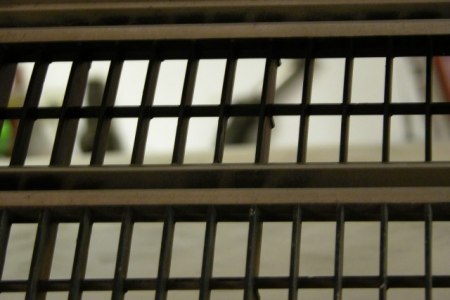
After trimming, sanding, and filing the new plastic to meet the shape and contour of the other fins, a quick shot of flat black was applied just to test how well my new piece would blend in. Visitors to whom I have shown my grille in person cannot find the repaired fin until I show them which one it is, and even I have a bit of trouble finding it sometimes.
The next step for my grille (or is it grill?) will be to take it outside, clean it, buff it up with a Scotch-Brite pad, and repaint it using correct paints I purchased from Totally Auto. Stay tuned for completed grille pictures soon.
Posted in 2004-present | RESTORATION | body | trim | link to this page | | Comments (0)